From trailer frame to mobile pub — built by hand in Frederick County, MD. Newest updates first.
July 2026
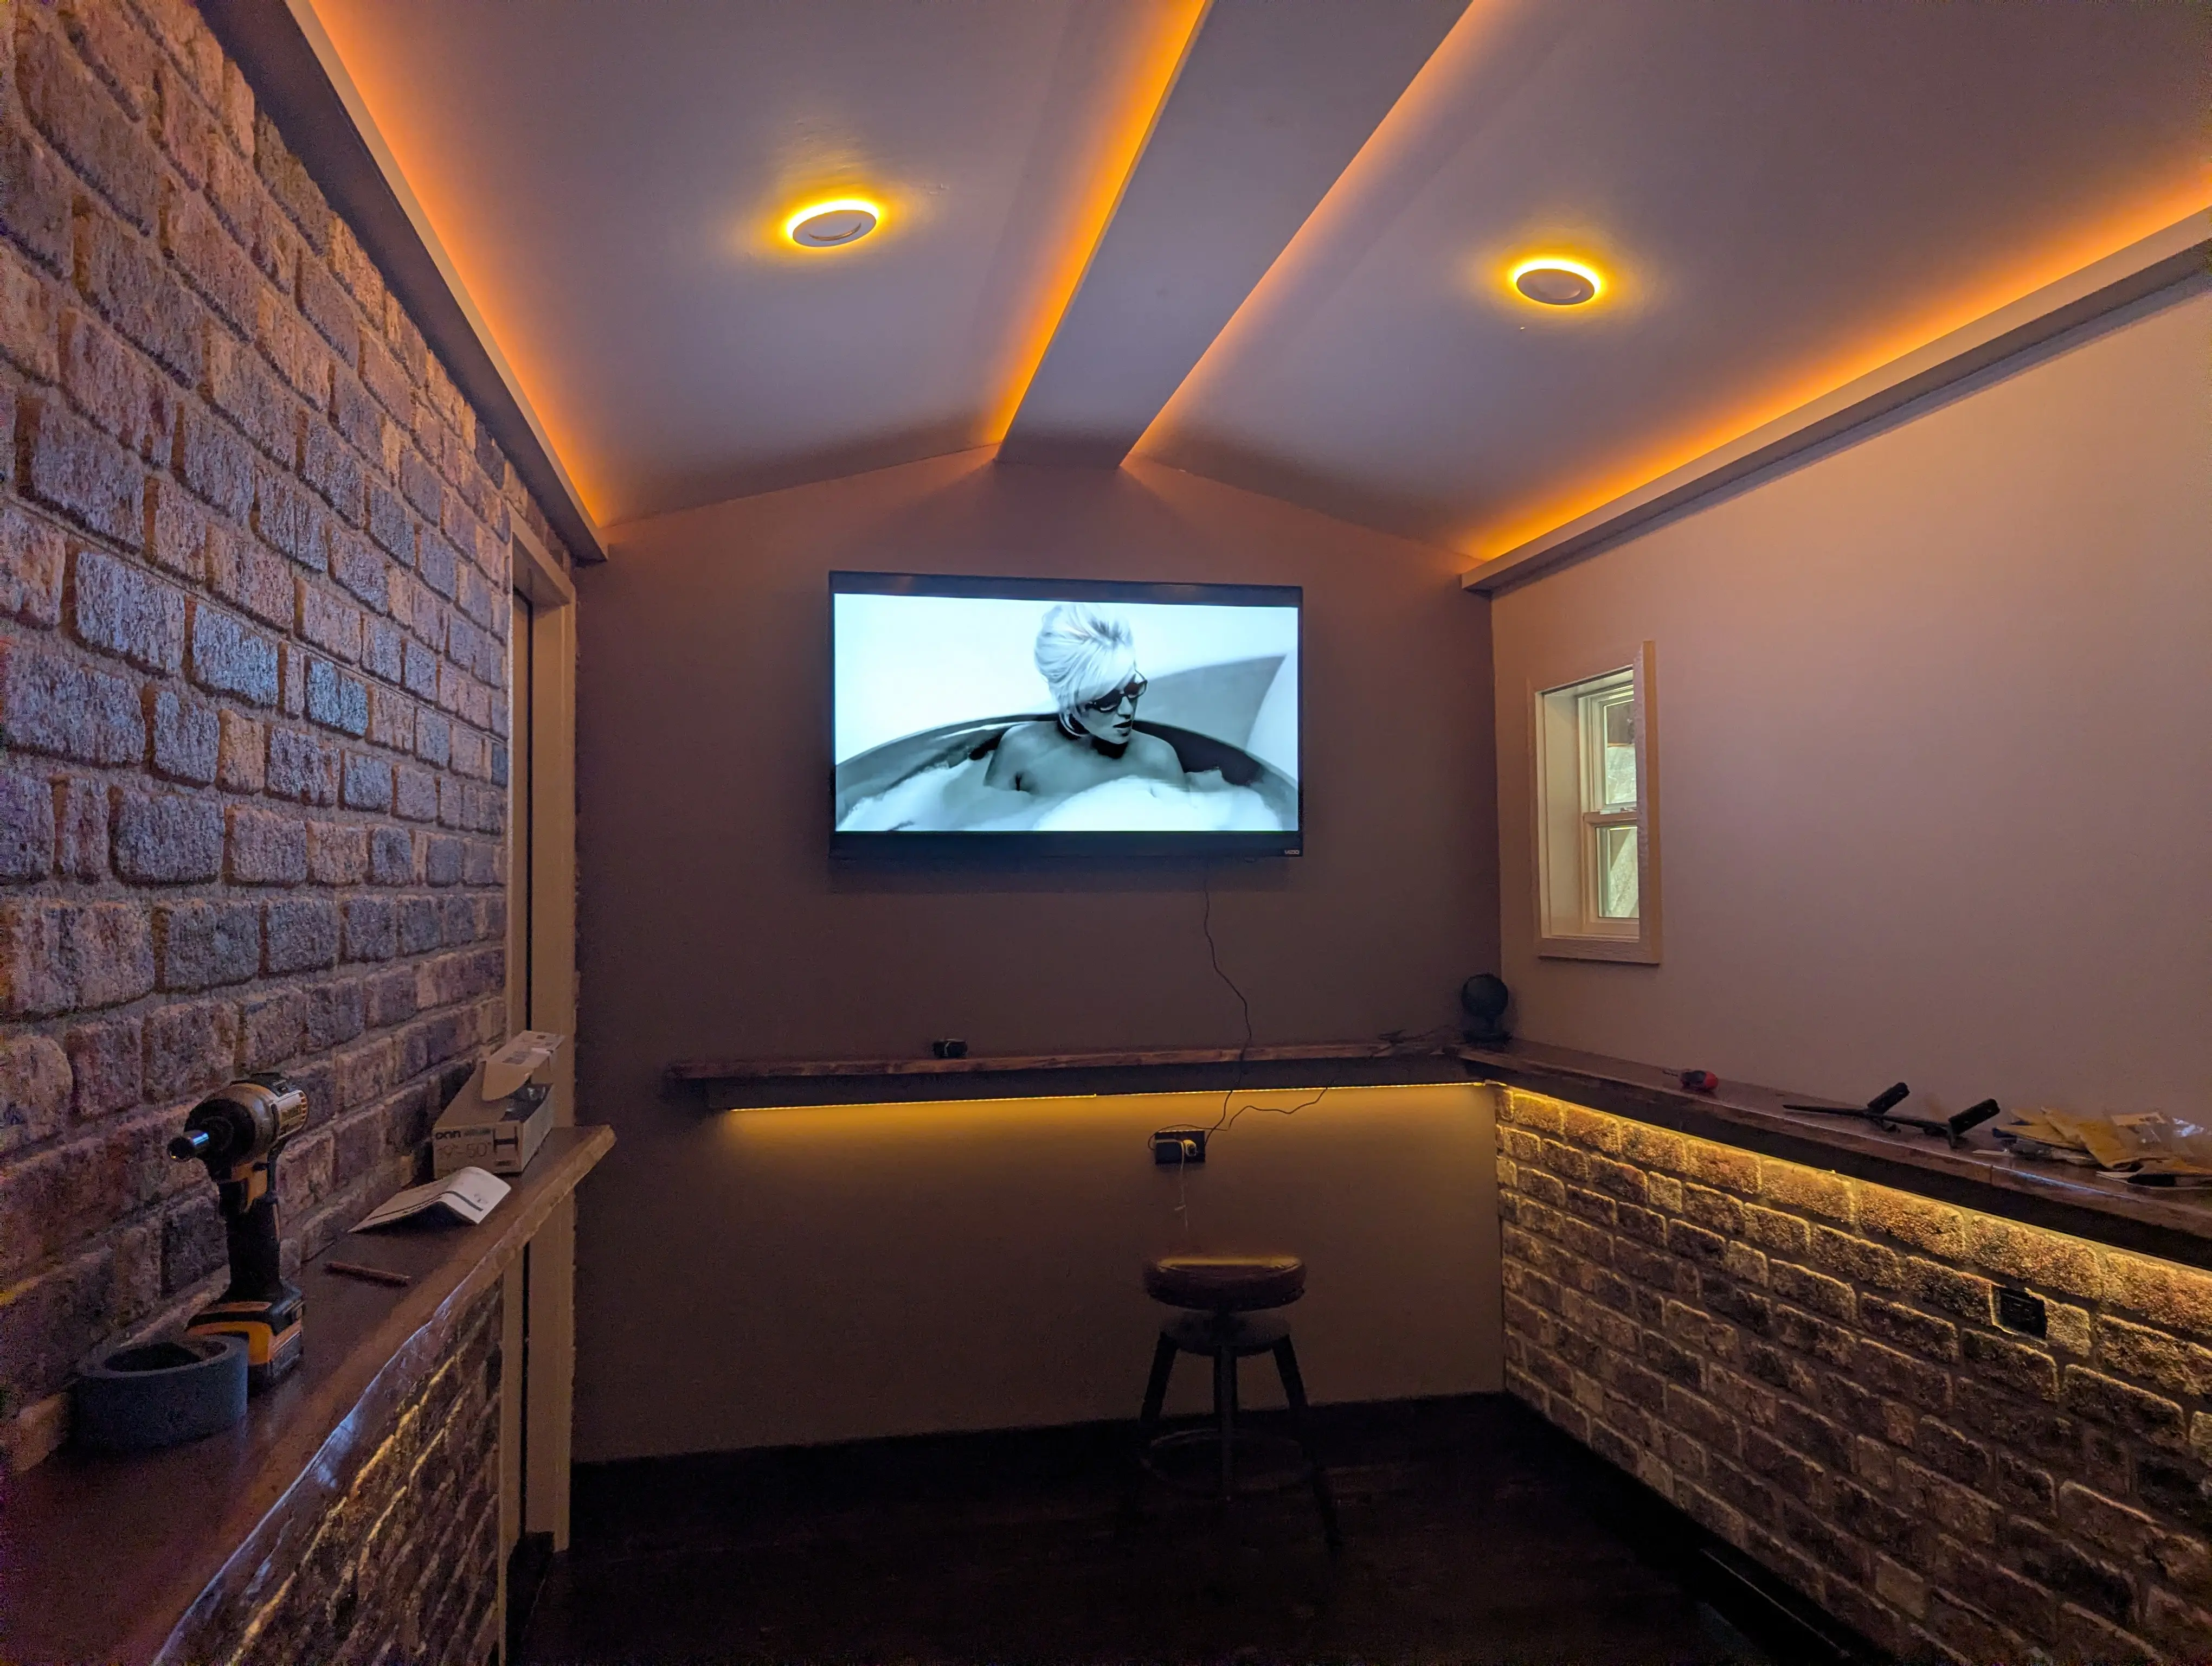
Into the Wild — The July 4th Reveal
We backed an empty trailer into the barn back in February. Today, we pulled out the Swig Rig. The interior sign arrived from RDesignSpace.com and it looks absolutely fantastic — exactly the finishing touch the space needed. We got the TV and speakers mounted, the WiFi up and running, and then it was time. We hooked everything up, held our breath, and carefully pulled it out into the daylight for the very first time. Friends and family were over for the big 250th July 4th celebration, and the Swig Rig got its first real test — cold drinks, good company, and a rig that delivered on everything we promised. What a day.
Click any photo to enlarge
June 2026
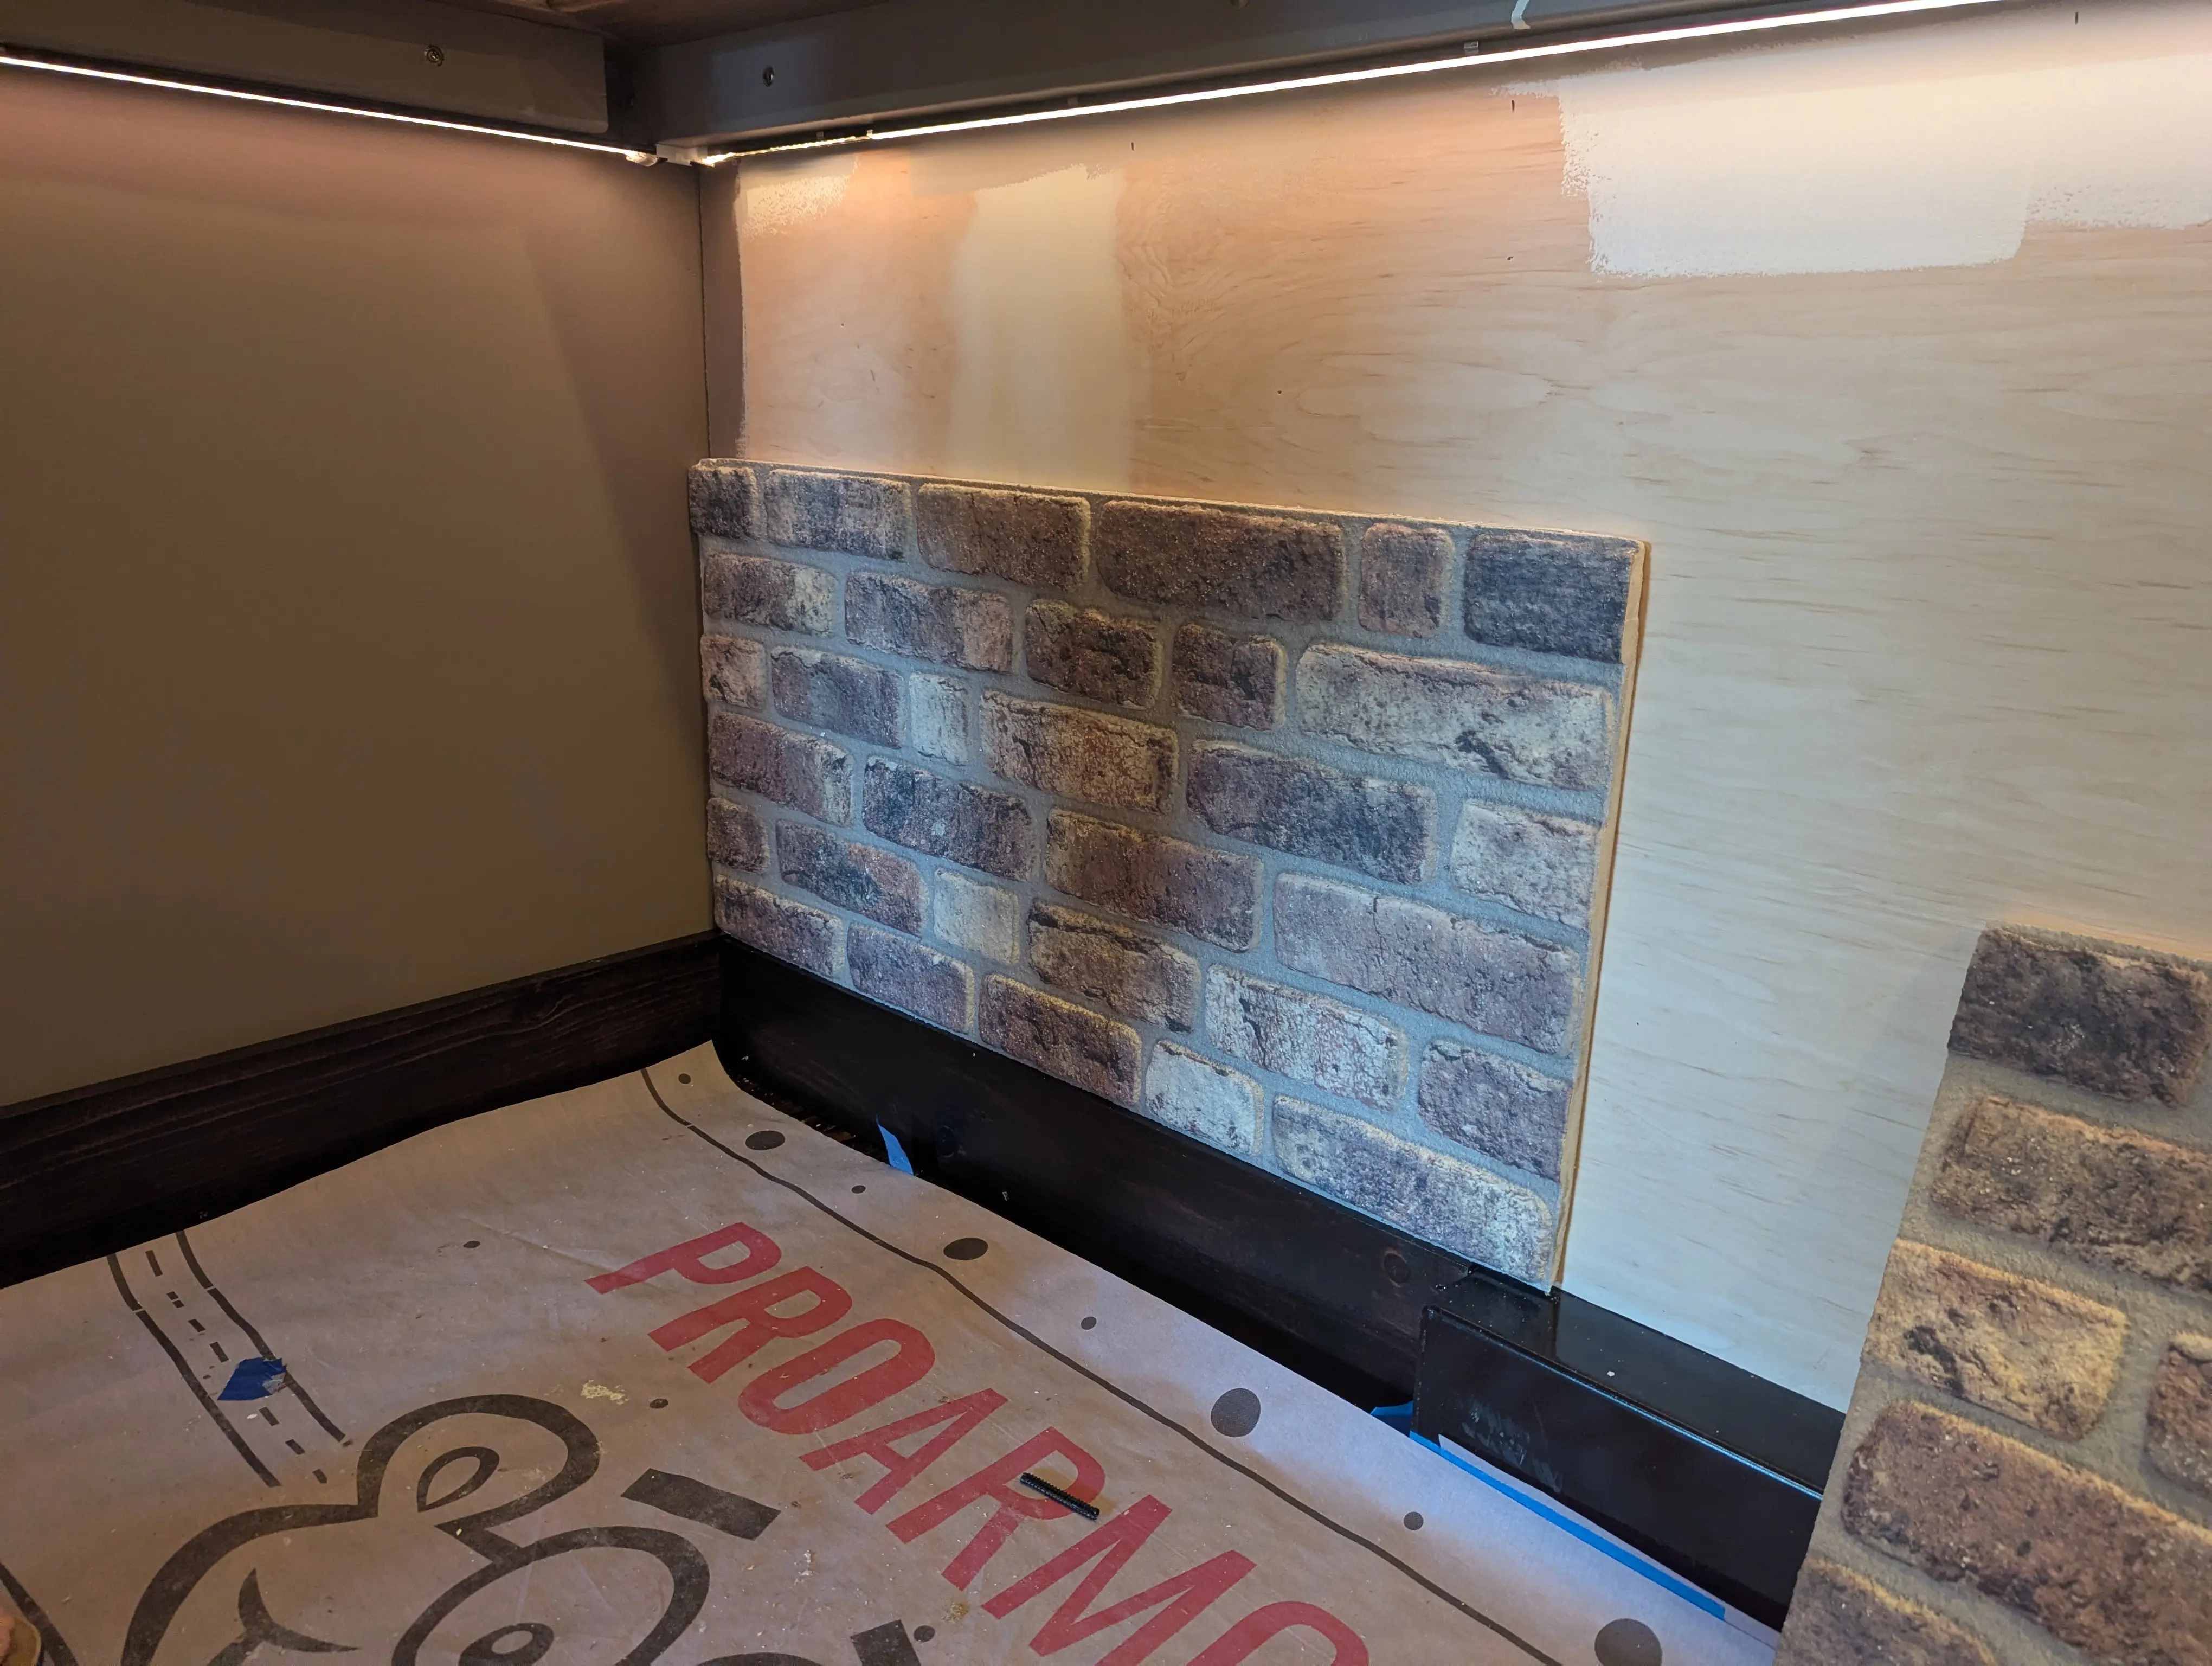
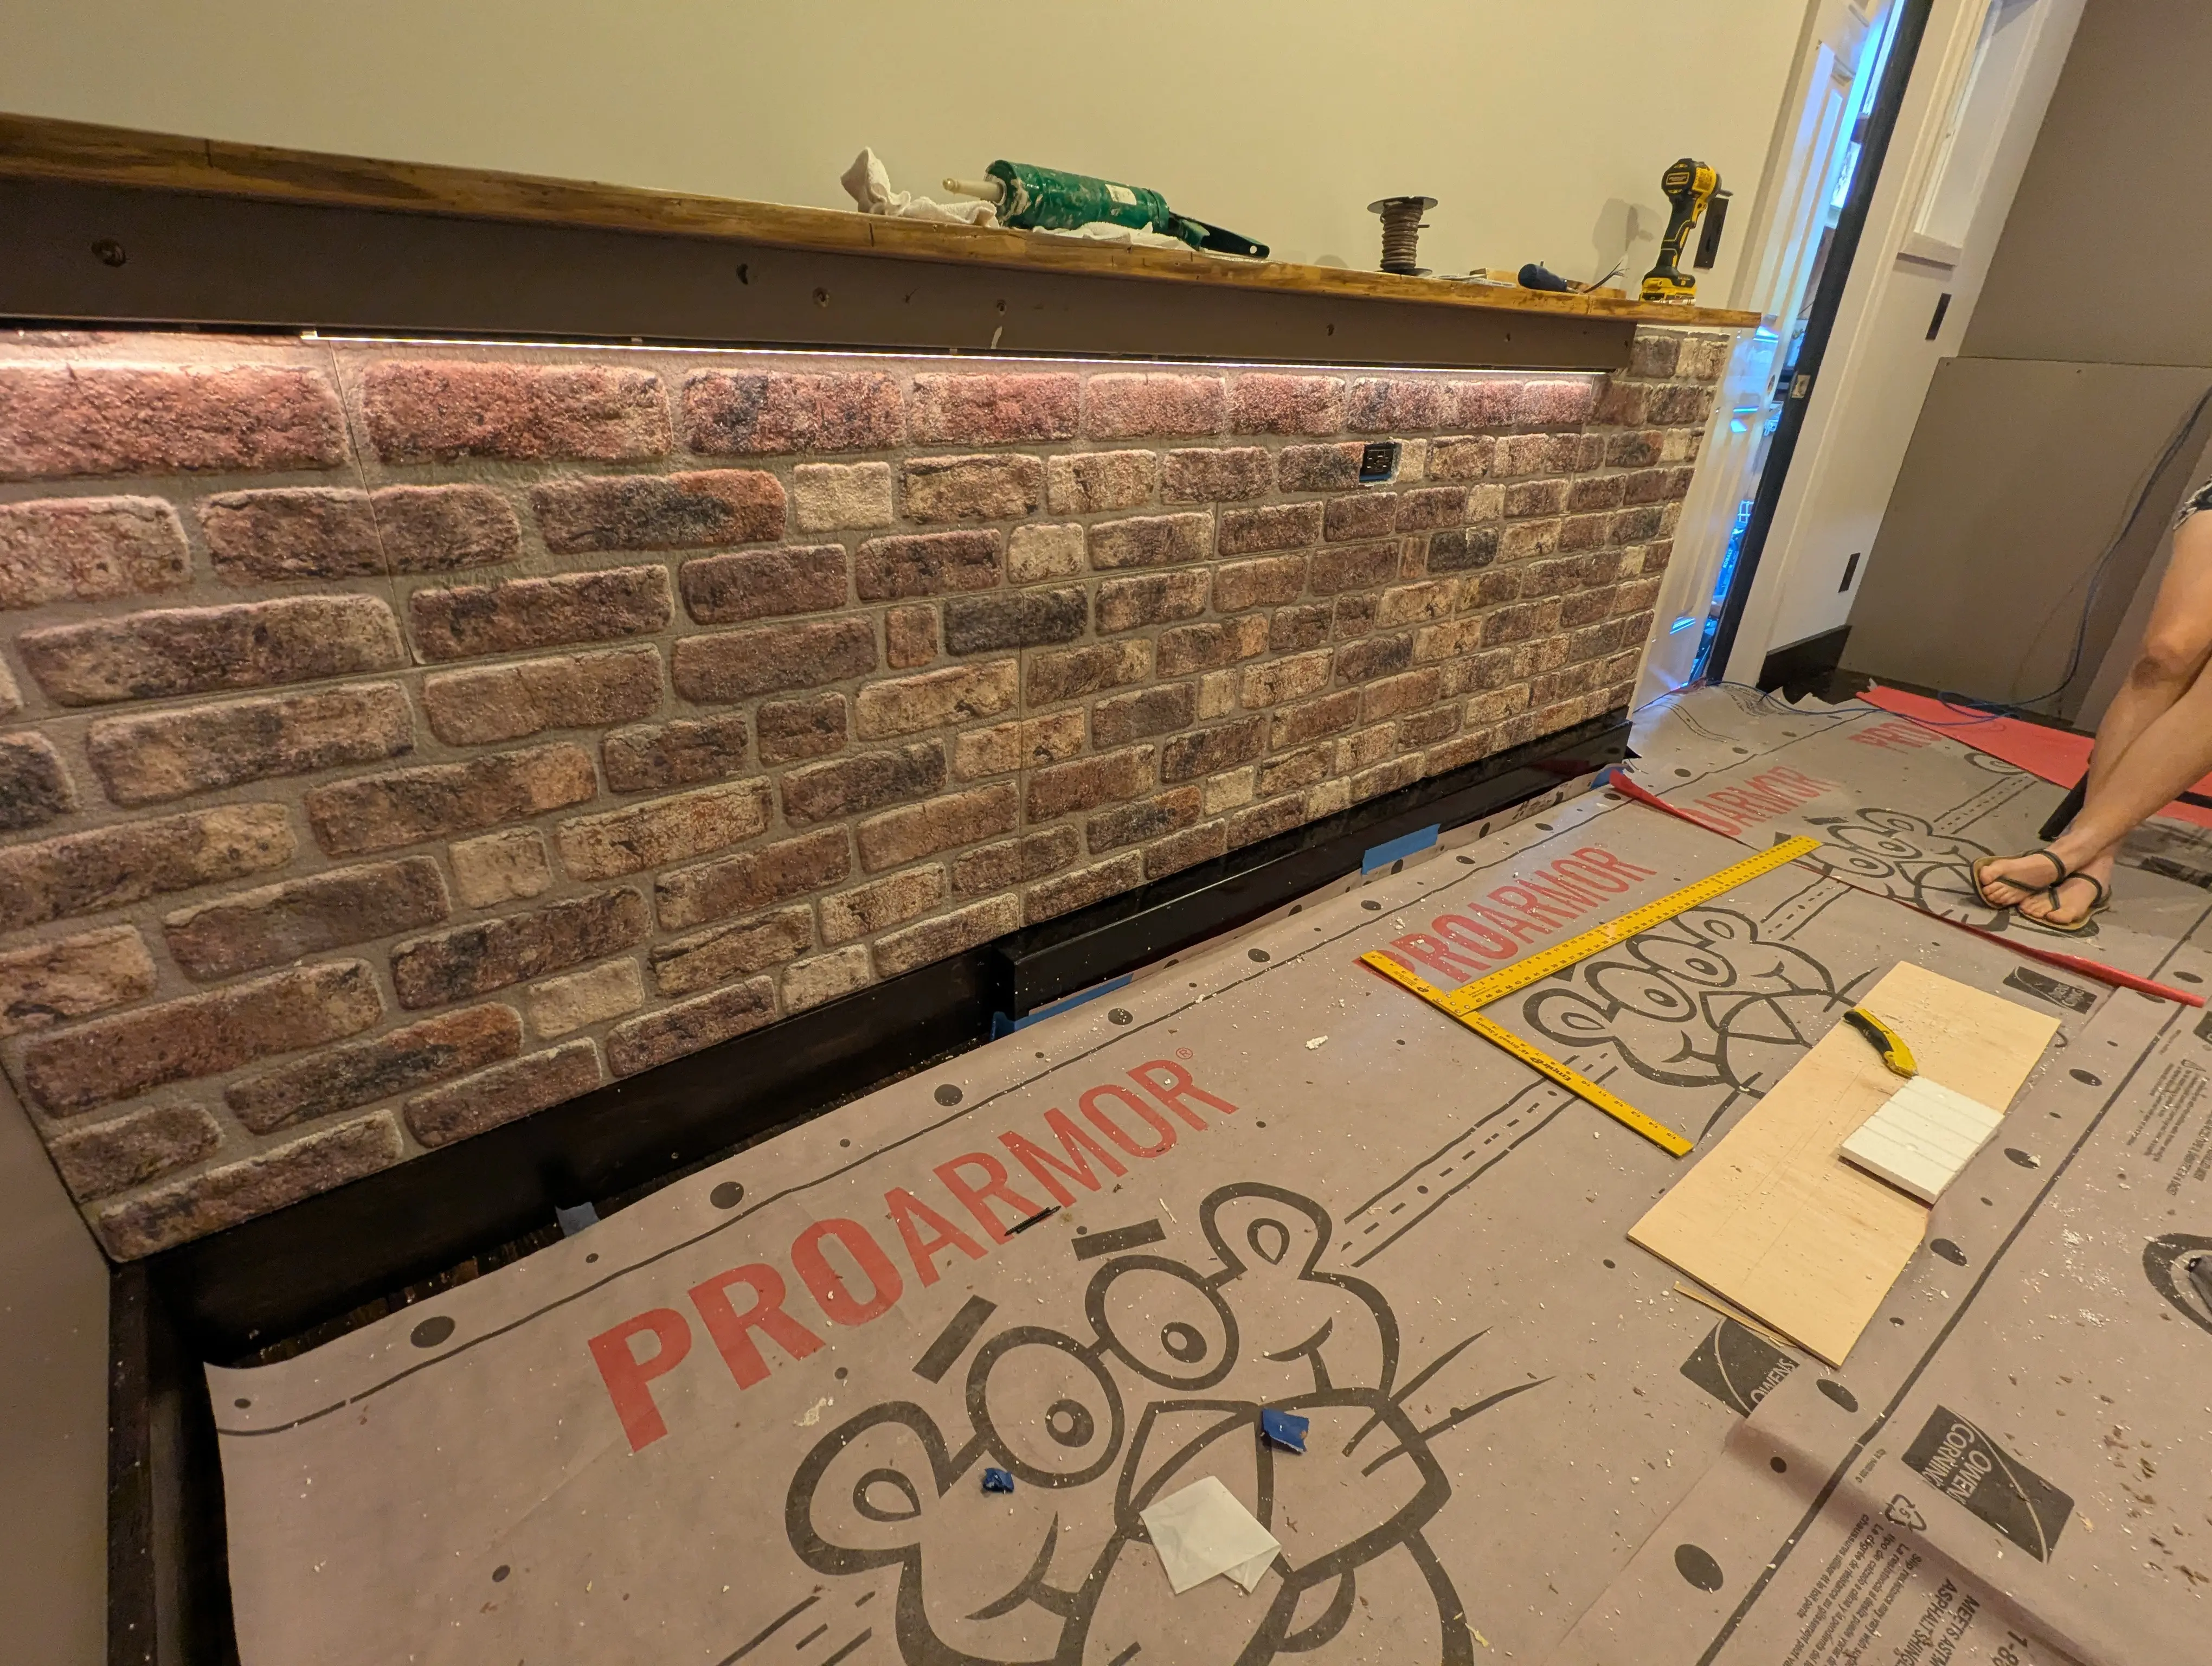
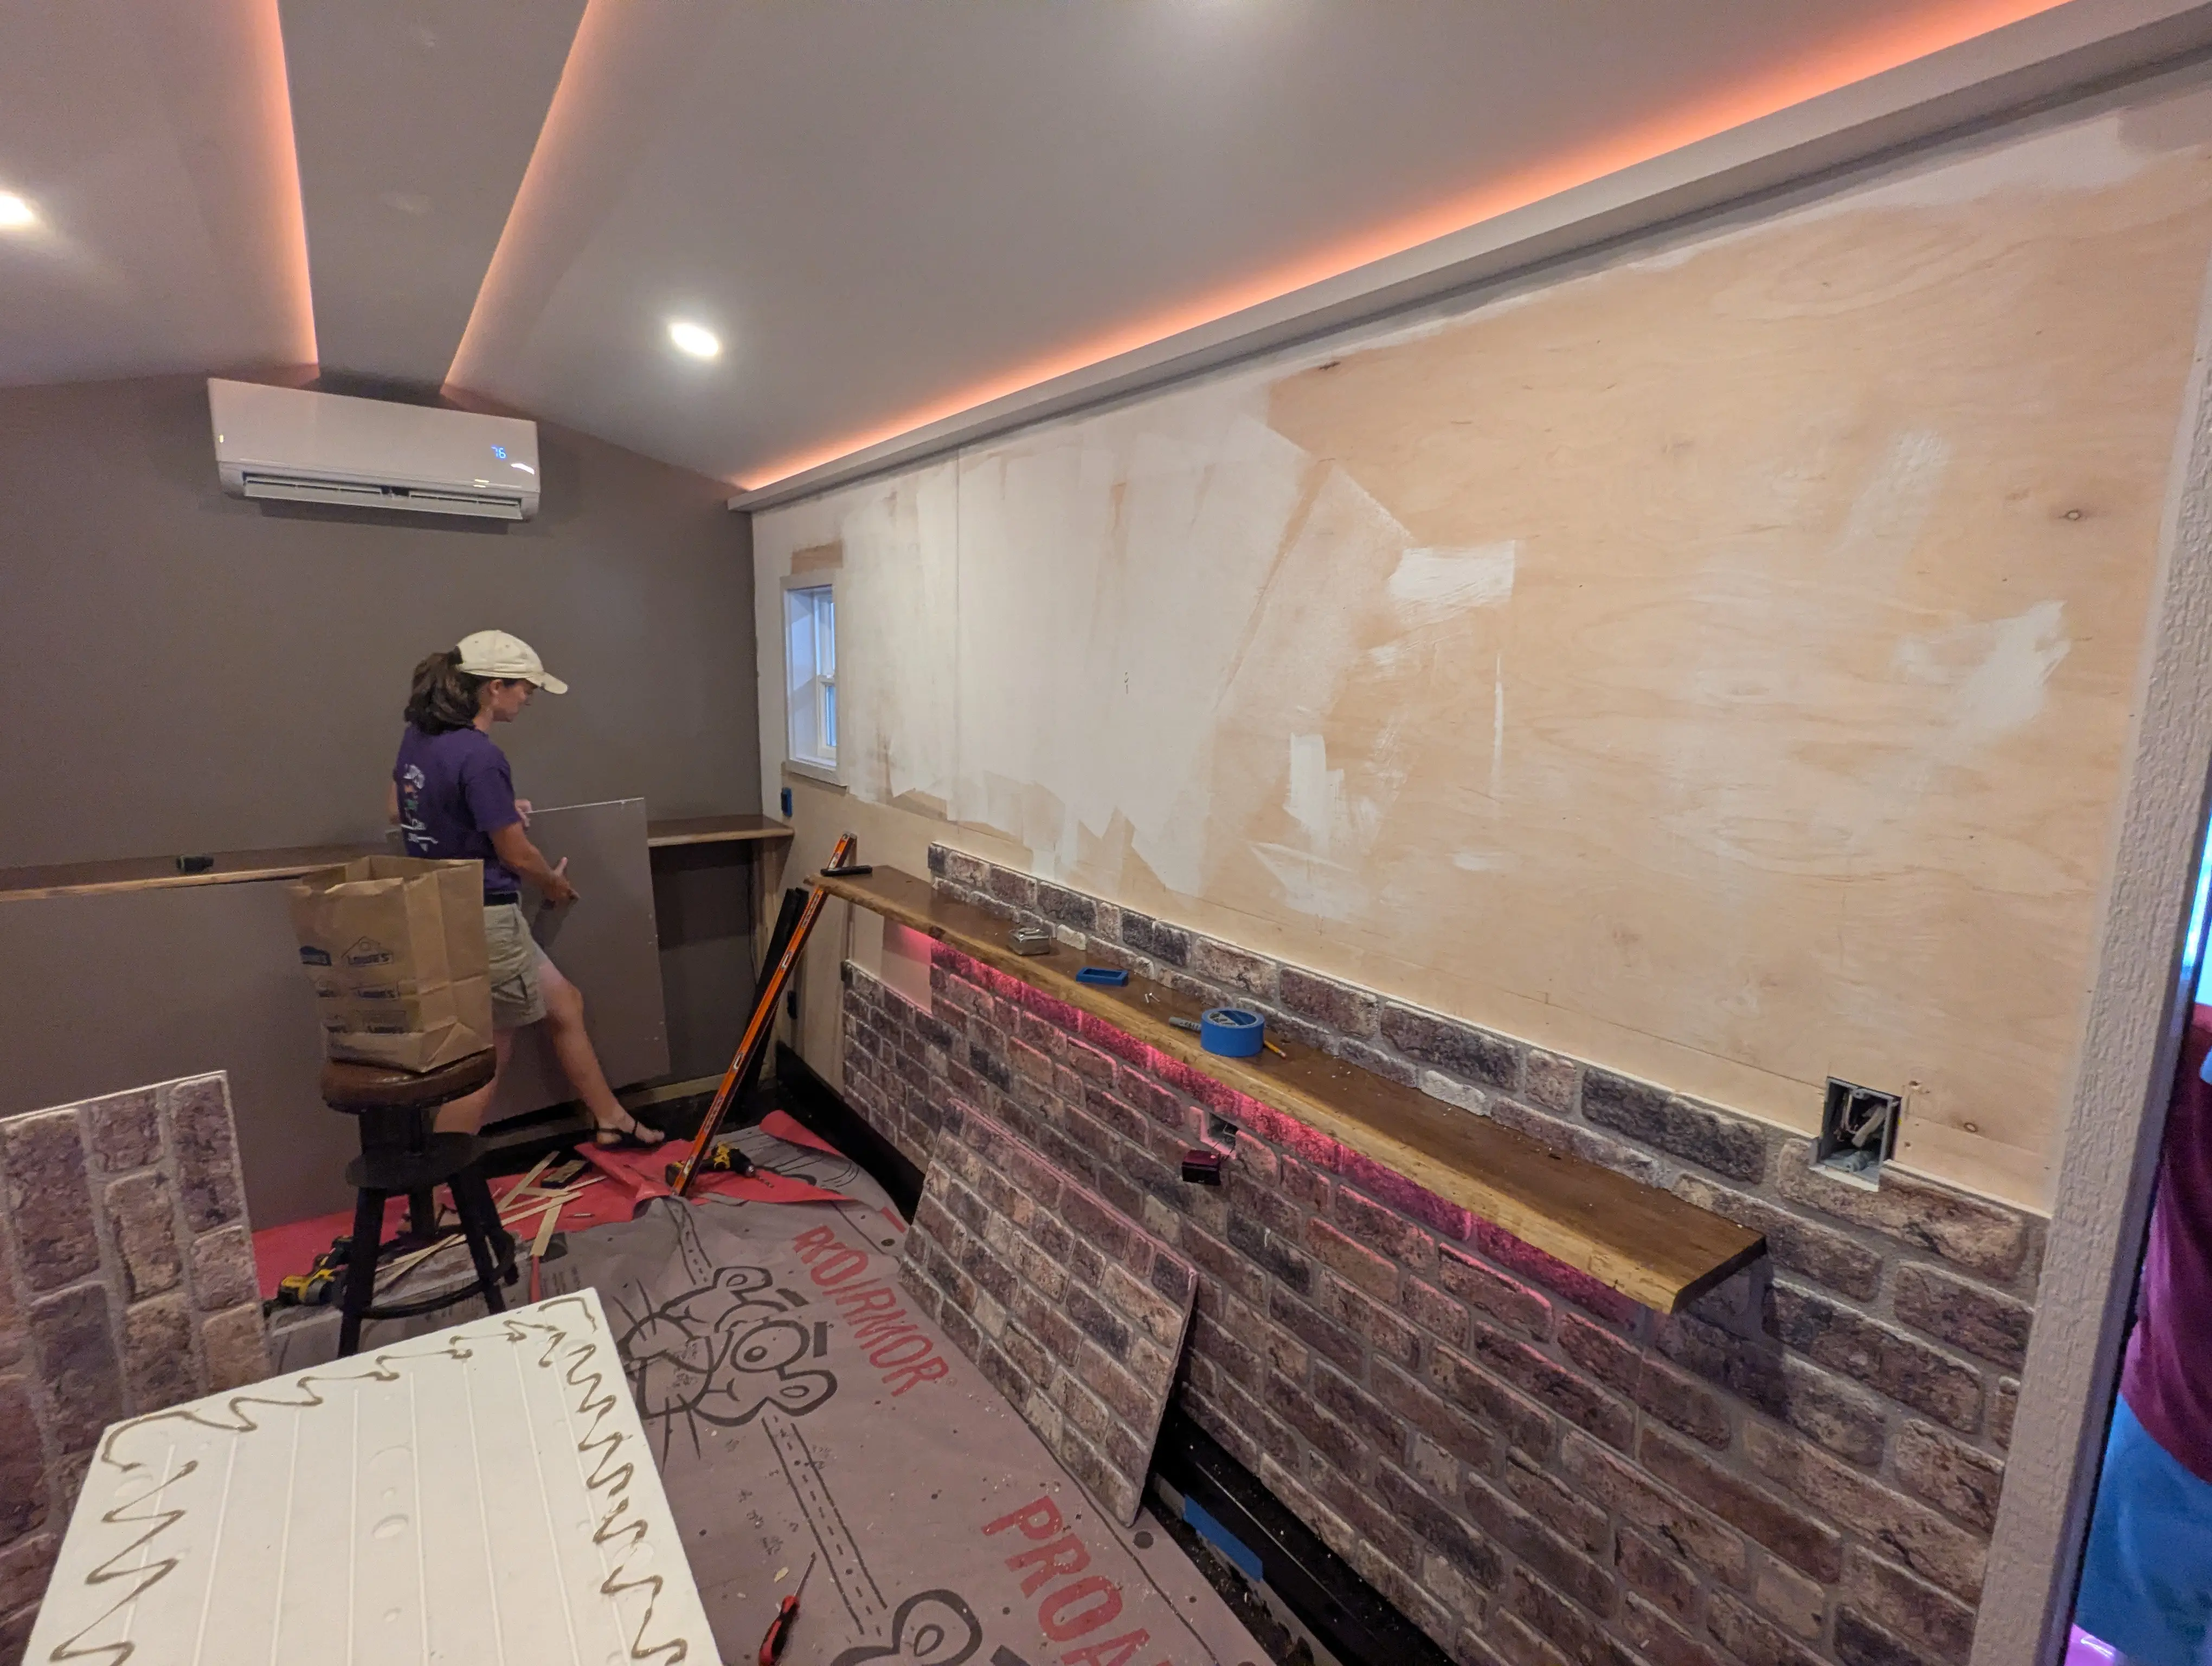
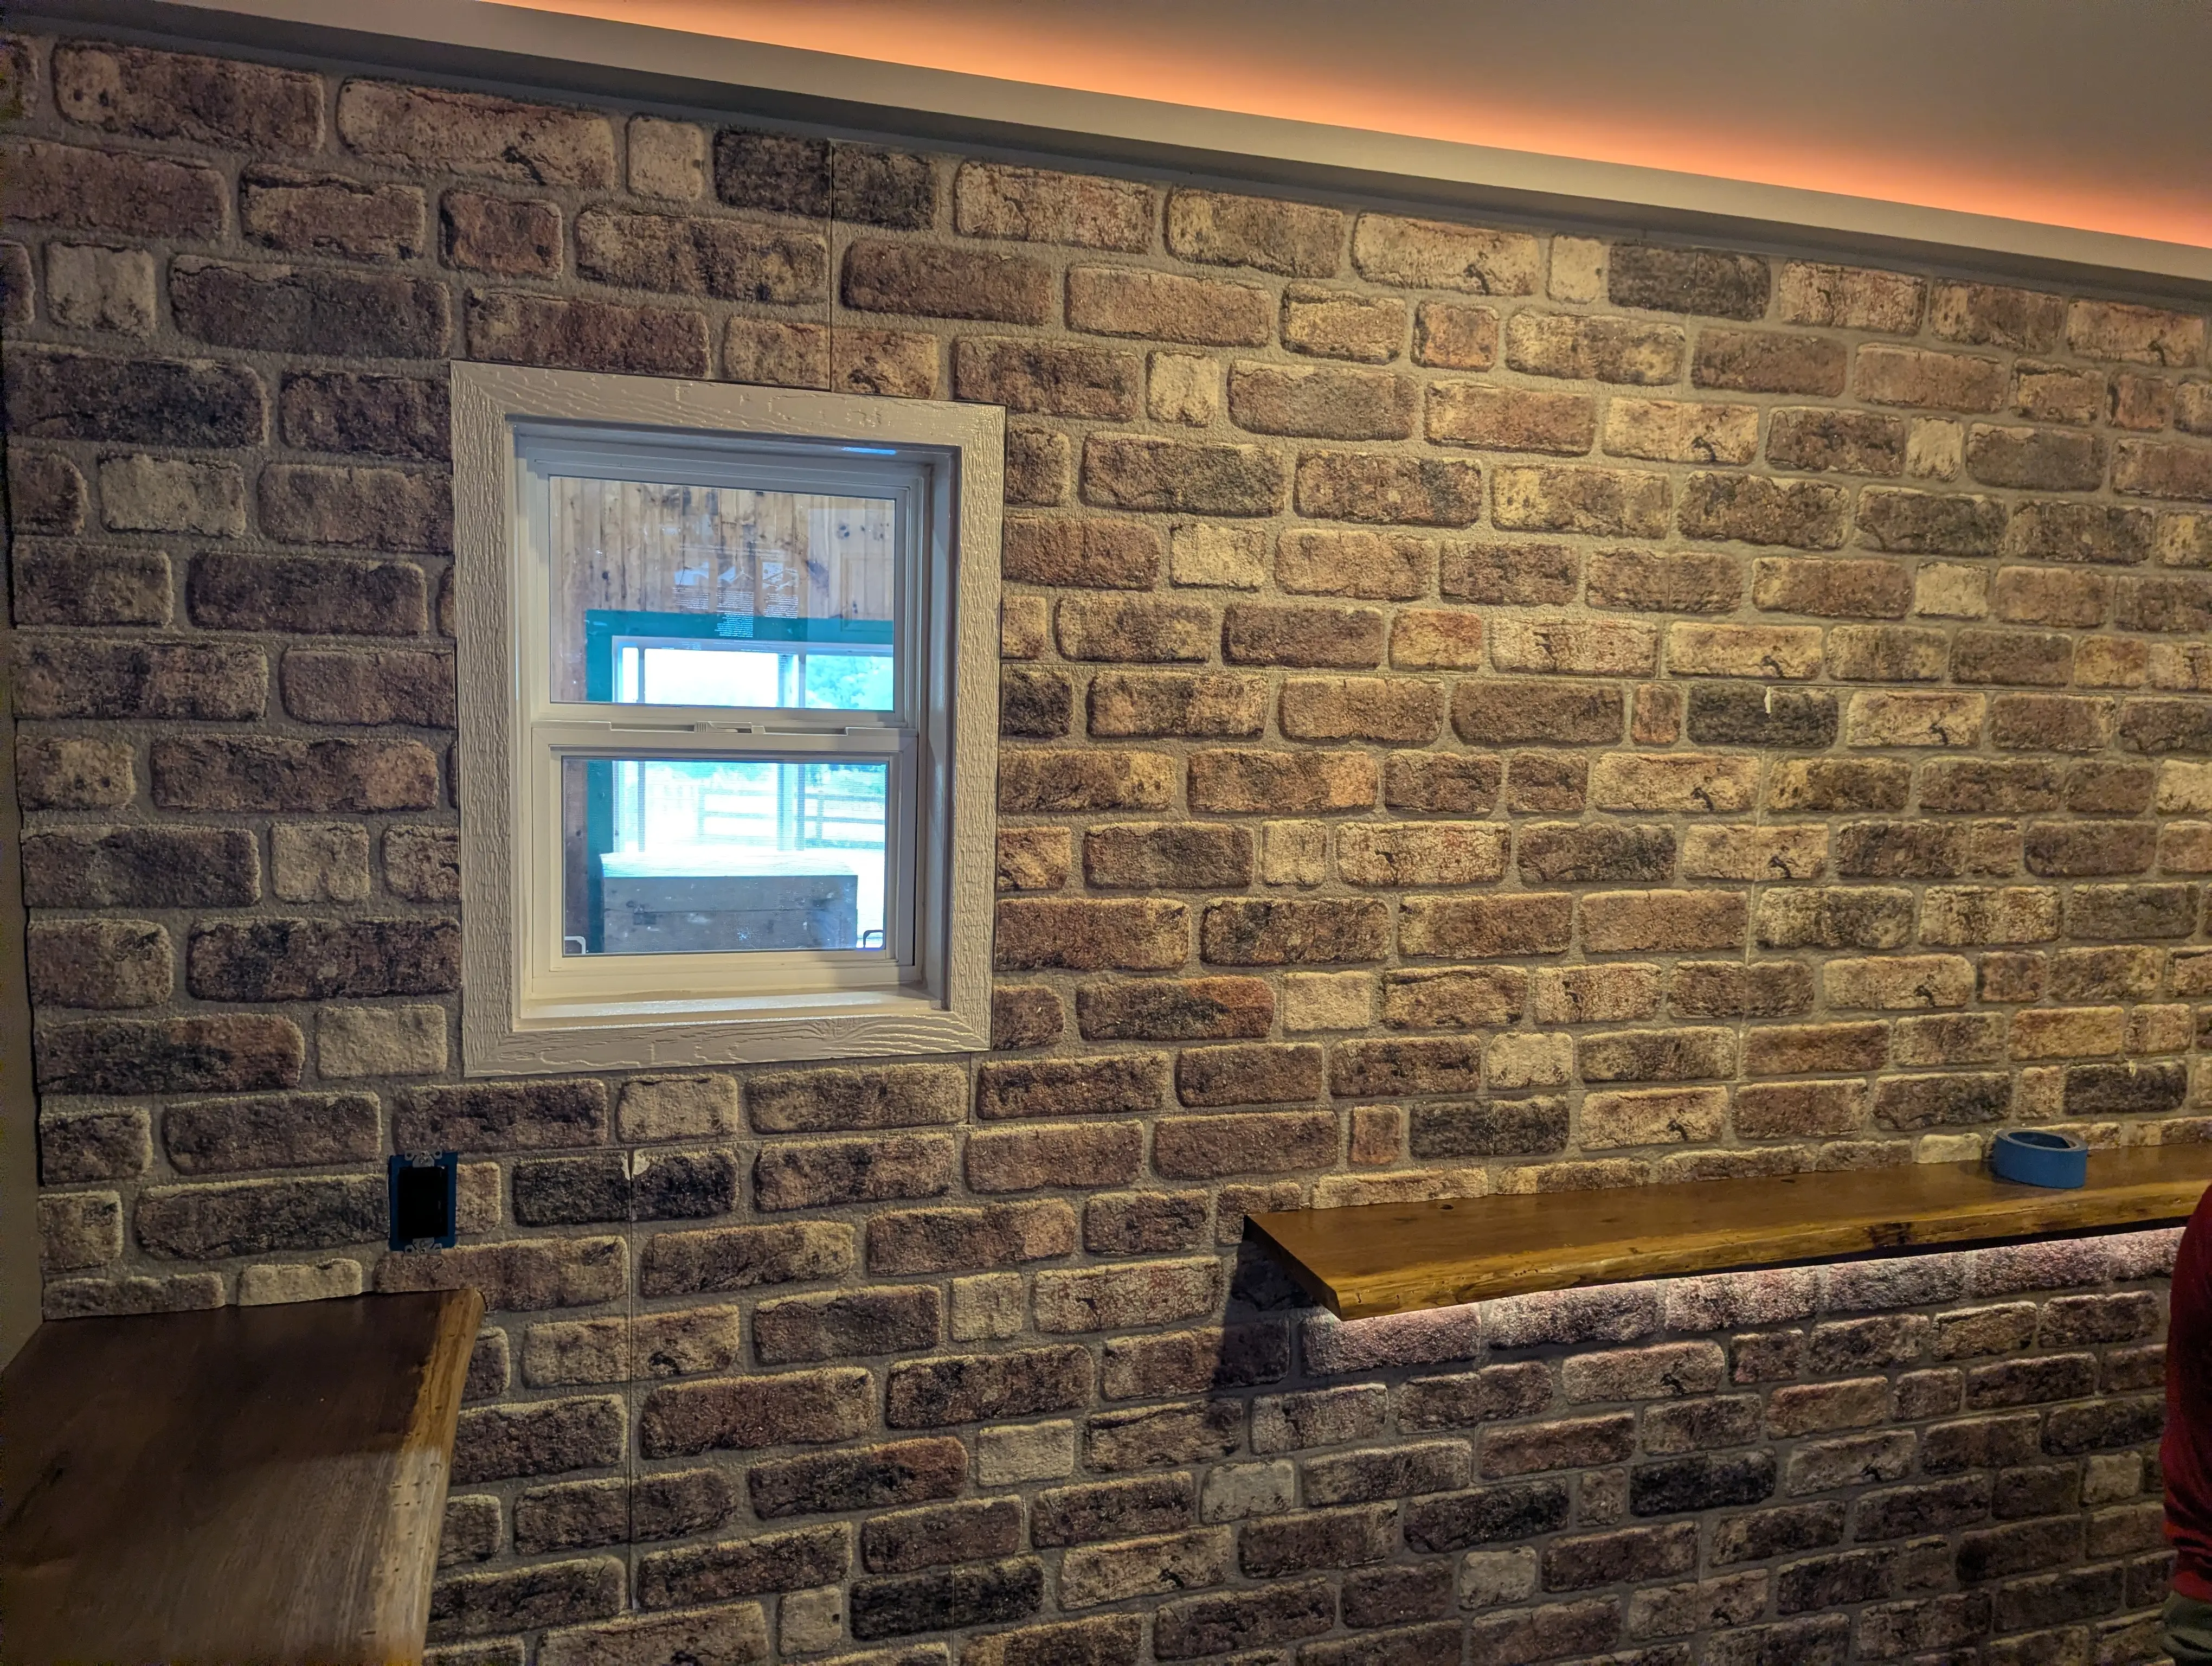
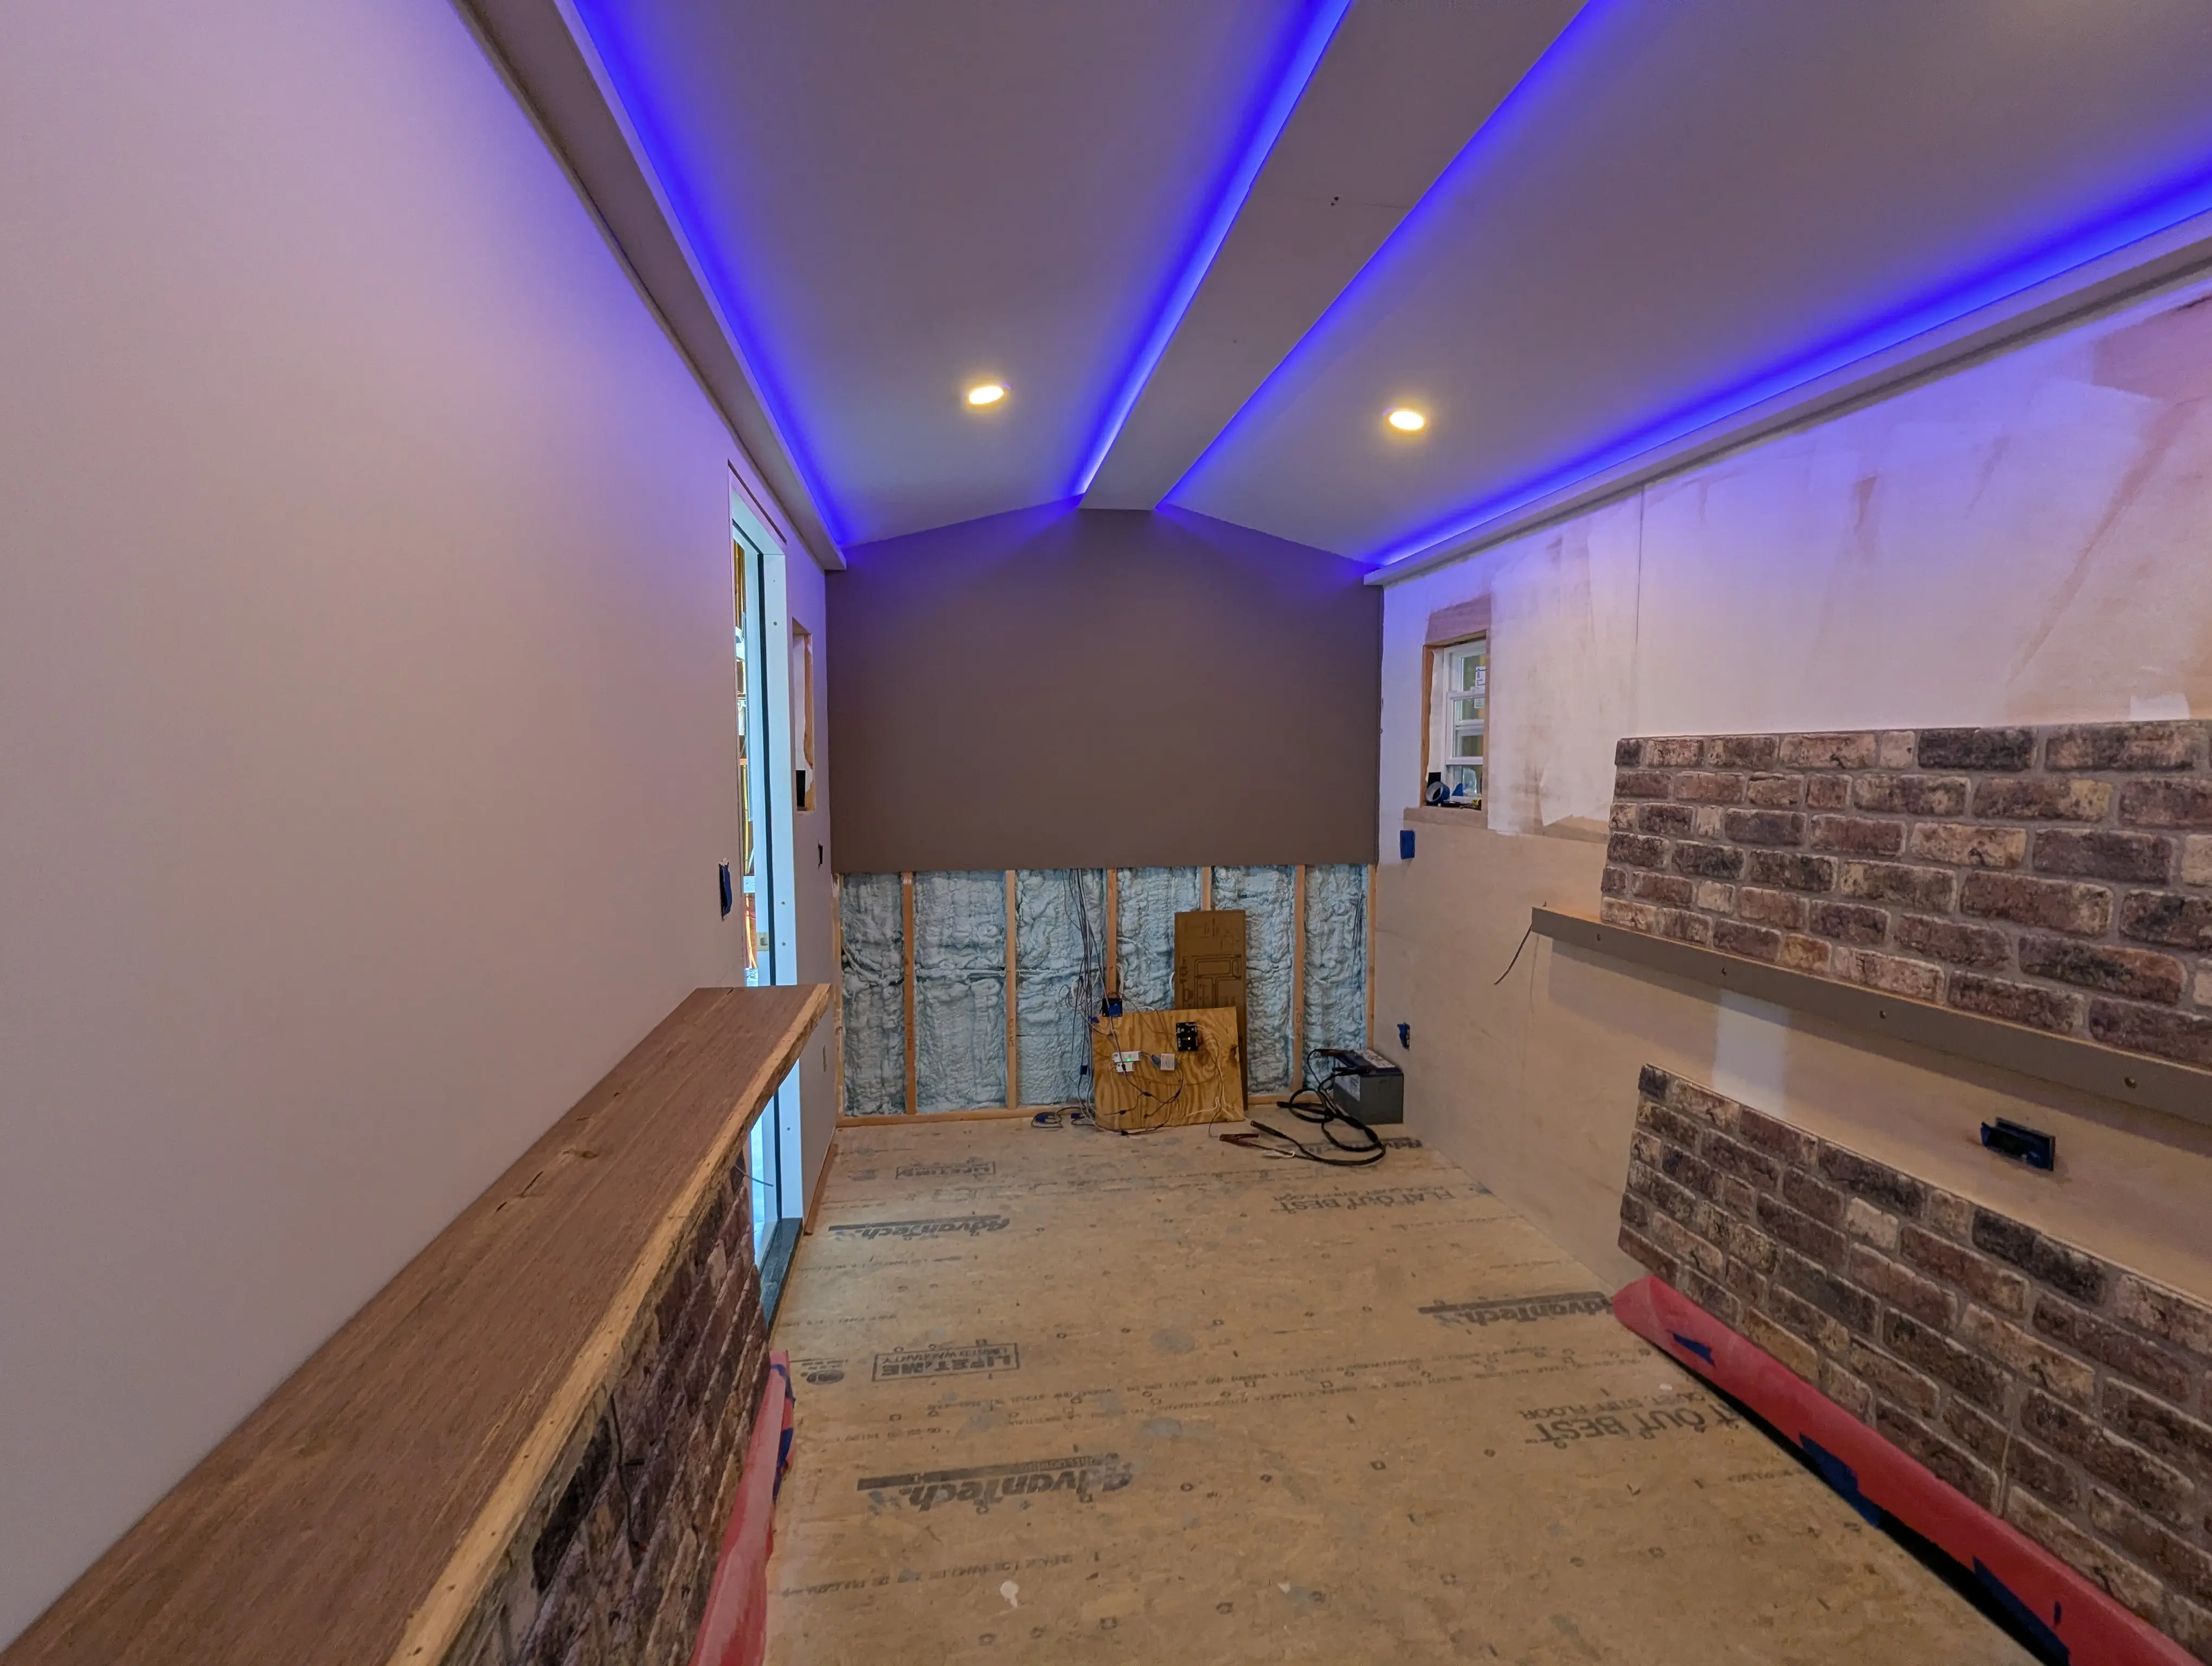
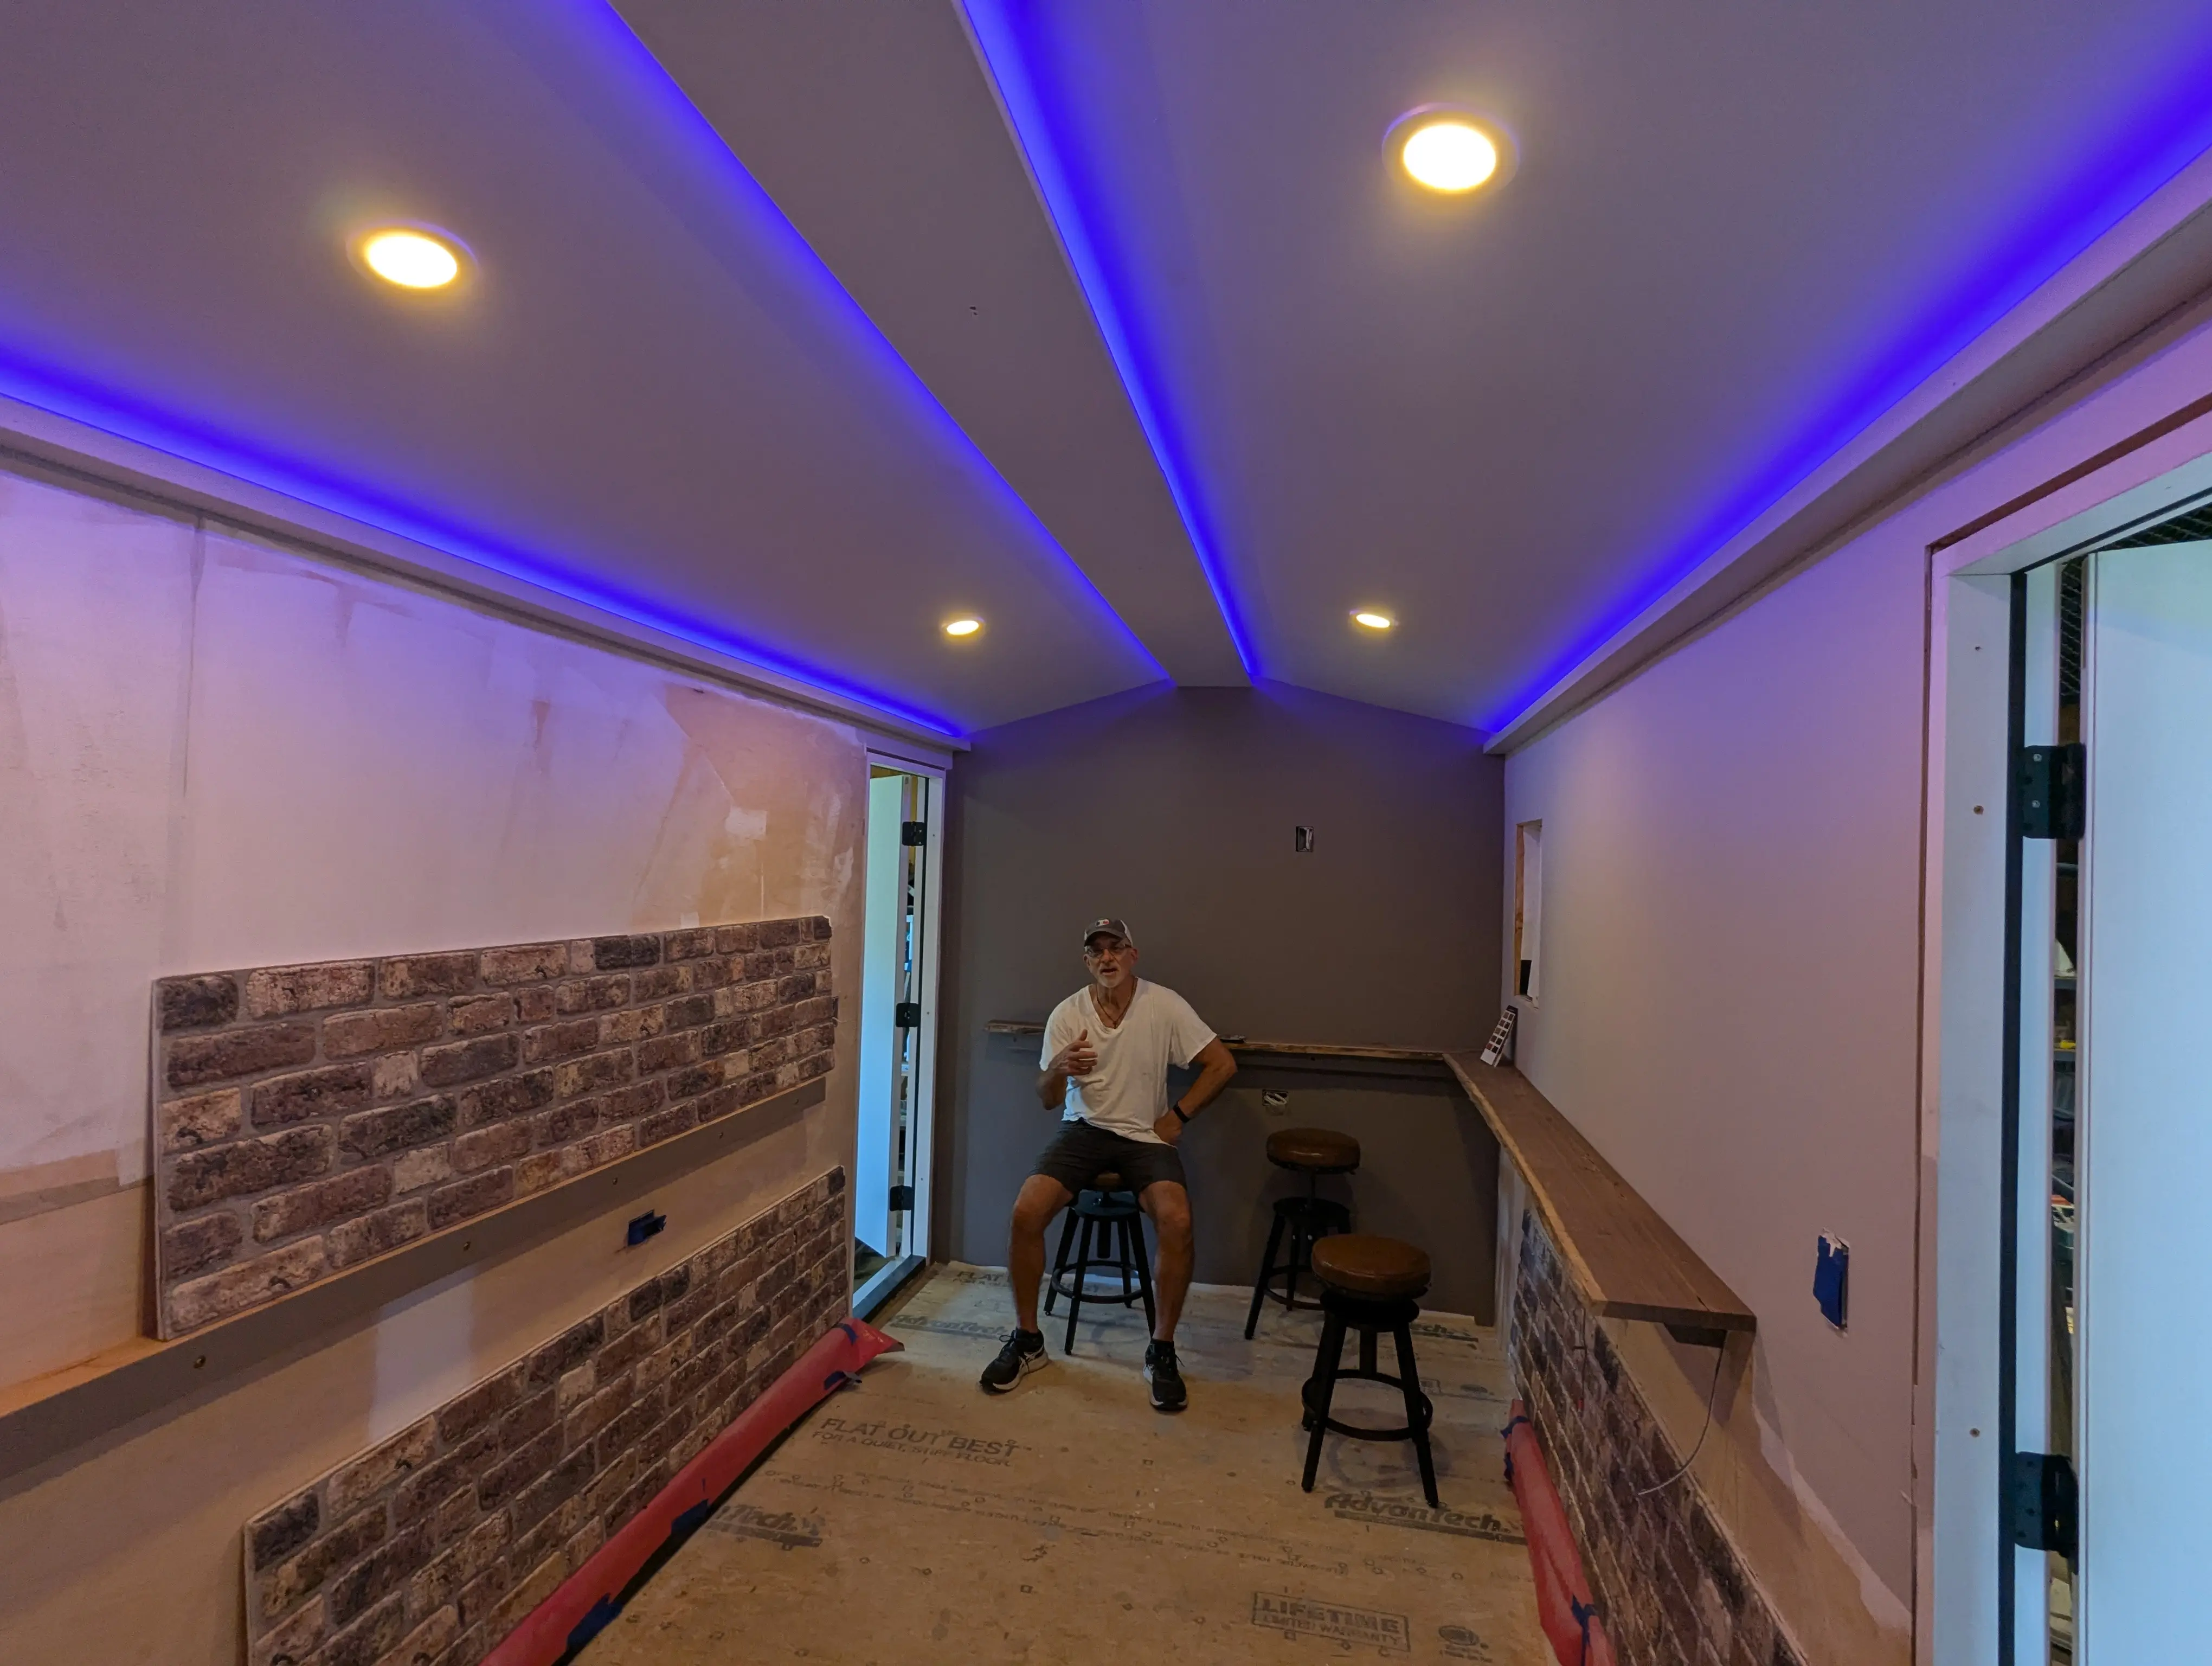
Faux Brick Goes Up — And It's Stunning
This was one of those steps we'd been quietly nervous about. How do you cut faux brick cleanly around the shelves, the outlets, all the little obstacles? Once we got into it, though, it really just came together. The cuts were manageable, the pieces fit, and wall by wall the interior started to look like something out of a proper pub. We still have some touch-ups to do, but the initial result is way beyond what we expected. Standing inside and looking at it for the first time — yeah, we're happy with this one.
Click any photo to enlarge
June 2026
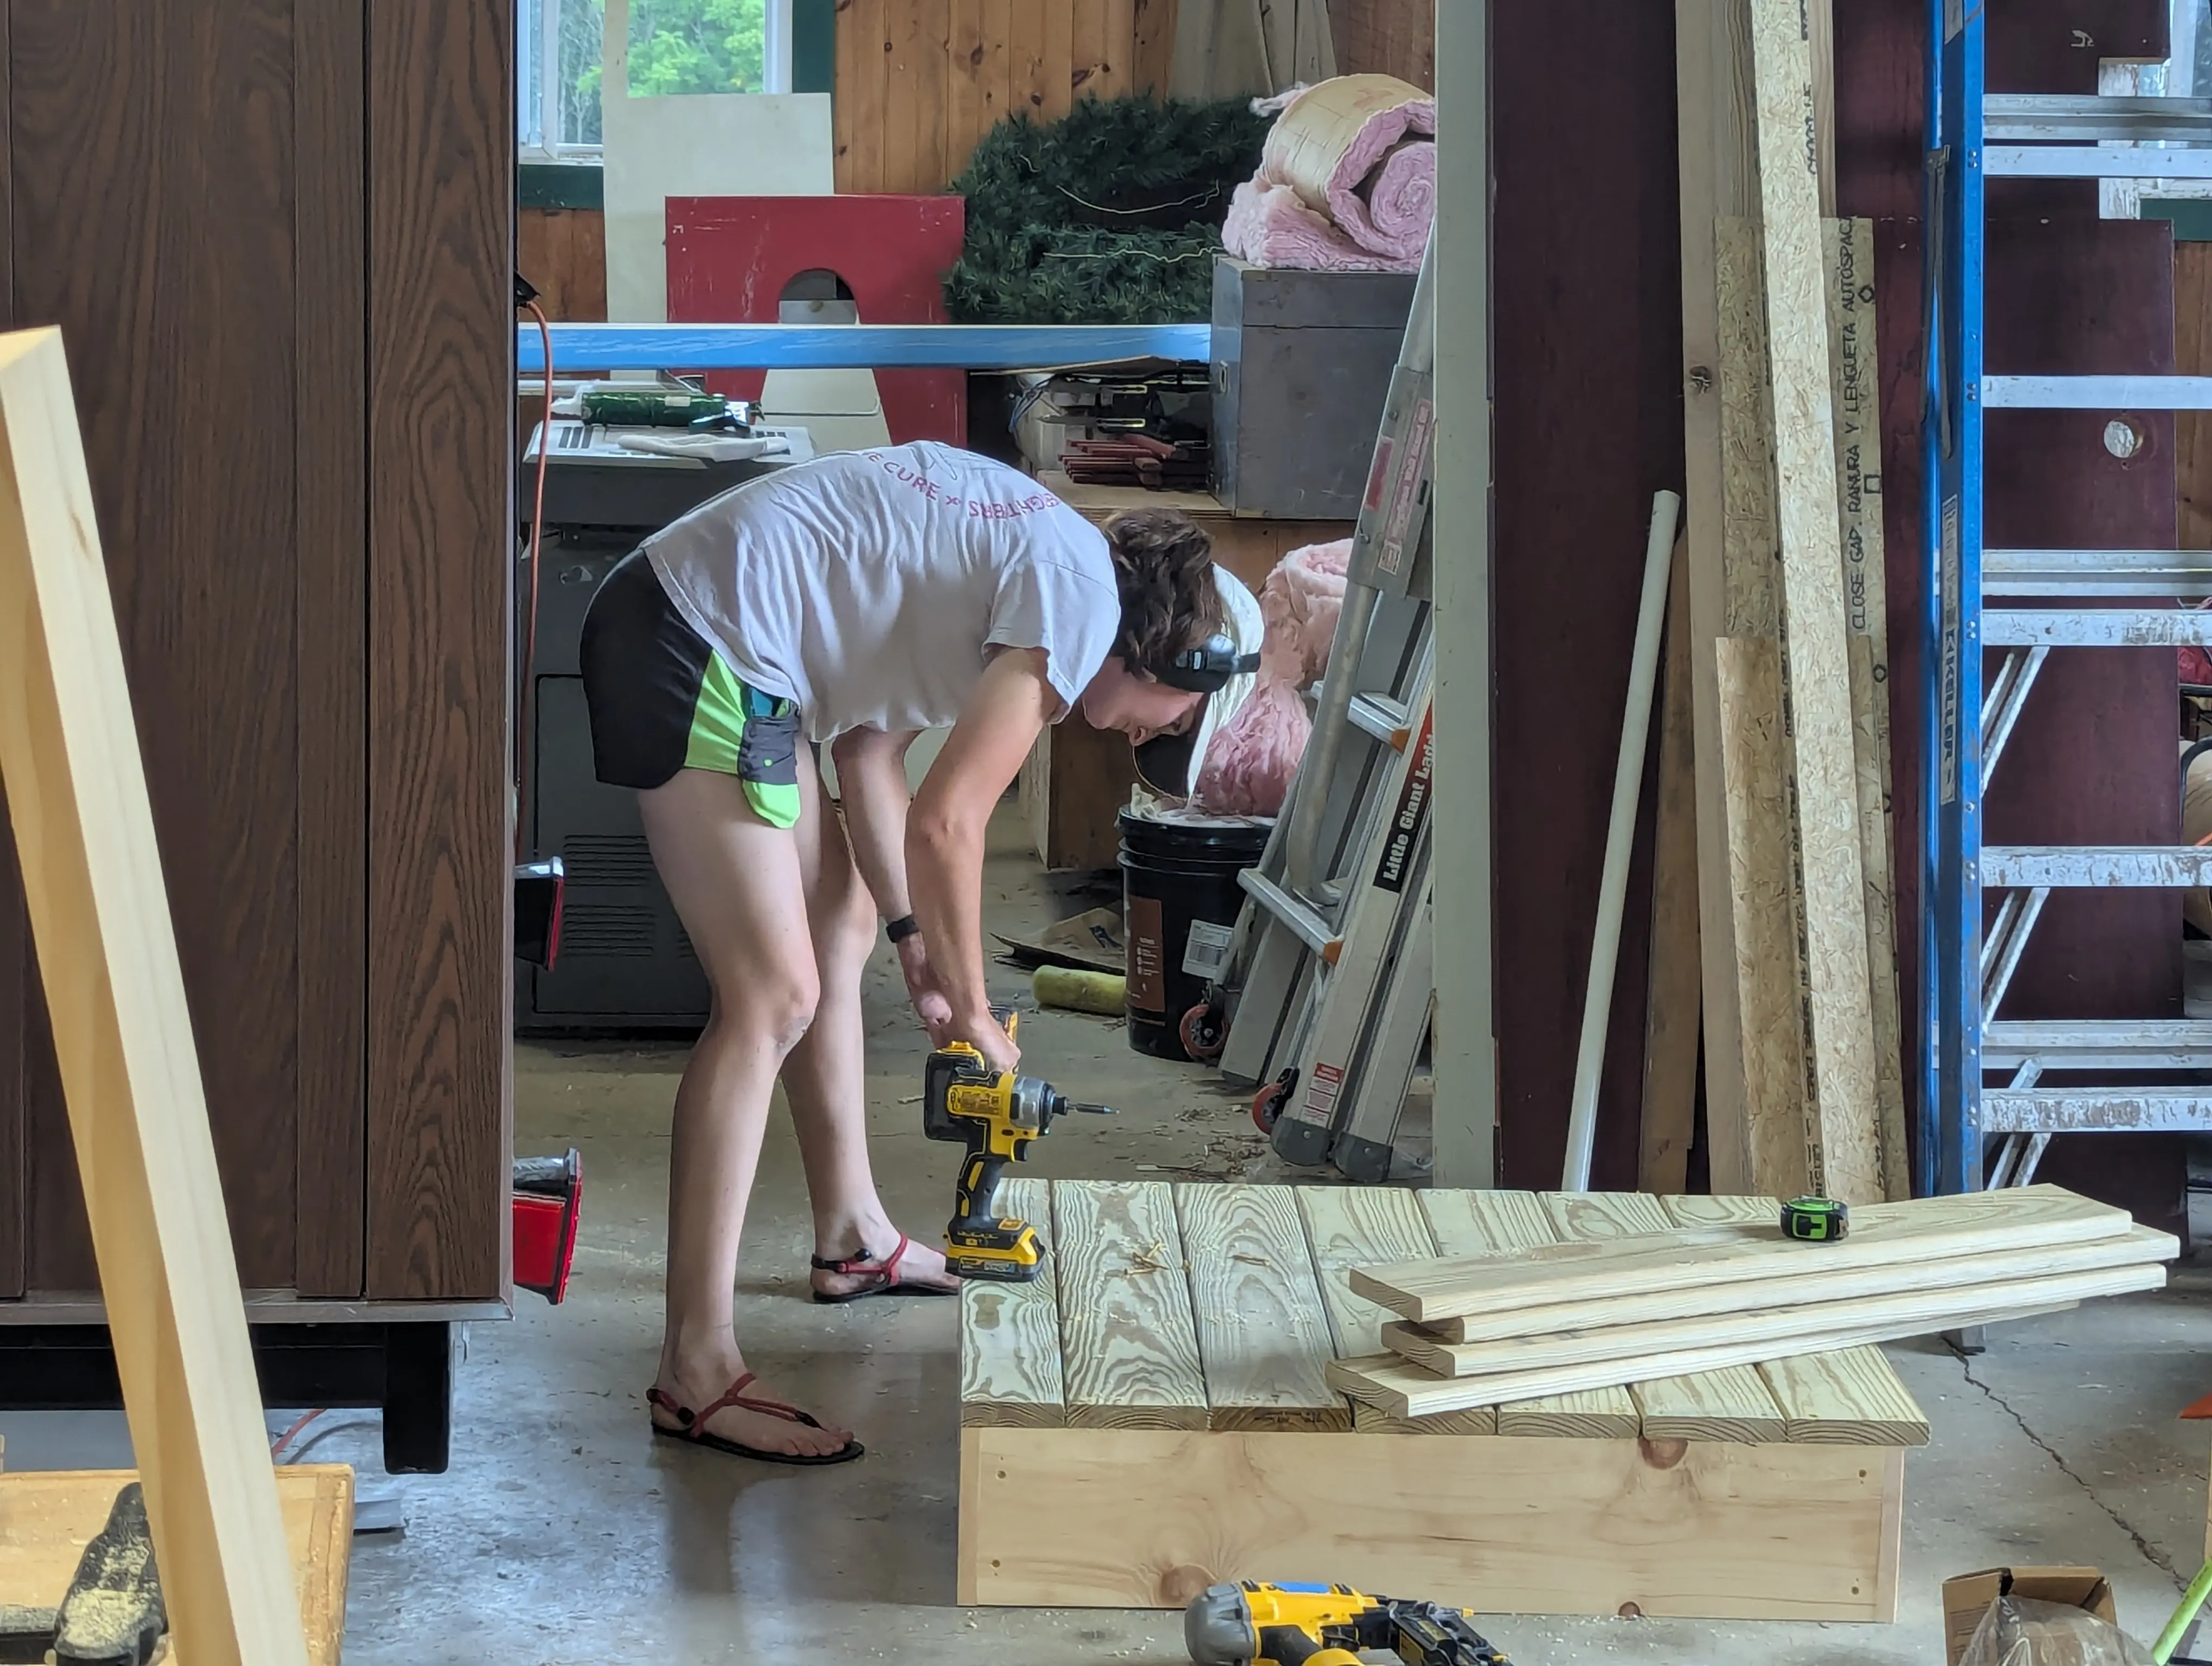
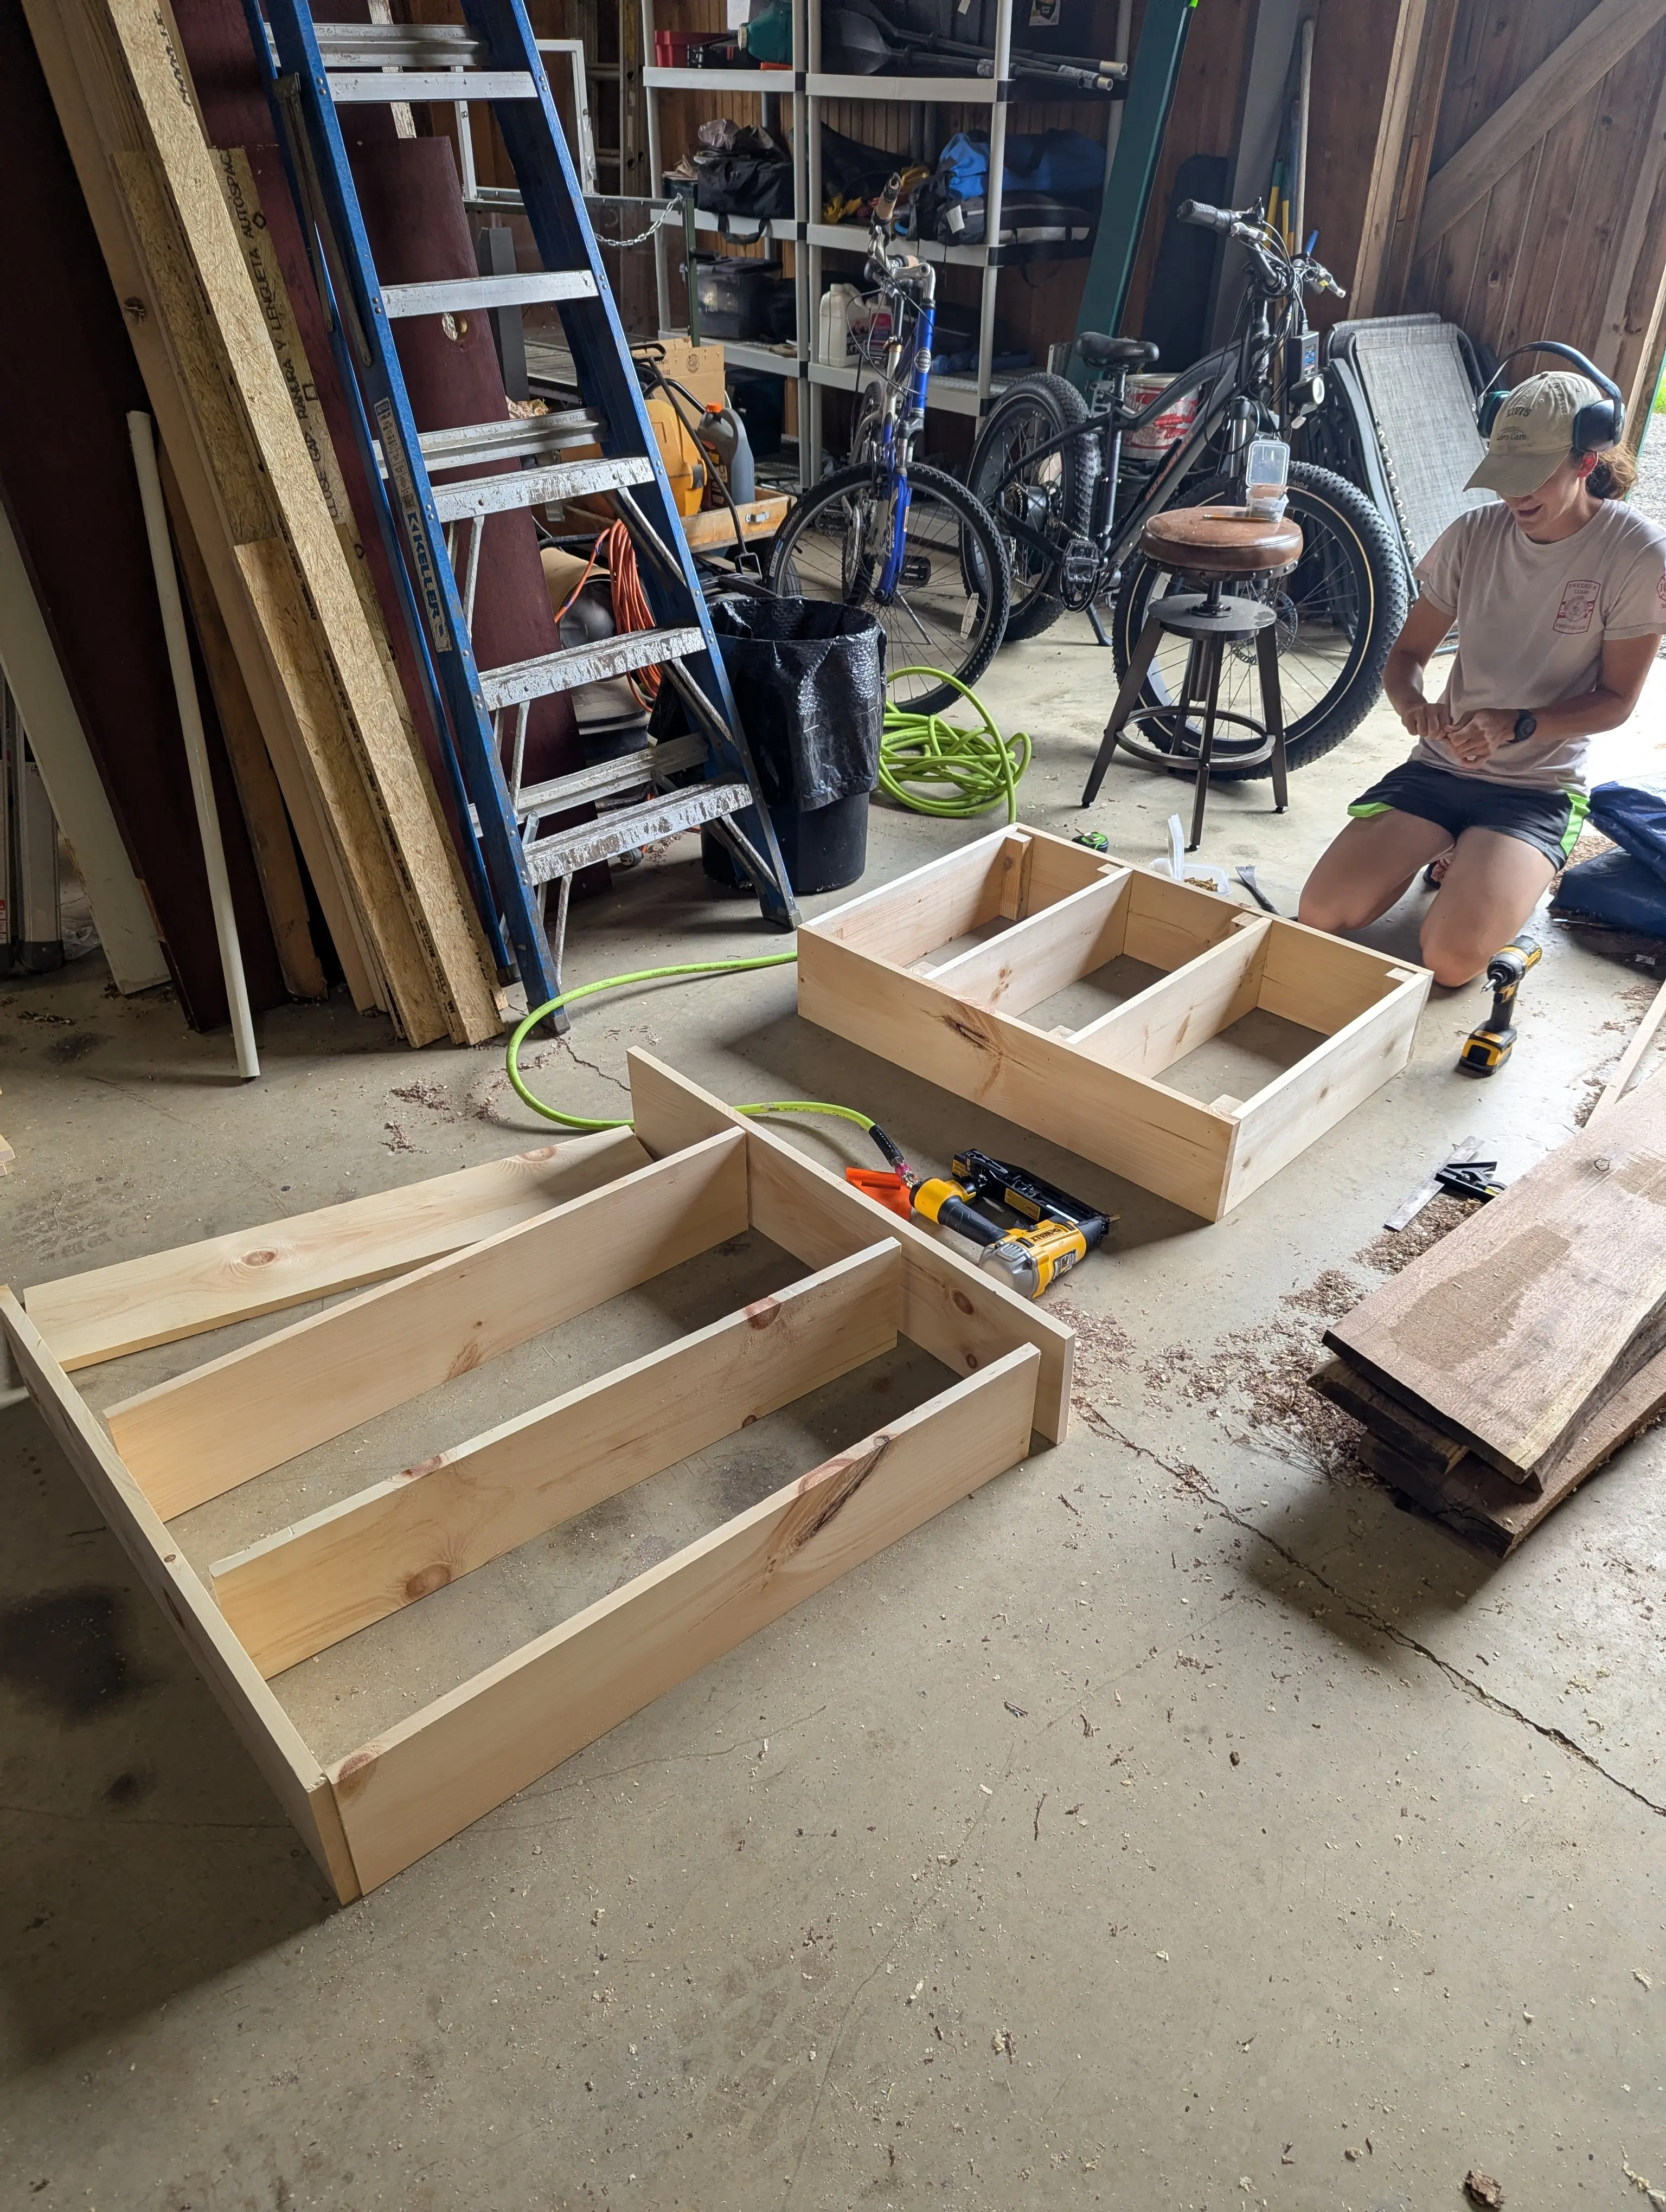
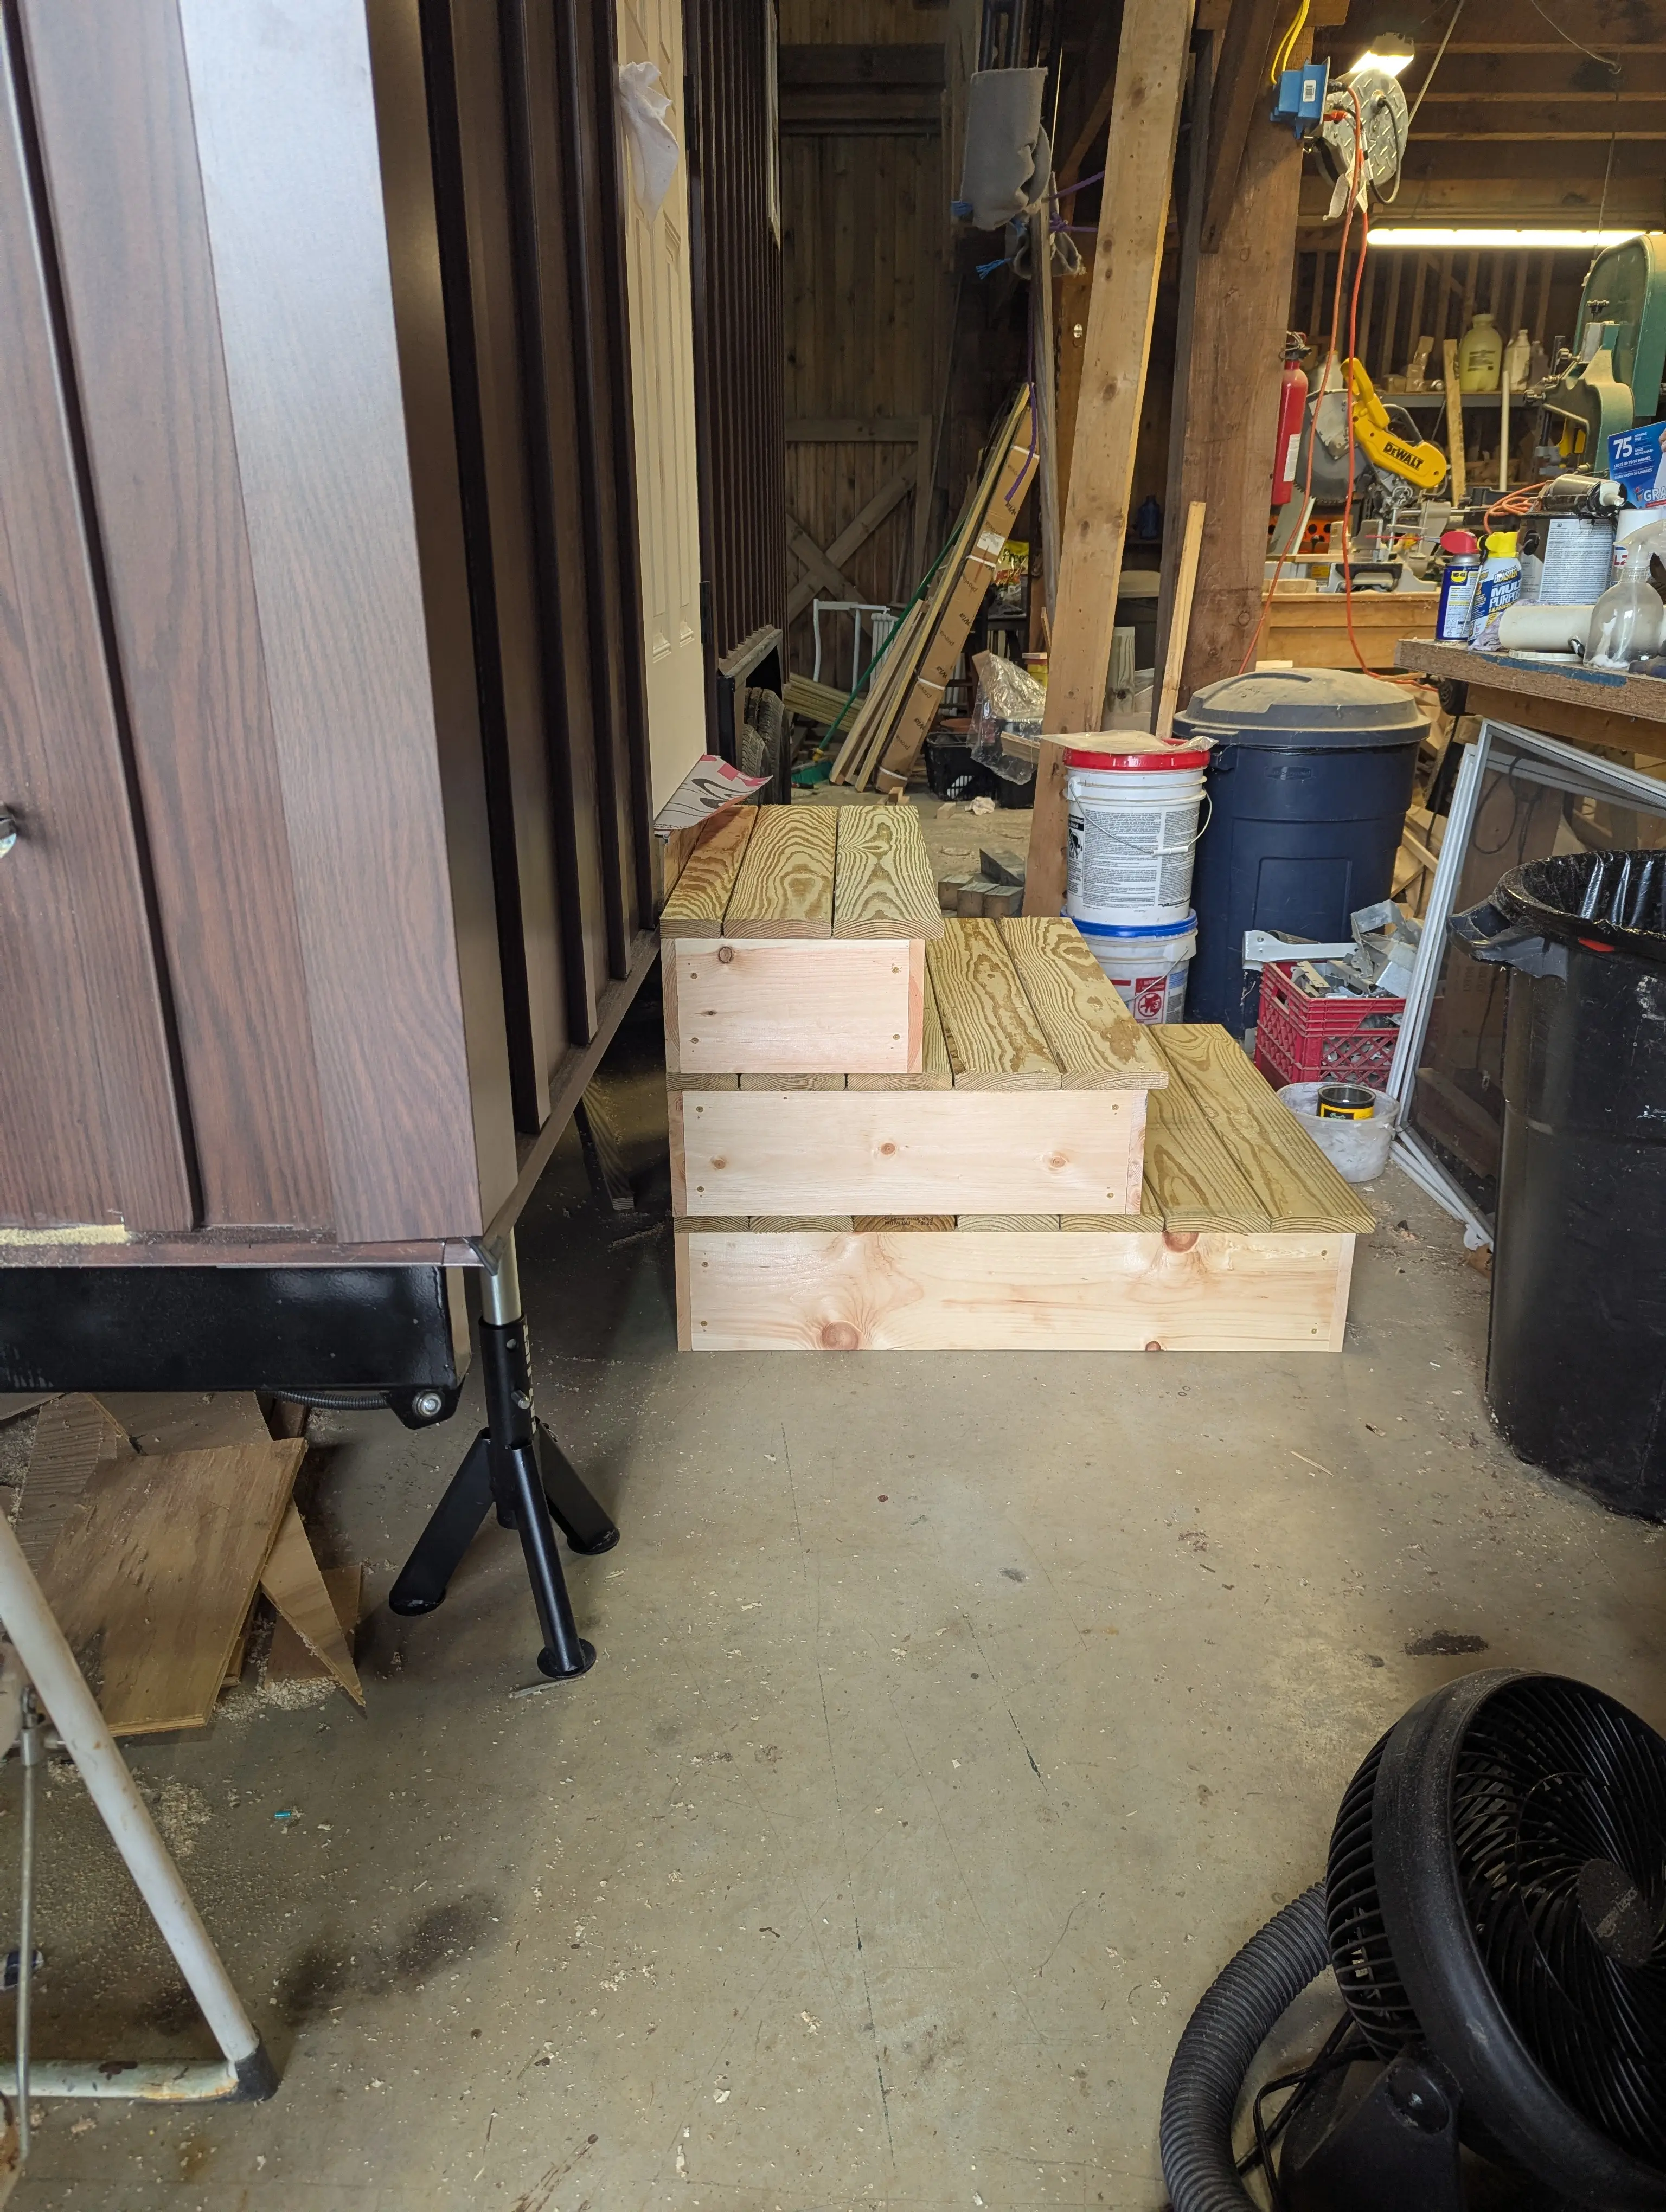
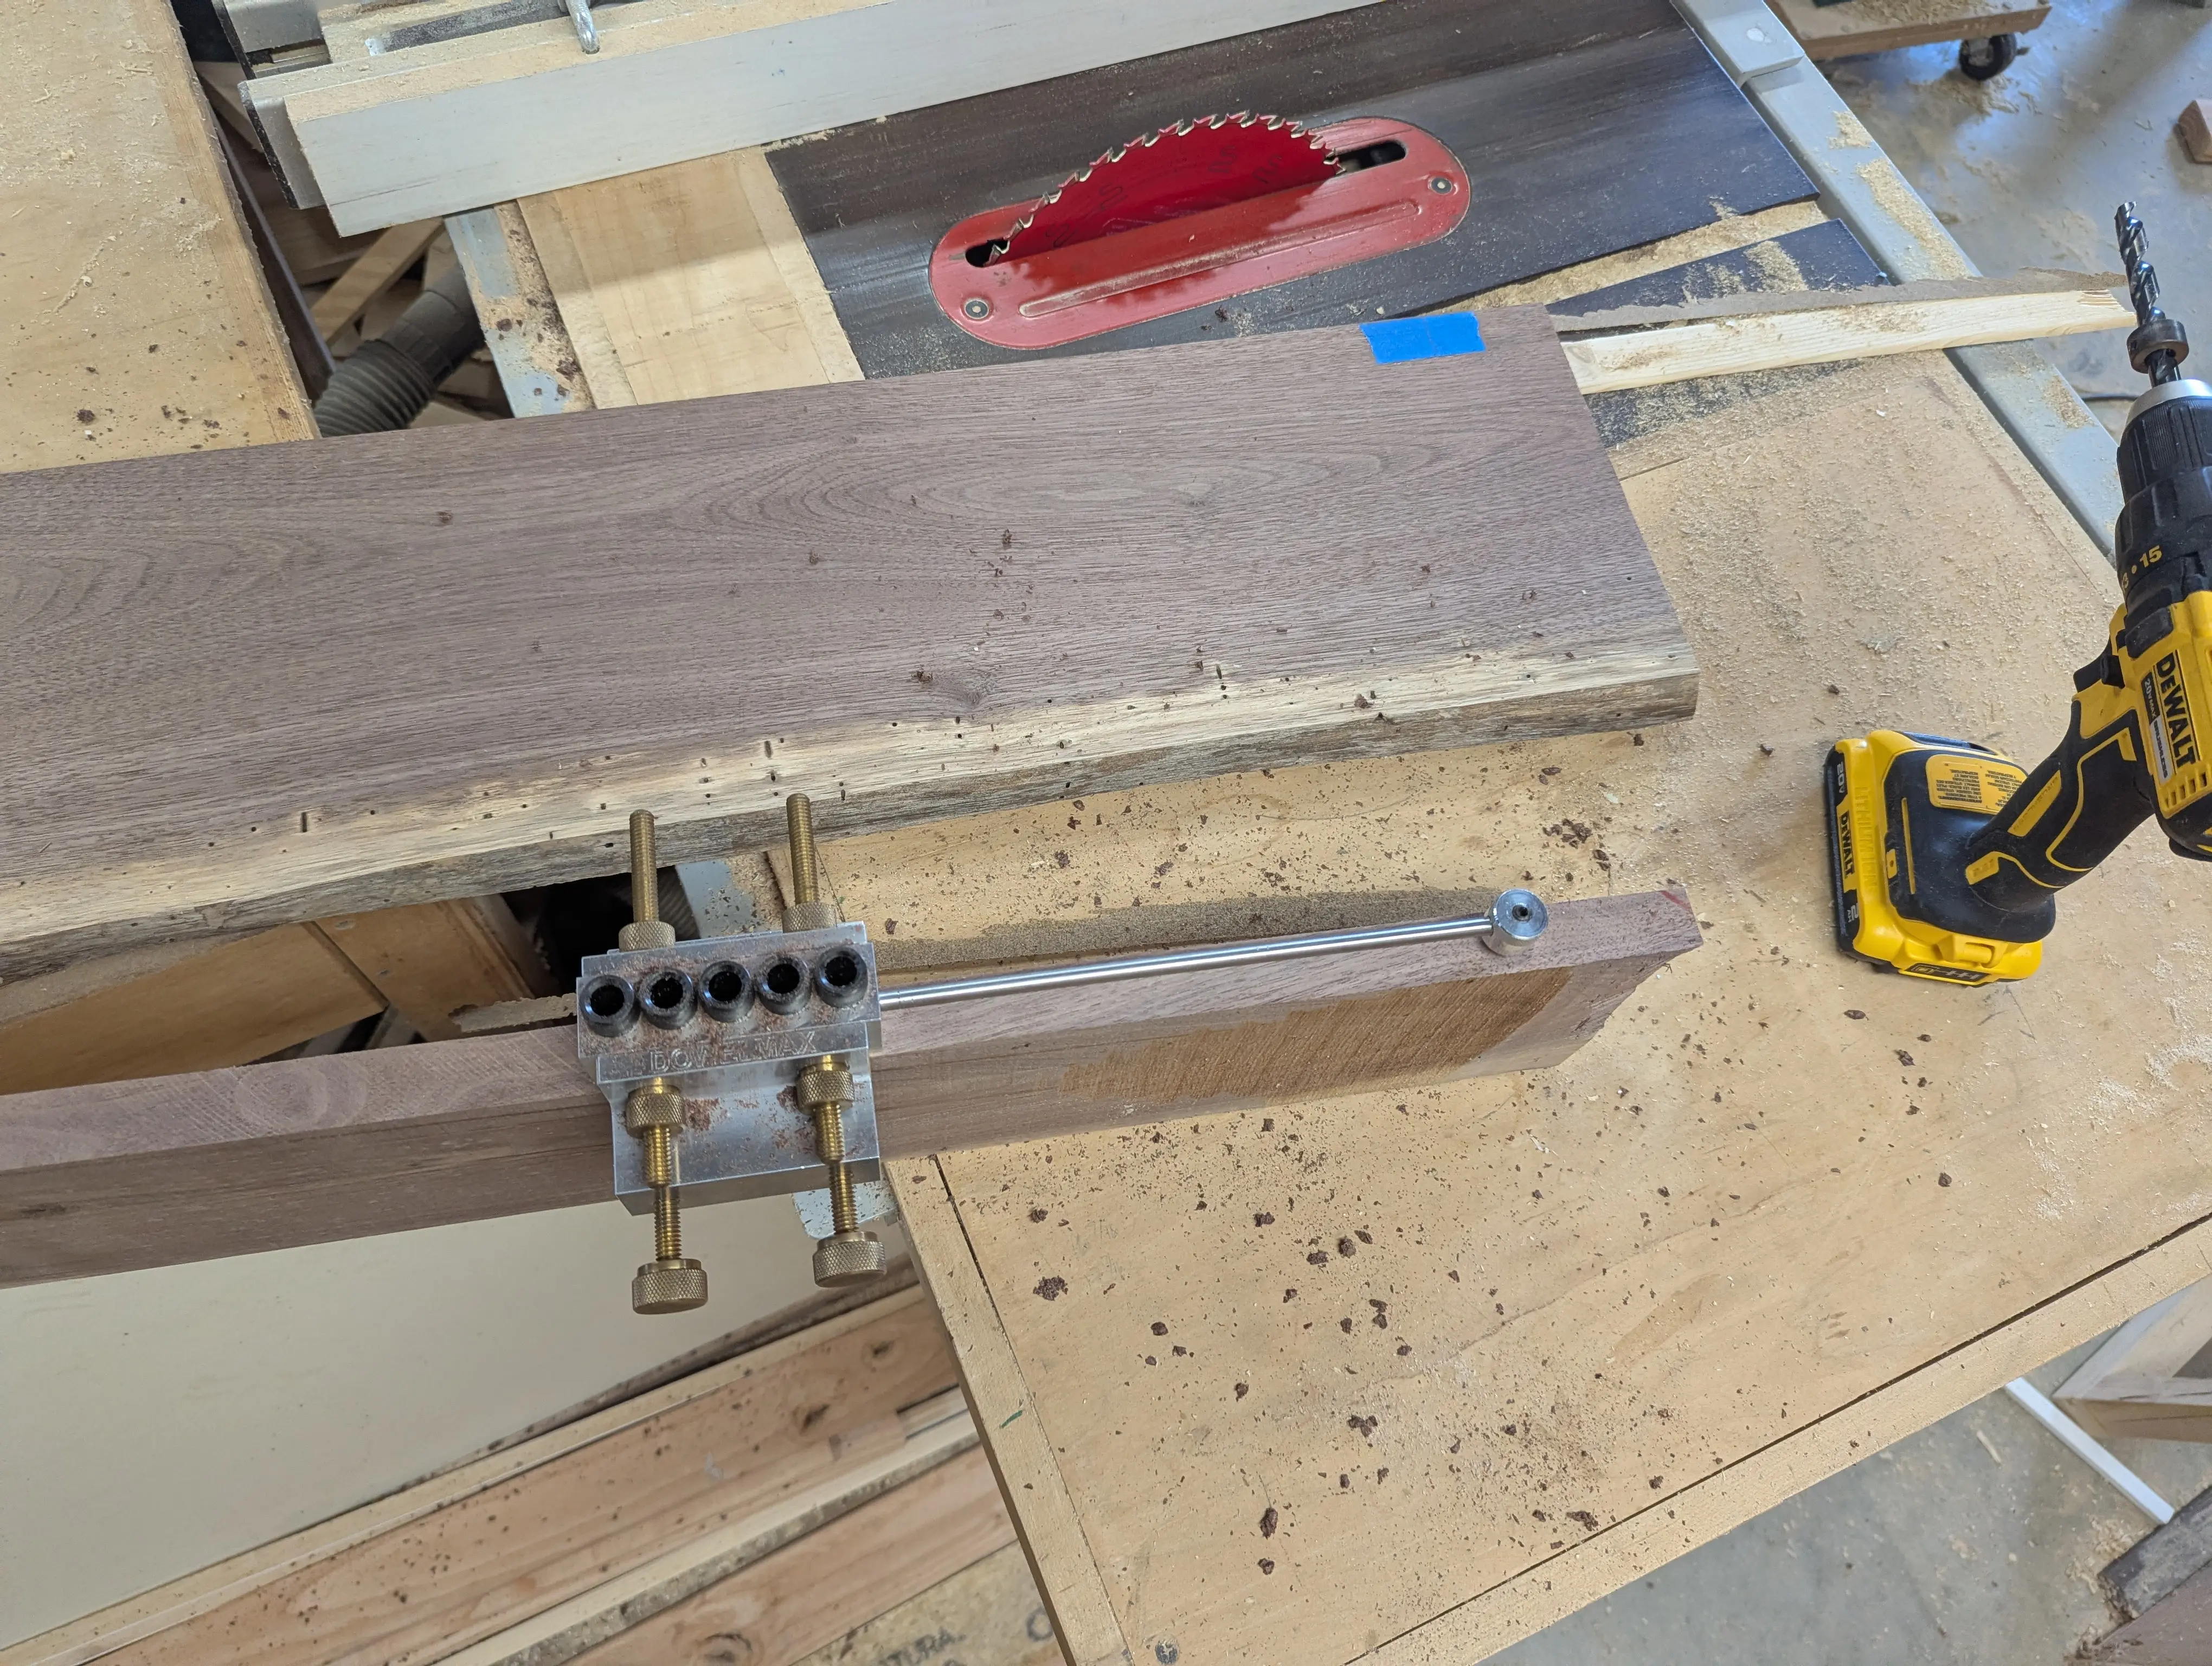
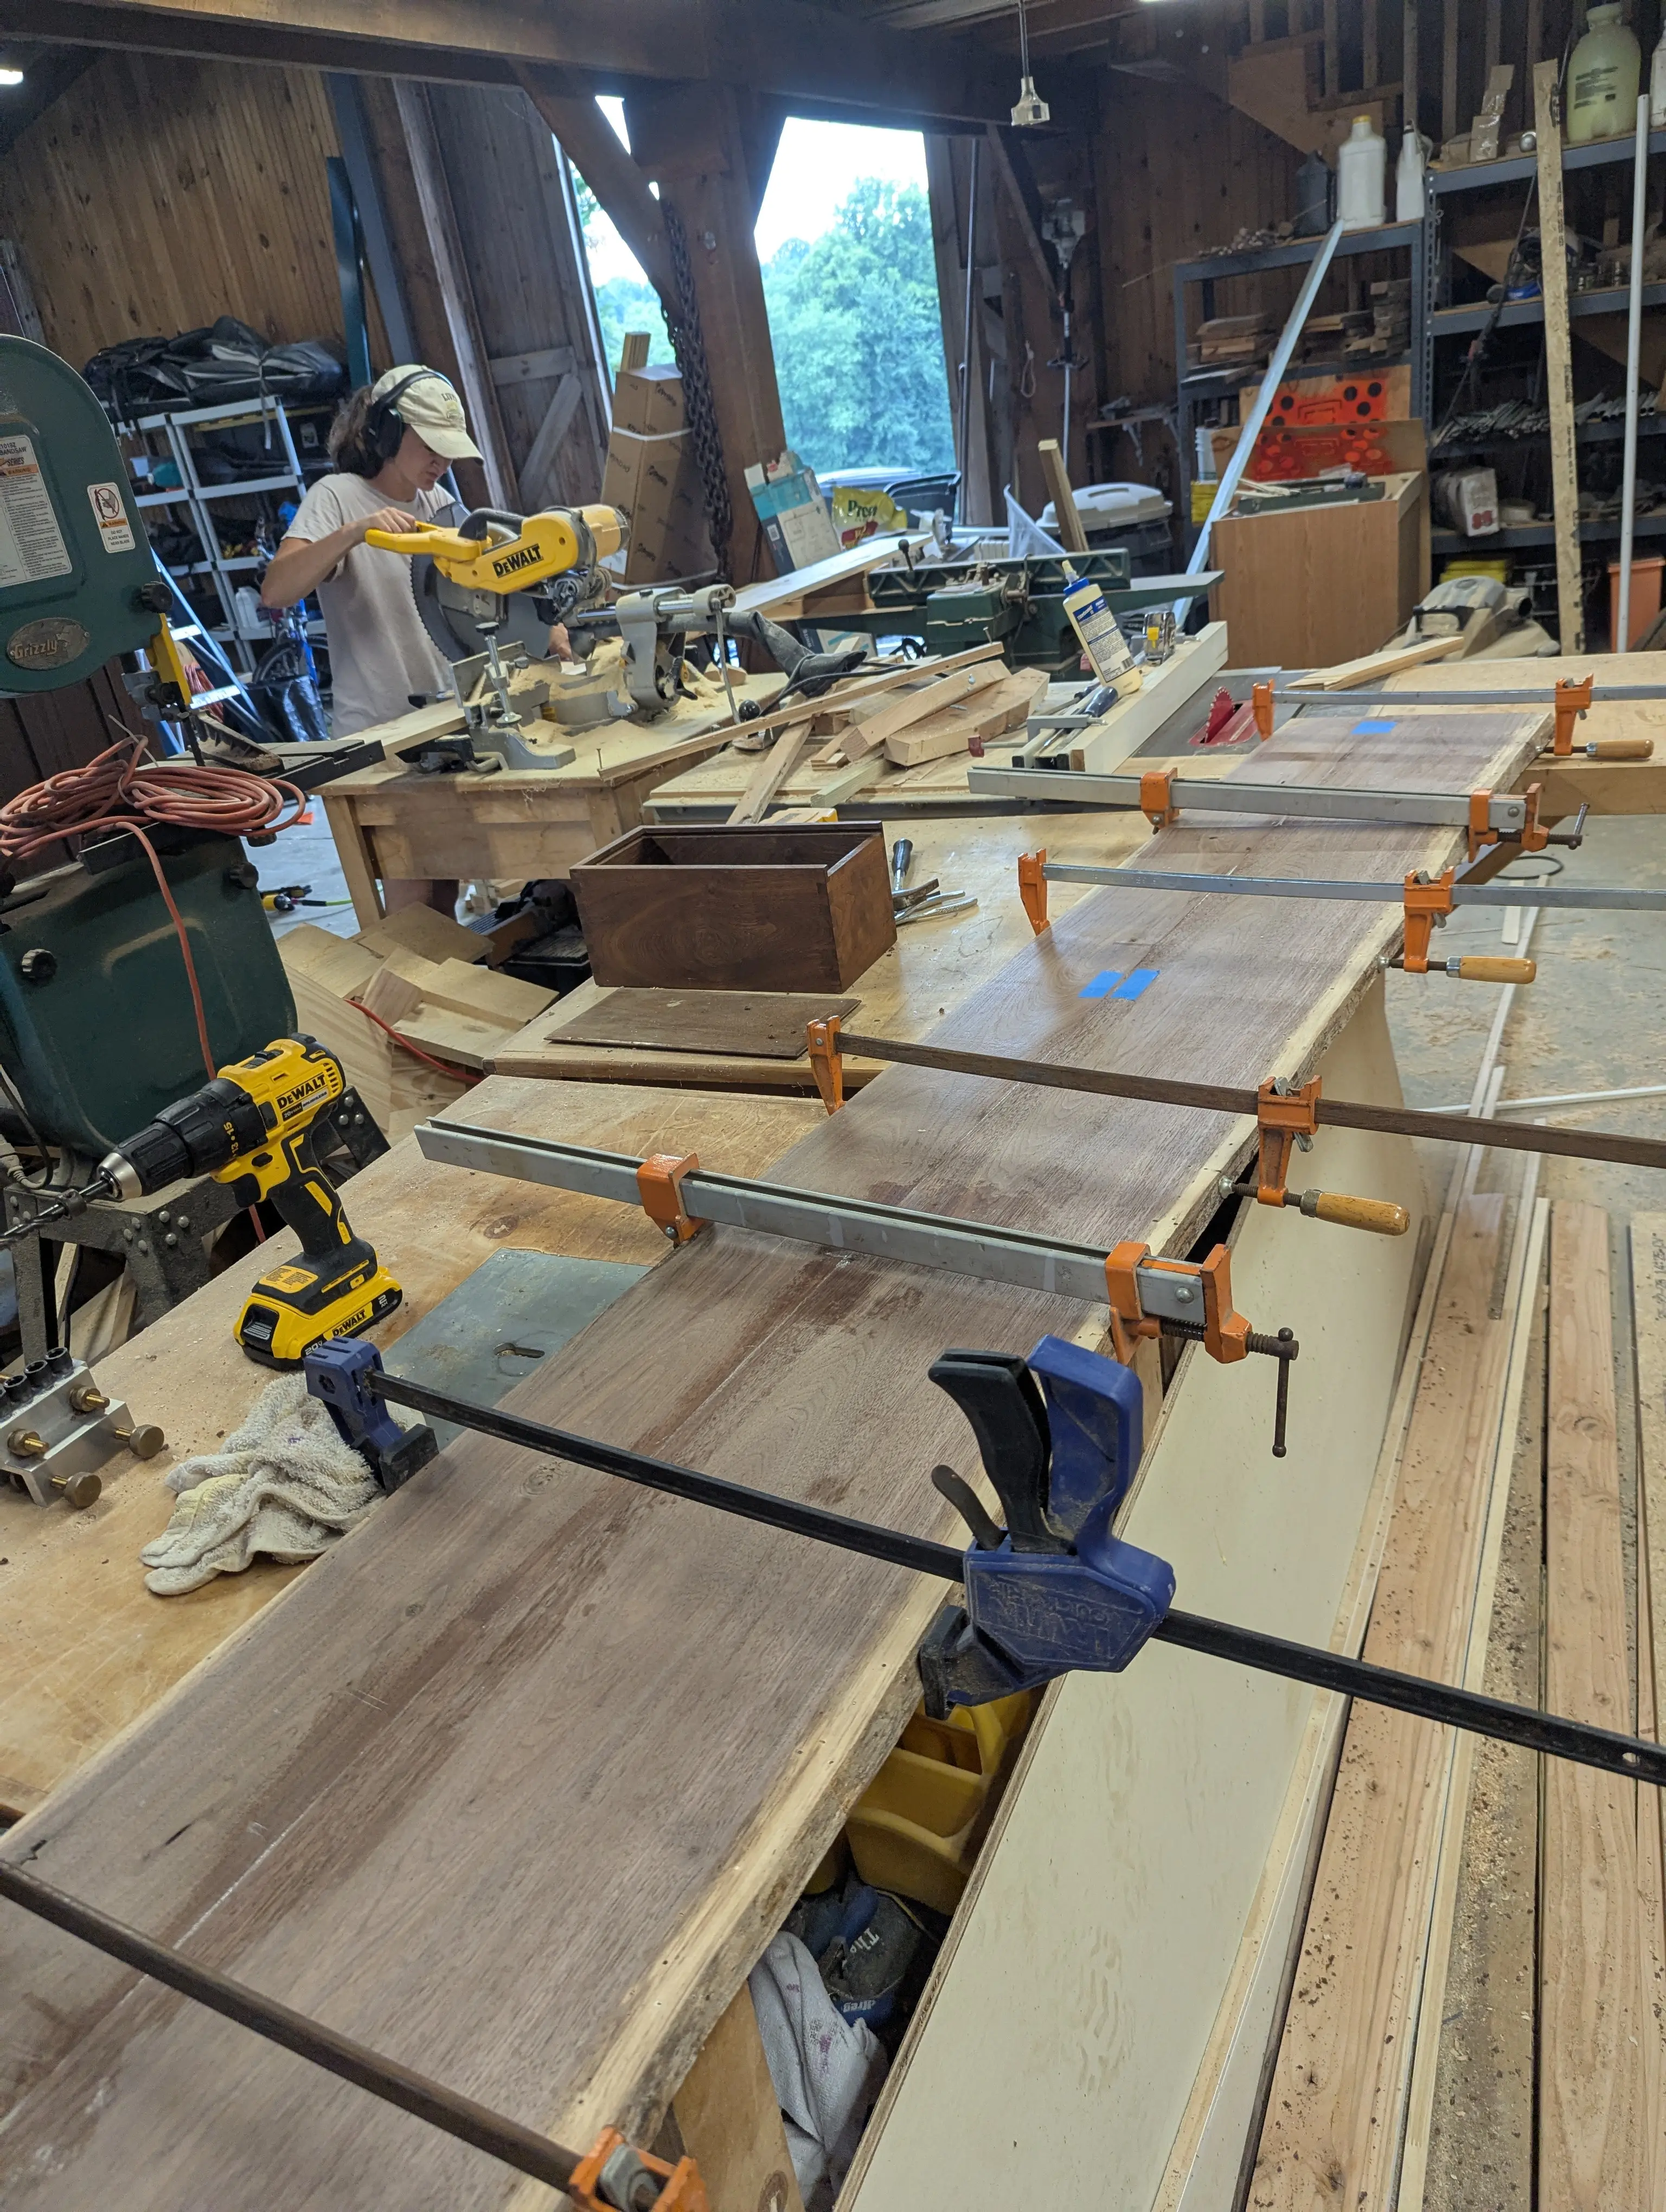
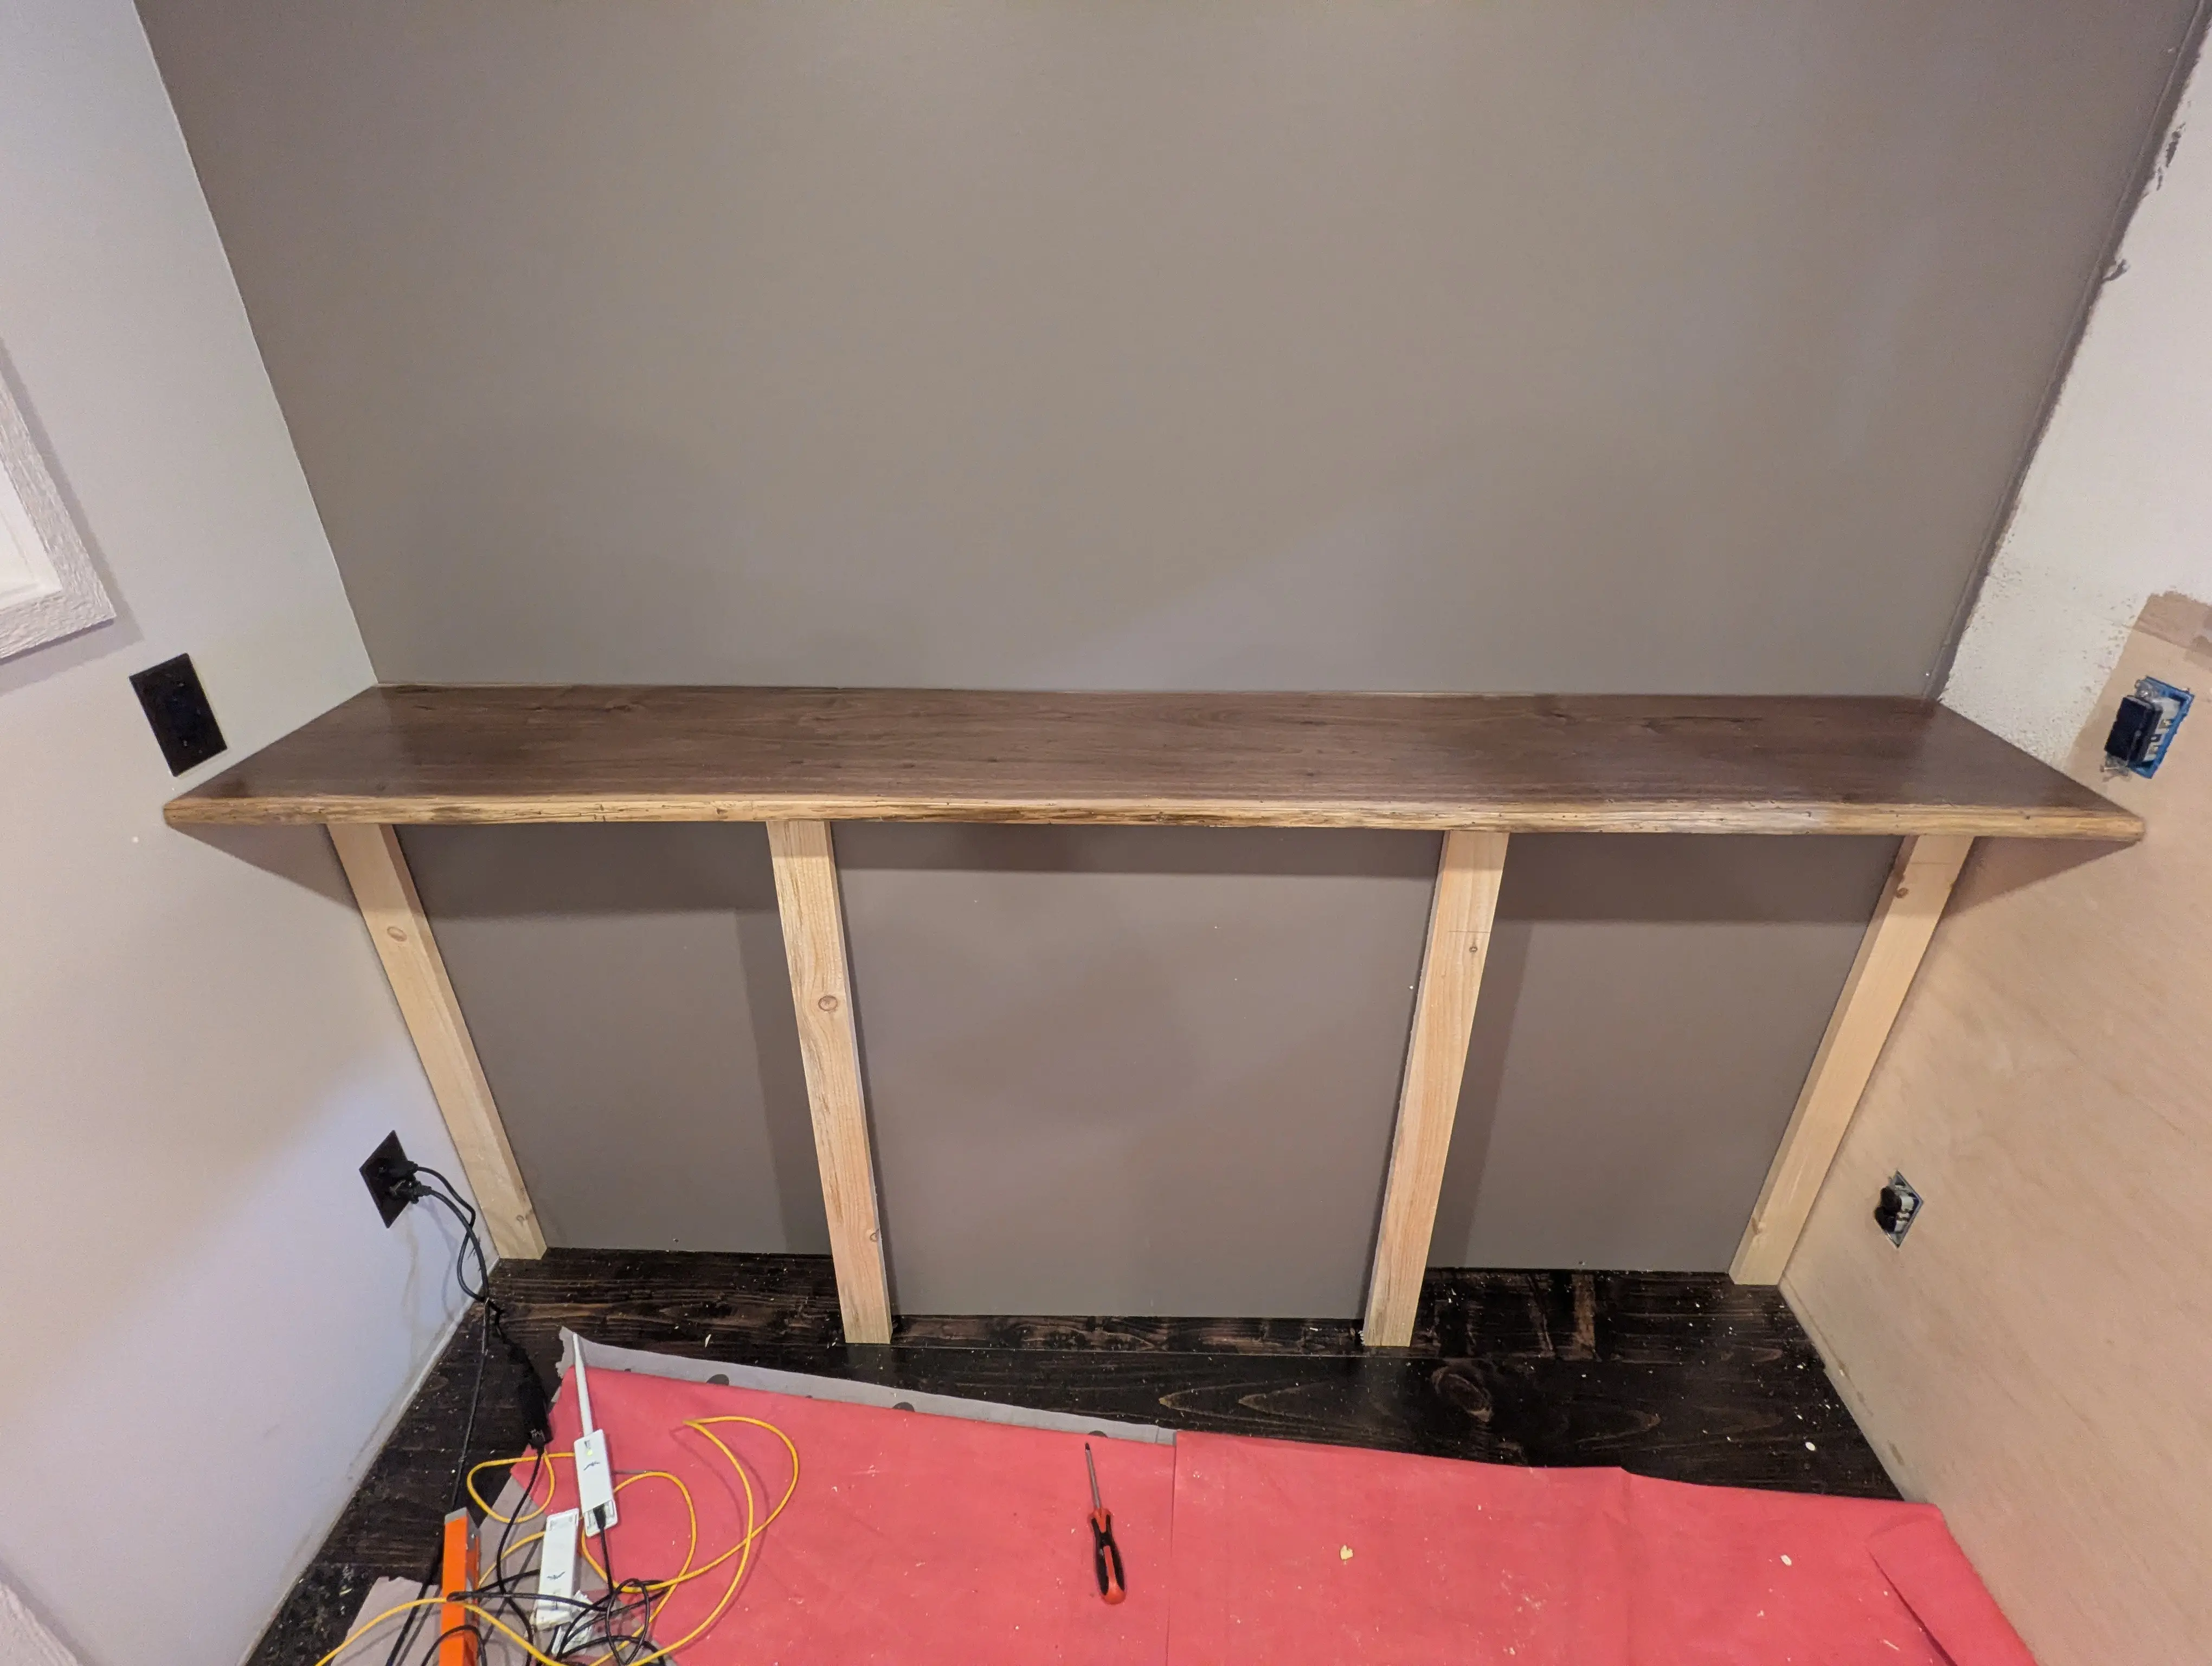
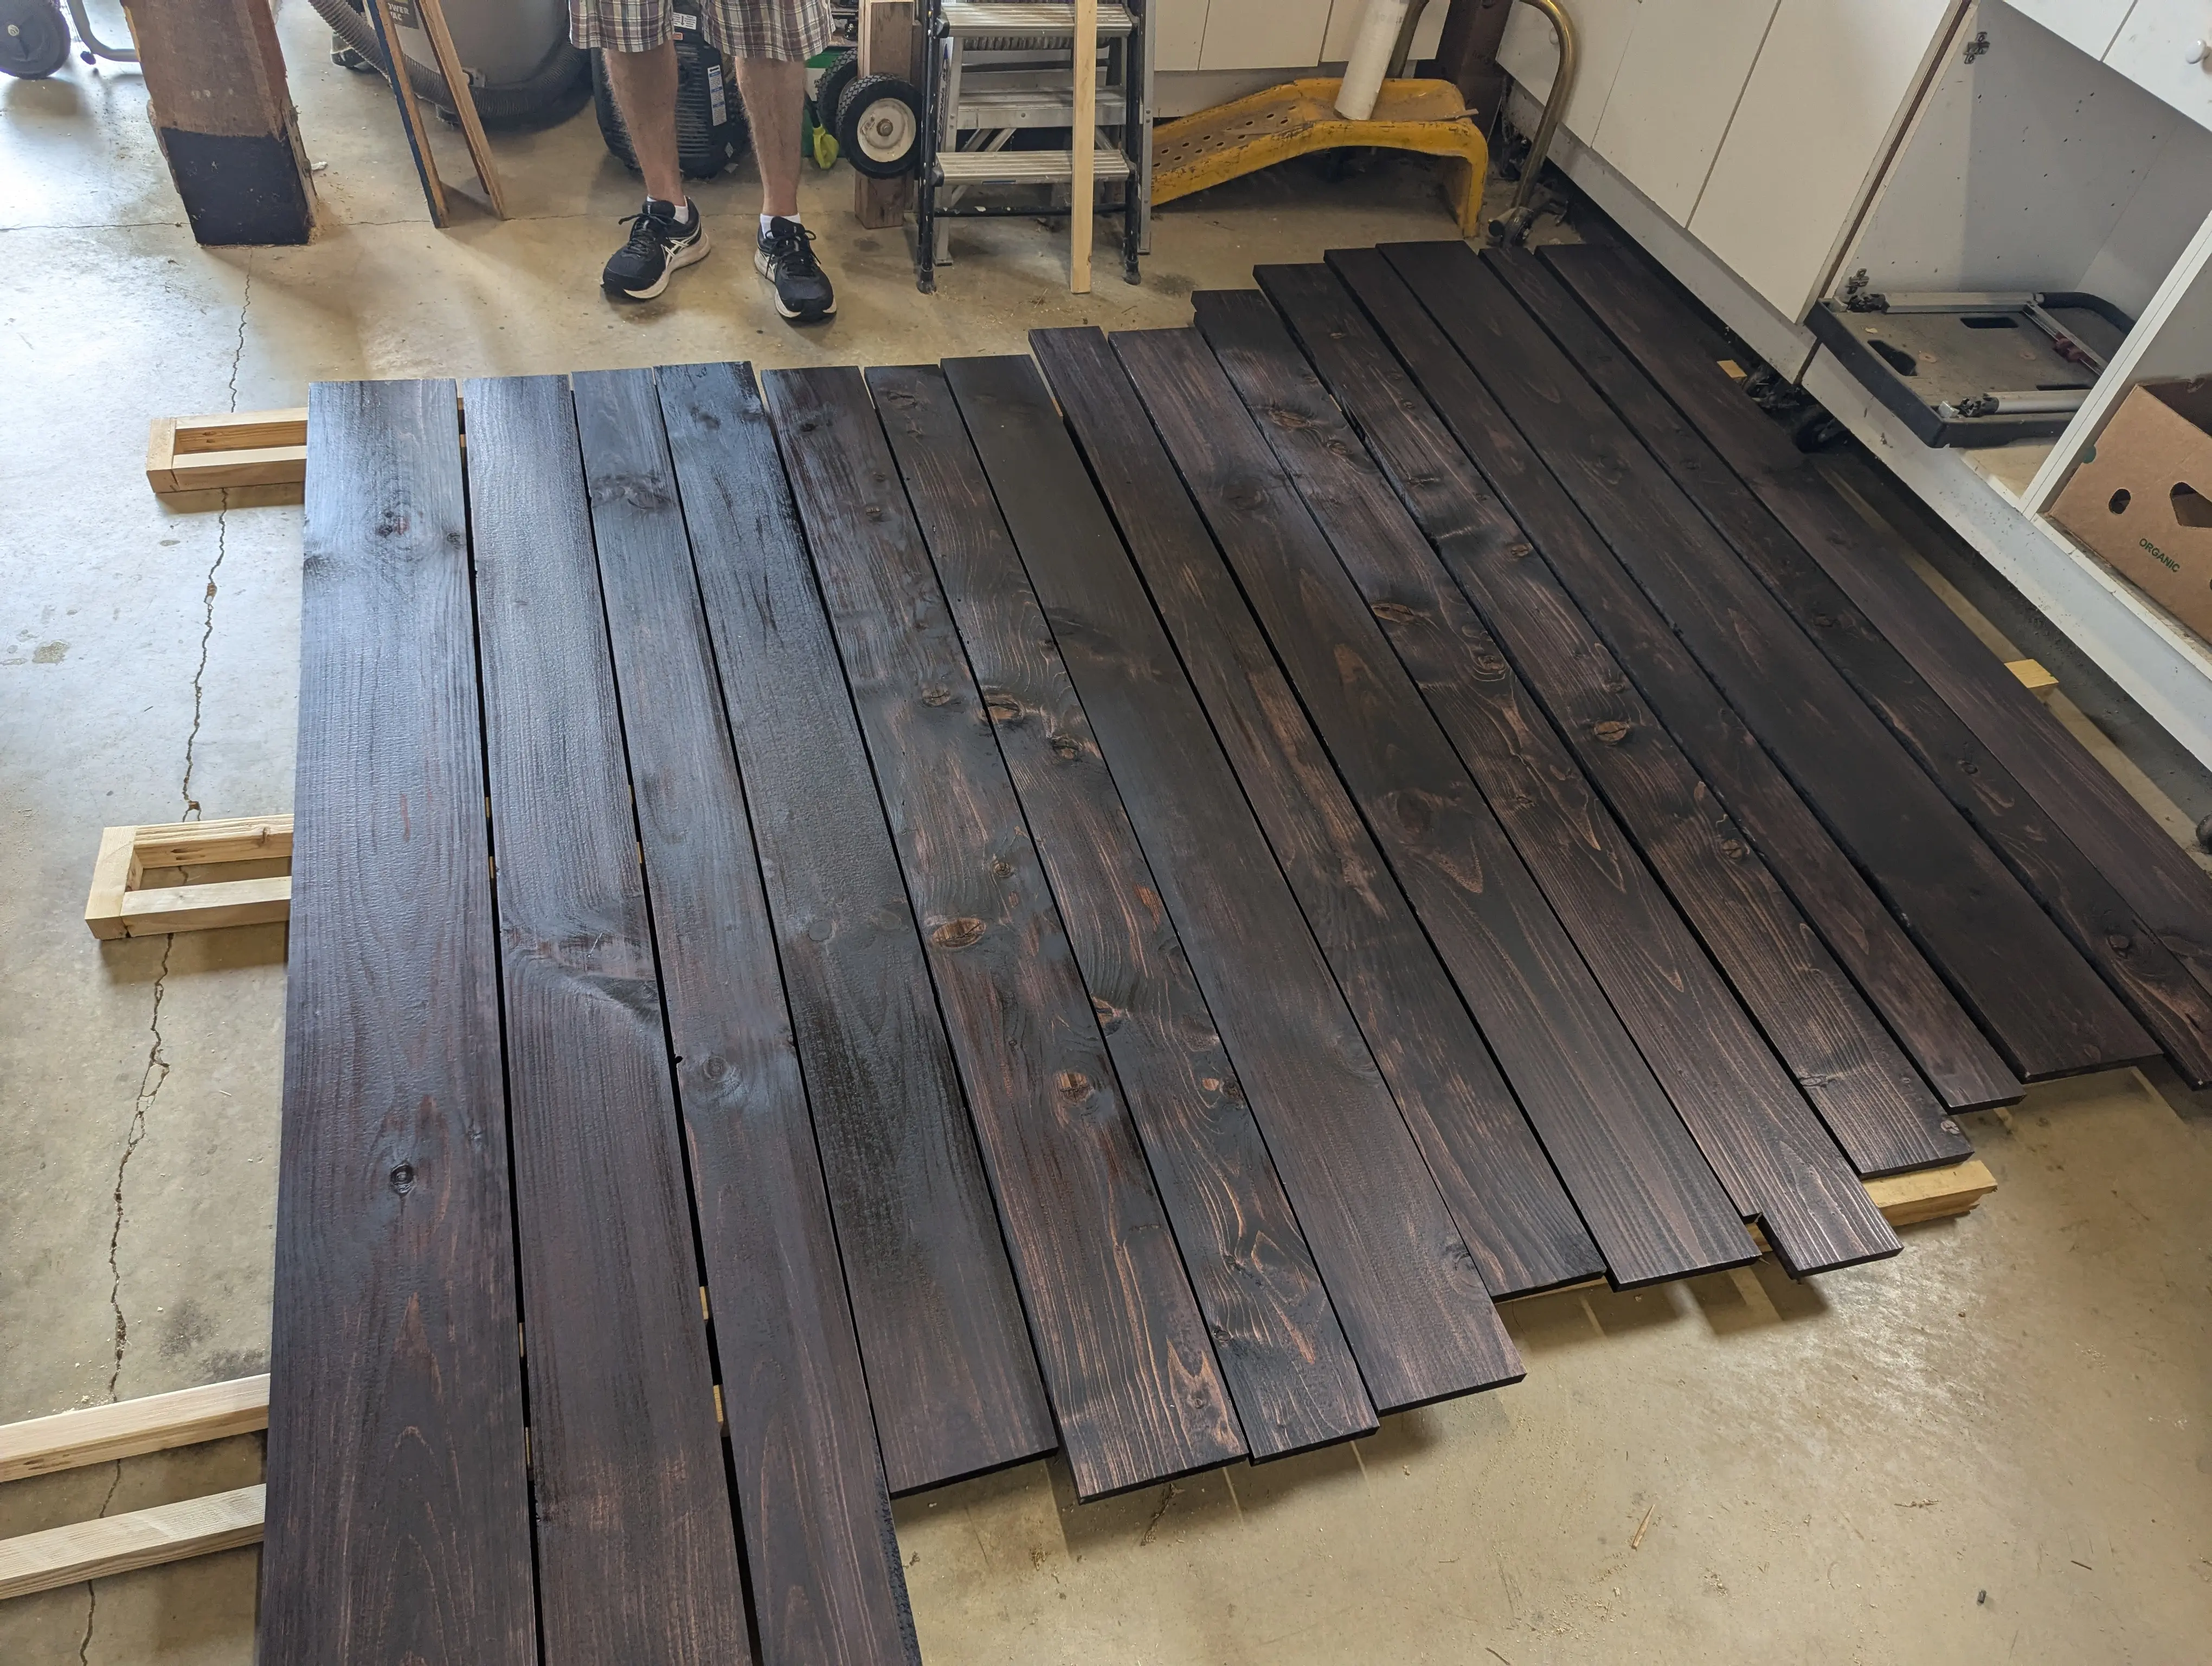
Bartop Glued Up, Steps Built — The 4th of July Push
We came into the week before the 4th with a list and left with most of it checked. First big win: Olivia stopped by and built the steps — and they turned out great. While that was happening, we got the bar area framed and fully built out. Then came the main event: gluing up the bartop. Dowels to keep everything aligned, clamps everywhere, and then the waiting. Once it was out of clamps, the sanding began. And kept going. If you've never heard of 2000-grit sandpaper, now you have — it exists, it's real, and we used a lot of it. The result is a bartop surface that looks and feels like glass. Weeks of elbow grease, and it shows.
Click any photo to enlarge
June 2026
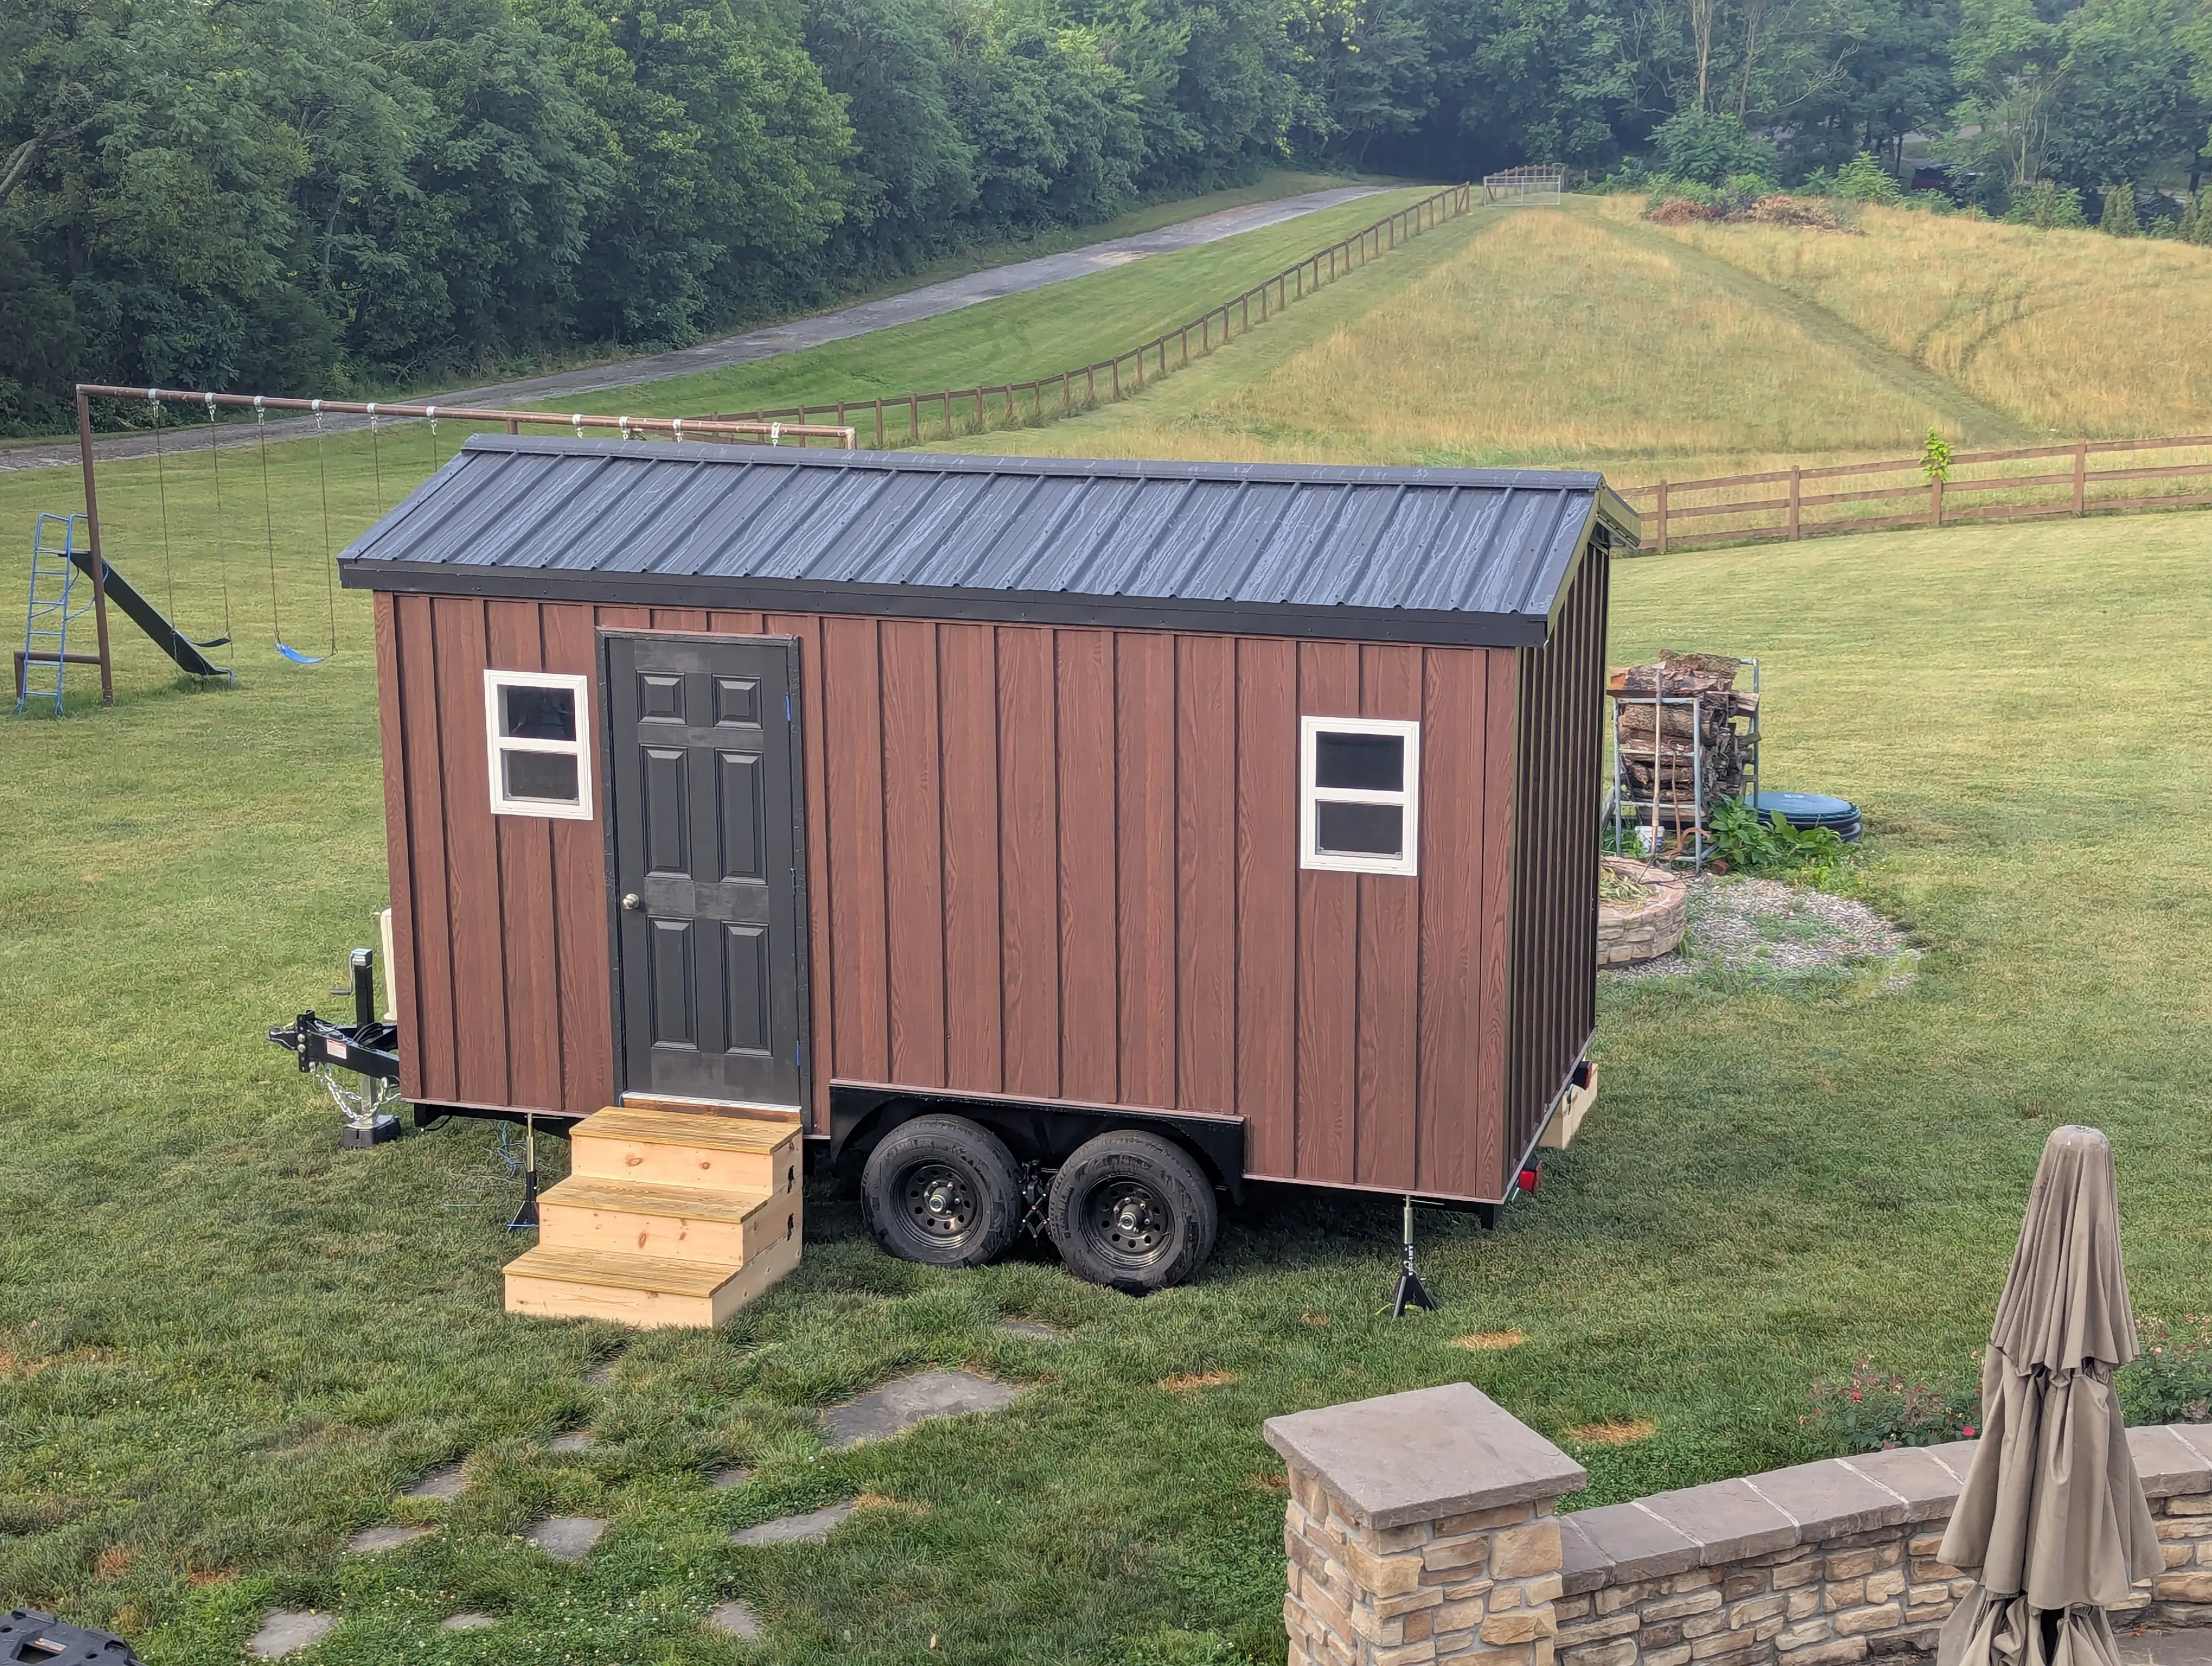
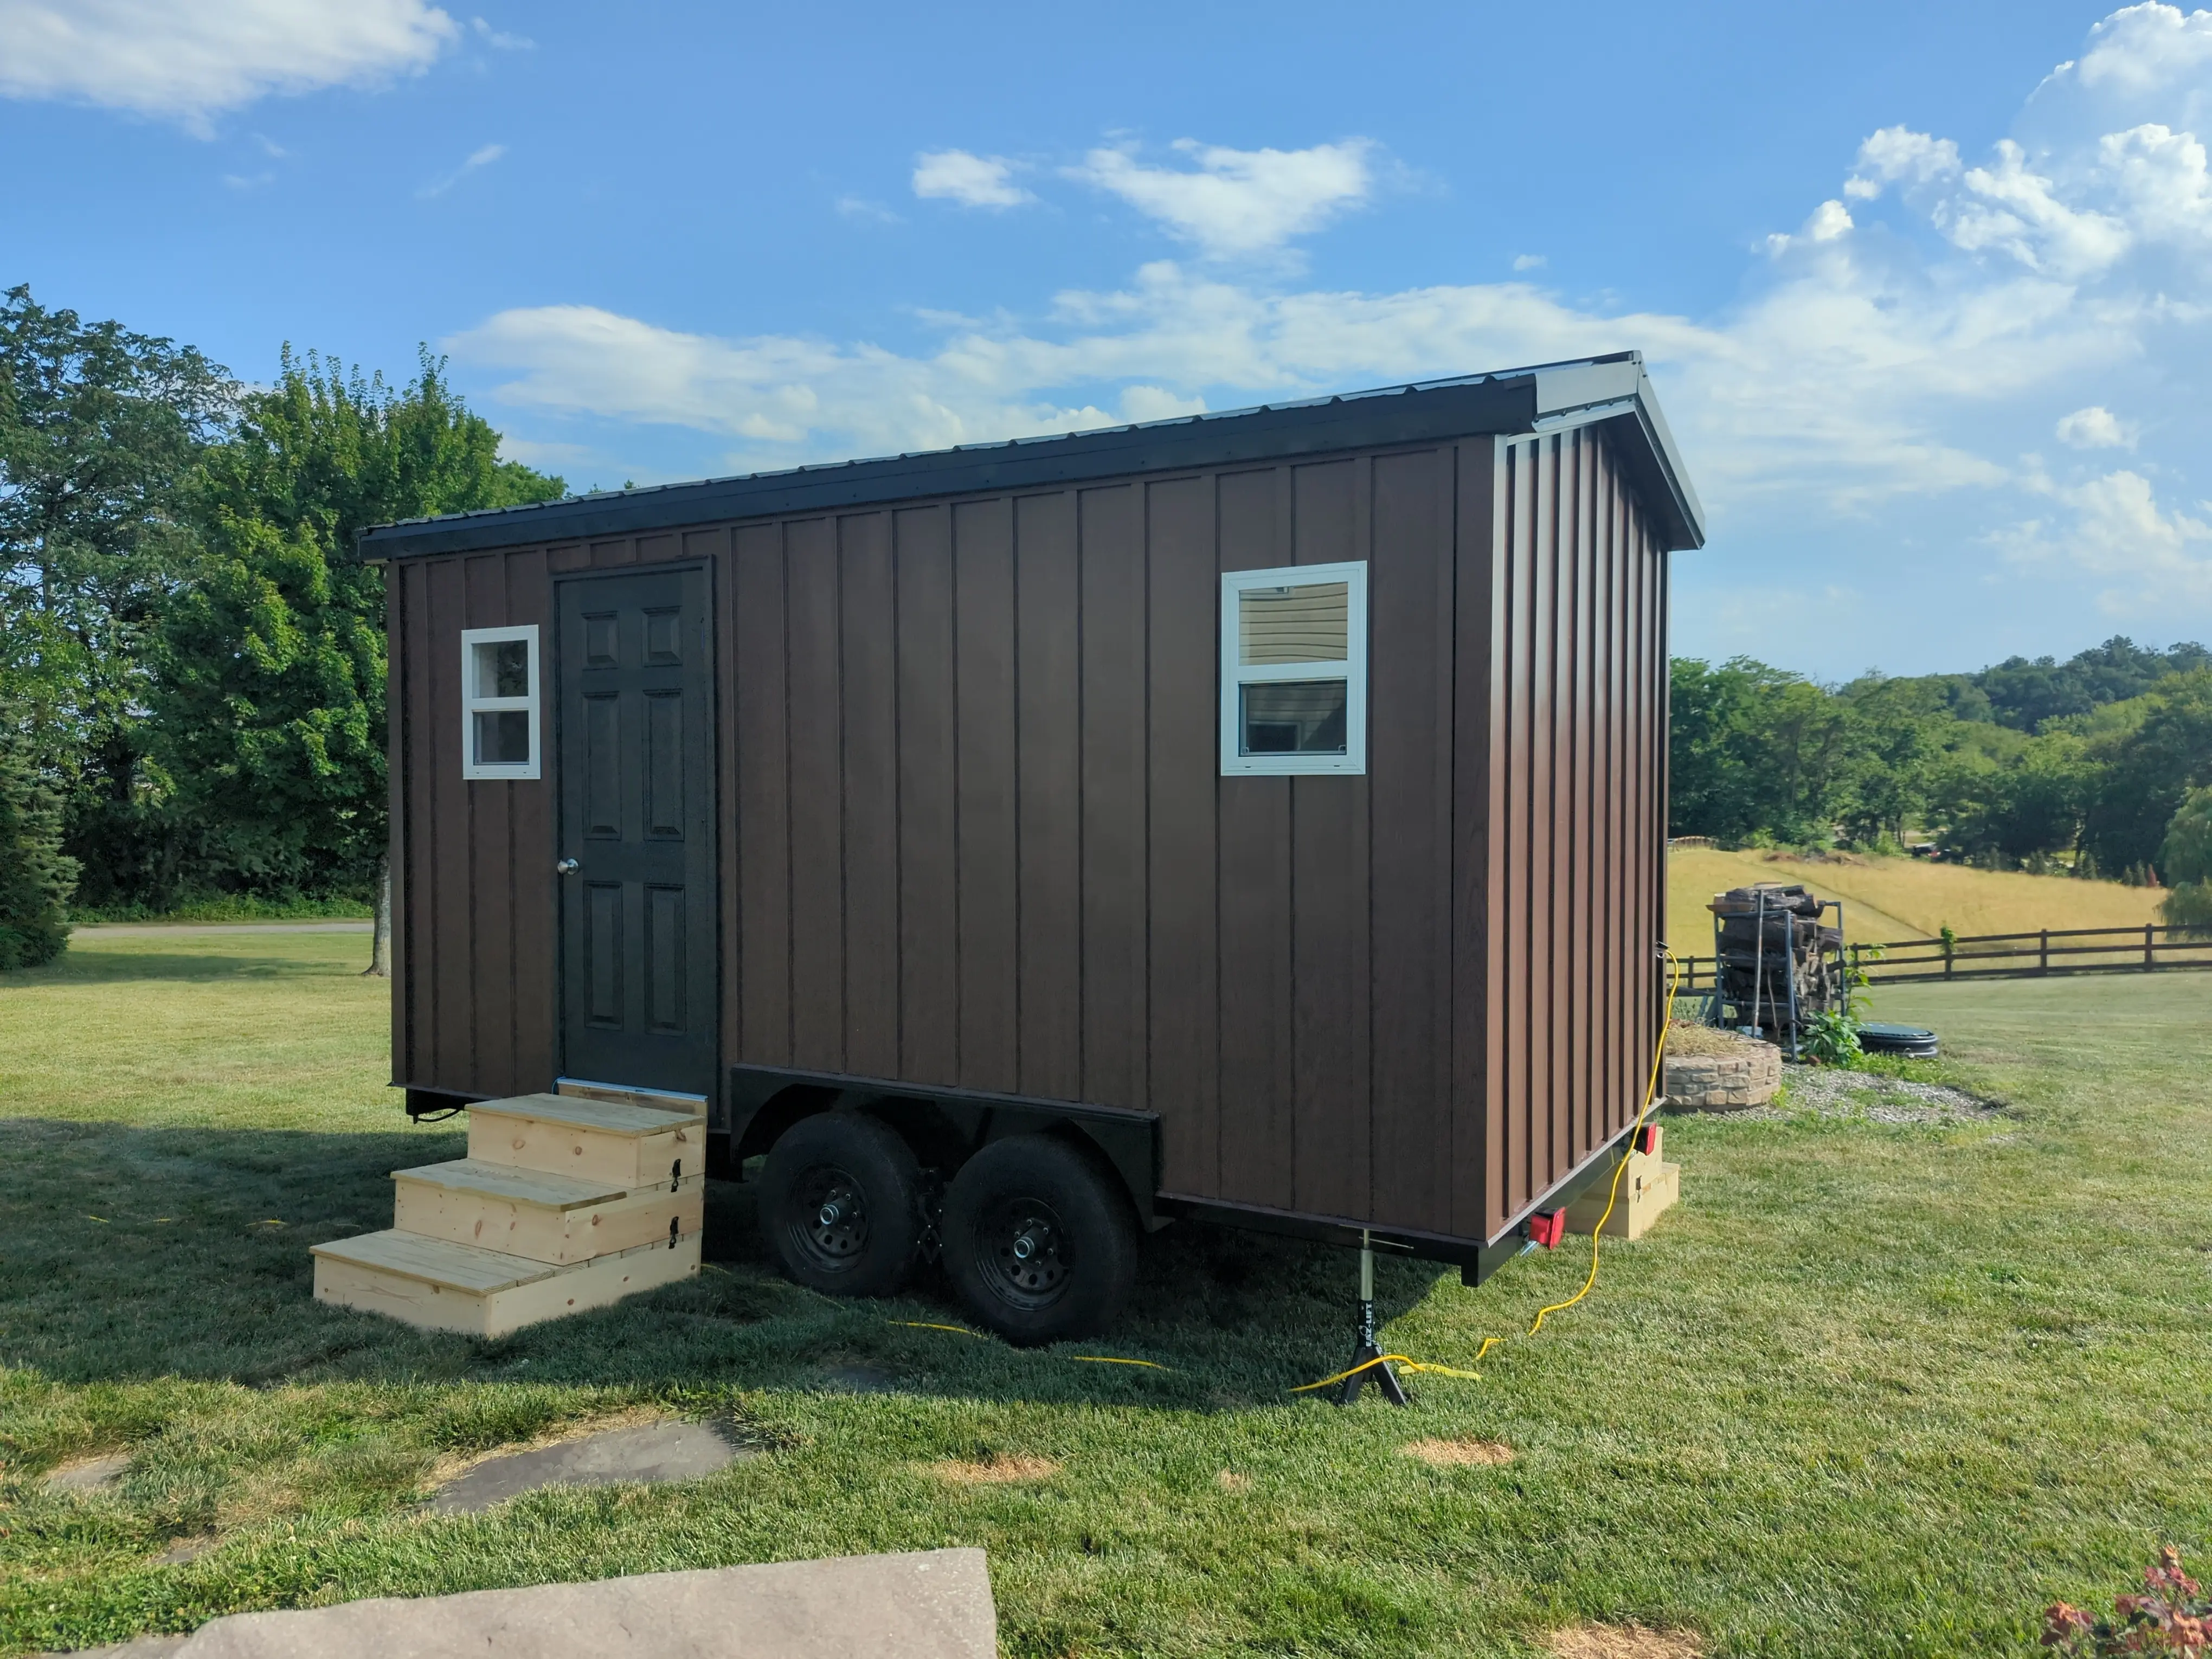
A Big Week — Siding Done, Floors Finished, Electric Started
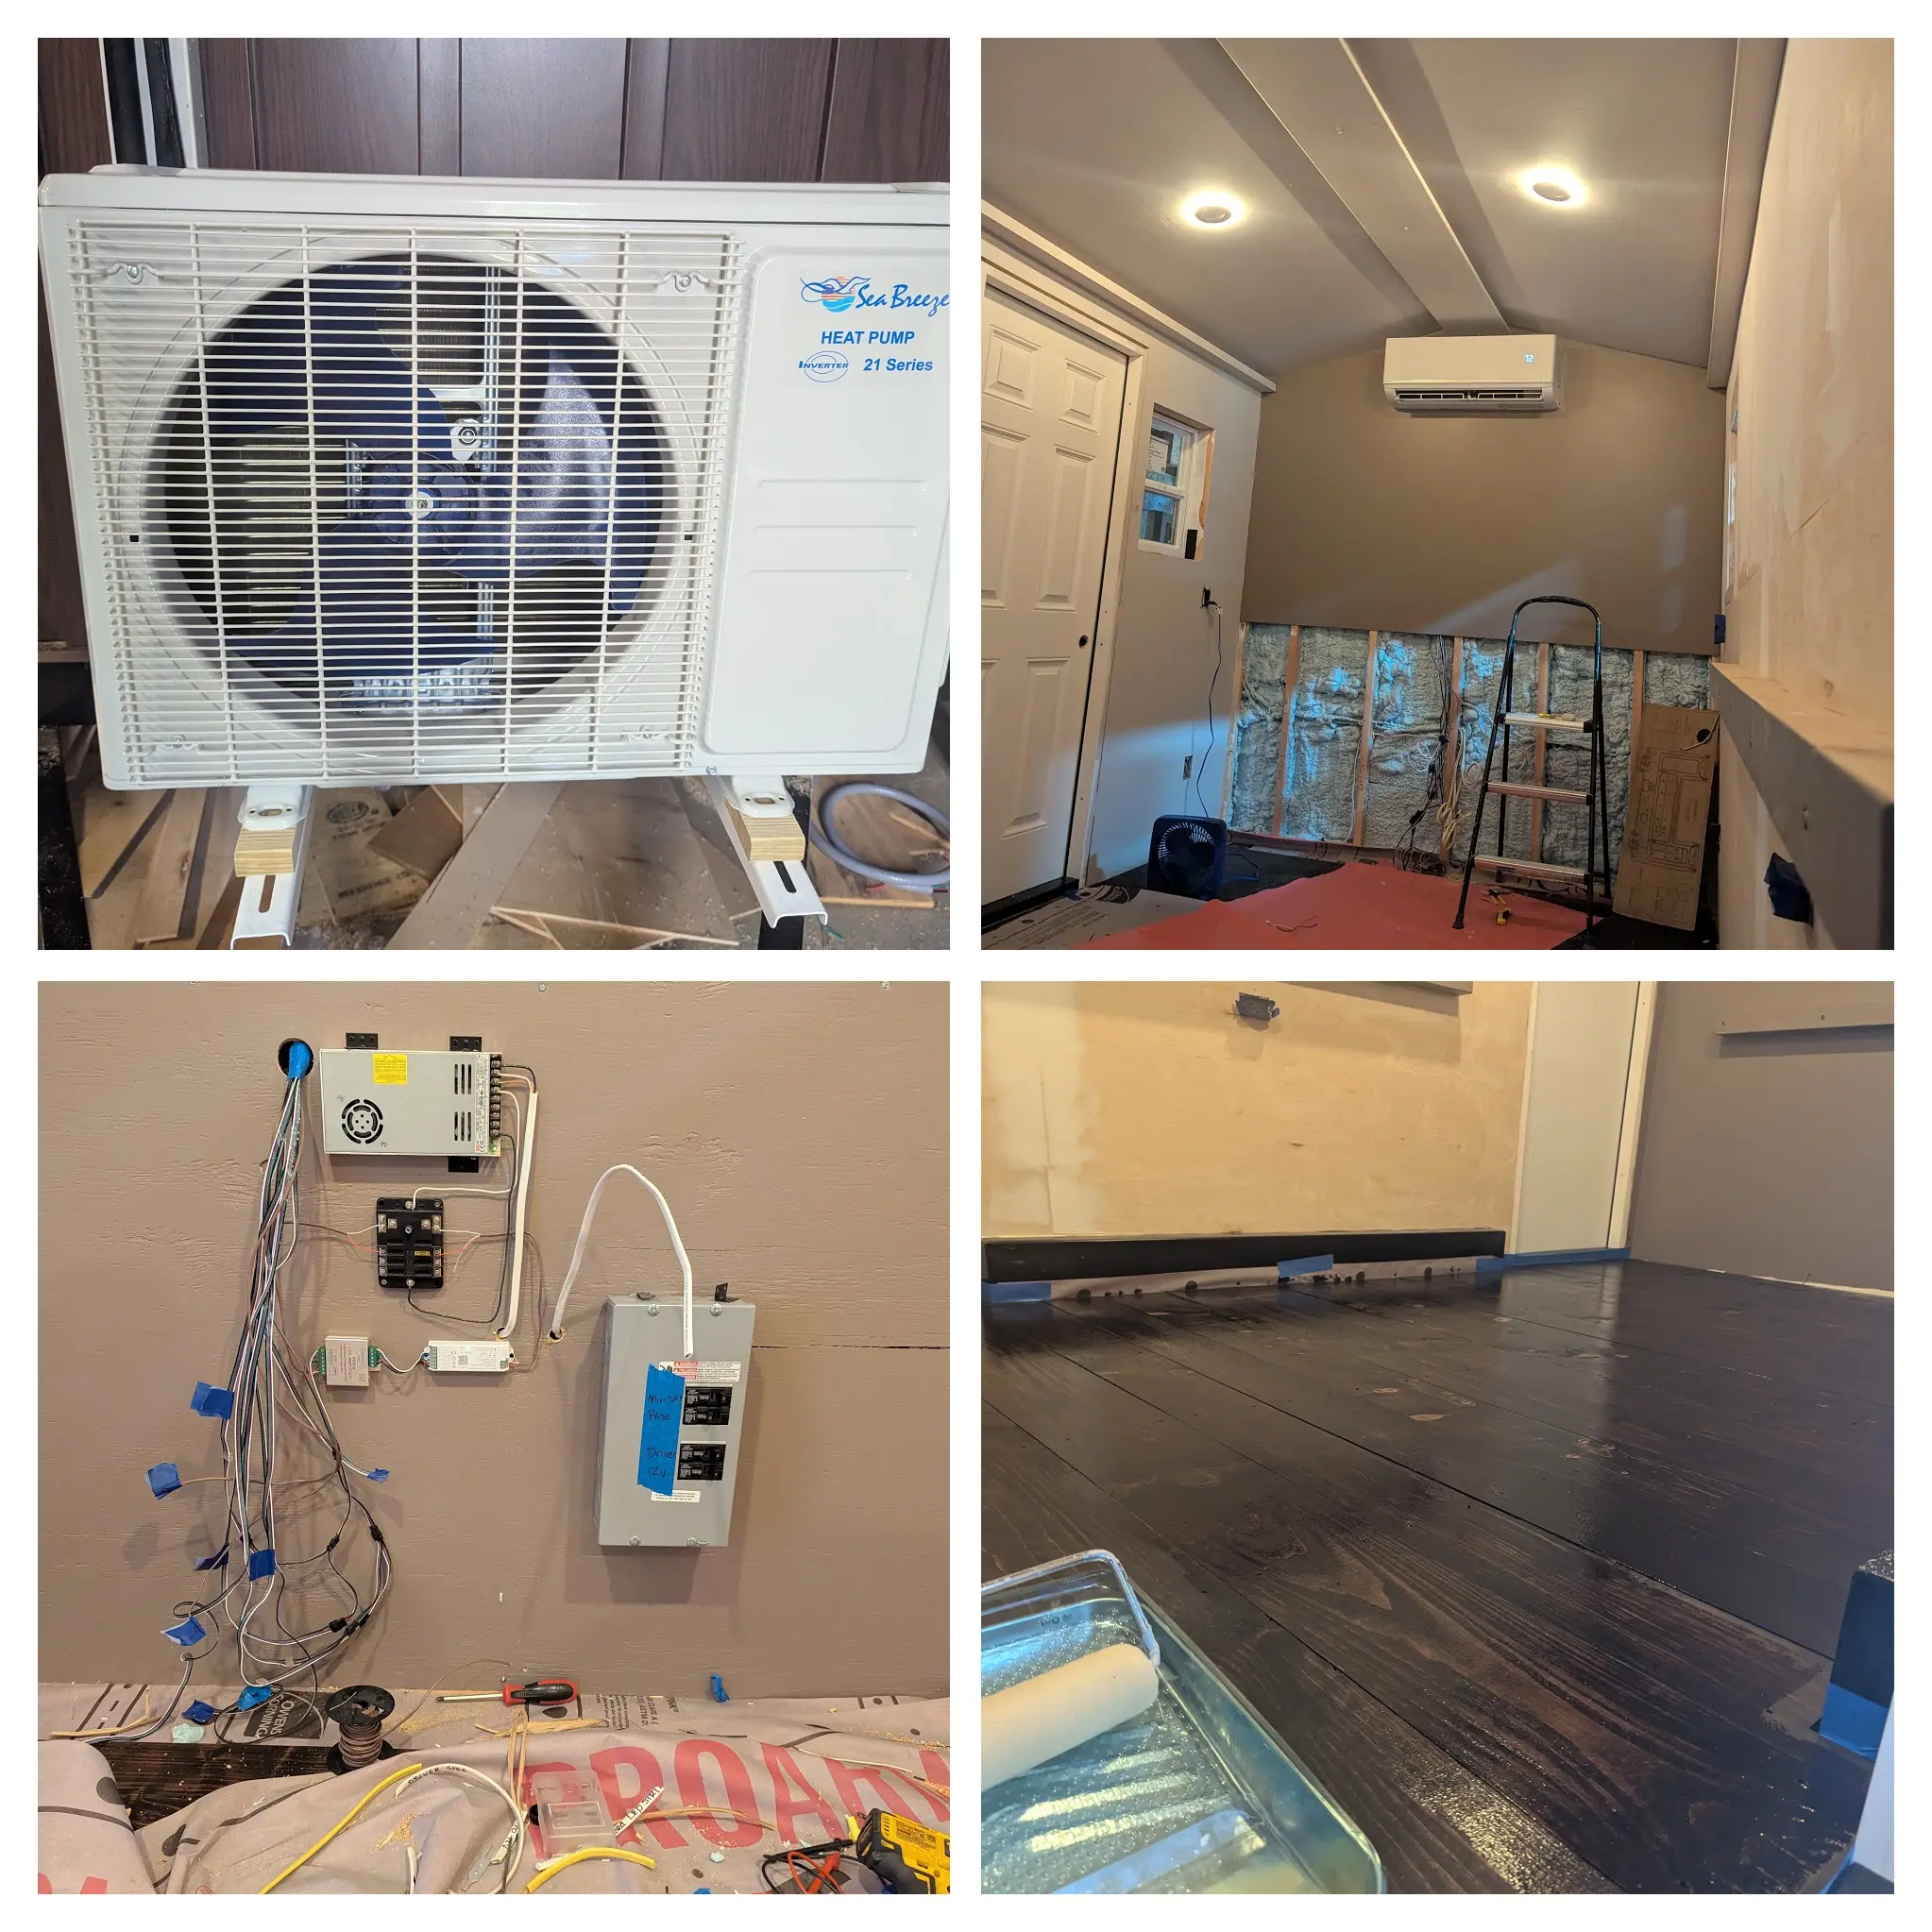
We had one of the most productive weeks of the entire build. The metal siding is now fully installed — every panel on, and it looks even better complete than it did halfway through. The mini-split is in. The pine floors got five coats of poly and are absolutely gleaming. Two of the walnut cup shelves are sanded glassy smooth and poly'd. And we turned the corner on the electrical: bottom board is in at the front of the rig, the outdoor extension cord outlet is installed, the breaker box and breakers are mounted, and we've started getting the 12v system wired up. We also got the outdoor trim cut and primed, and the door paint is in hand. A lot came together at once this week, and you can feel the finish line getting close.
June 2026
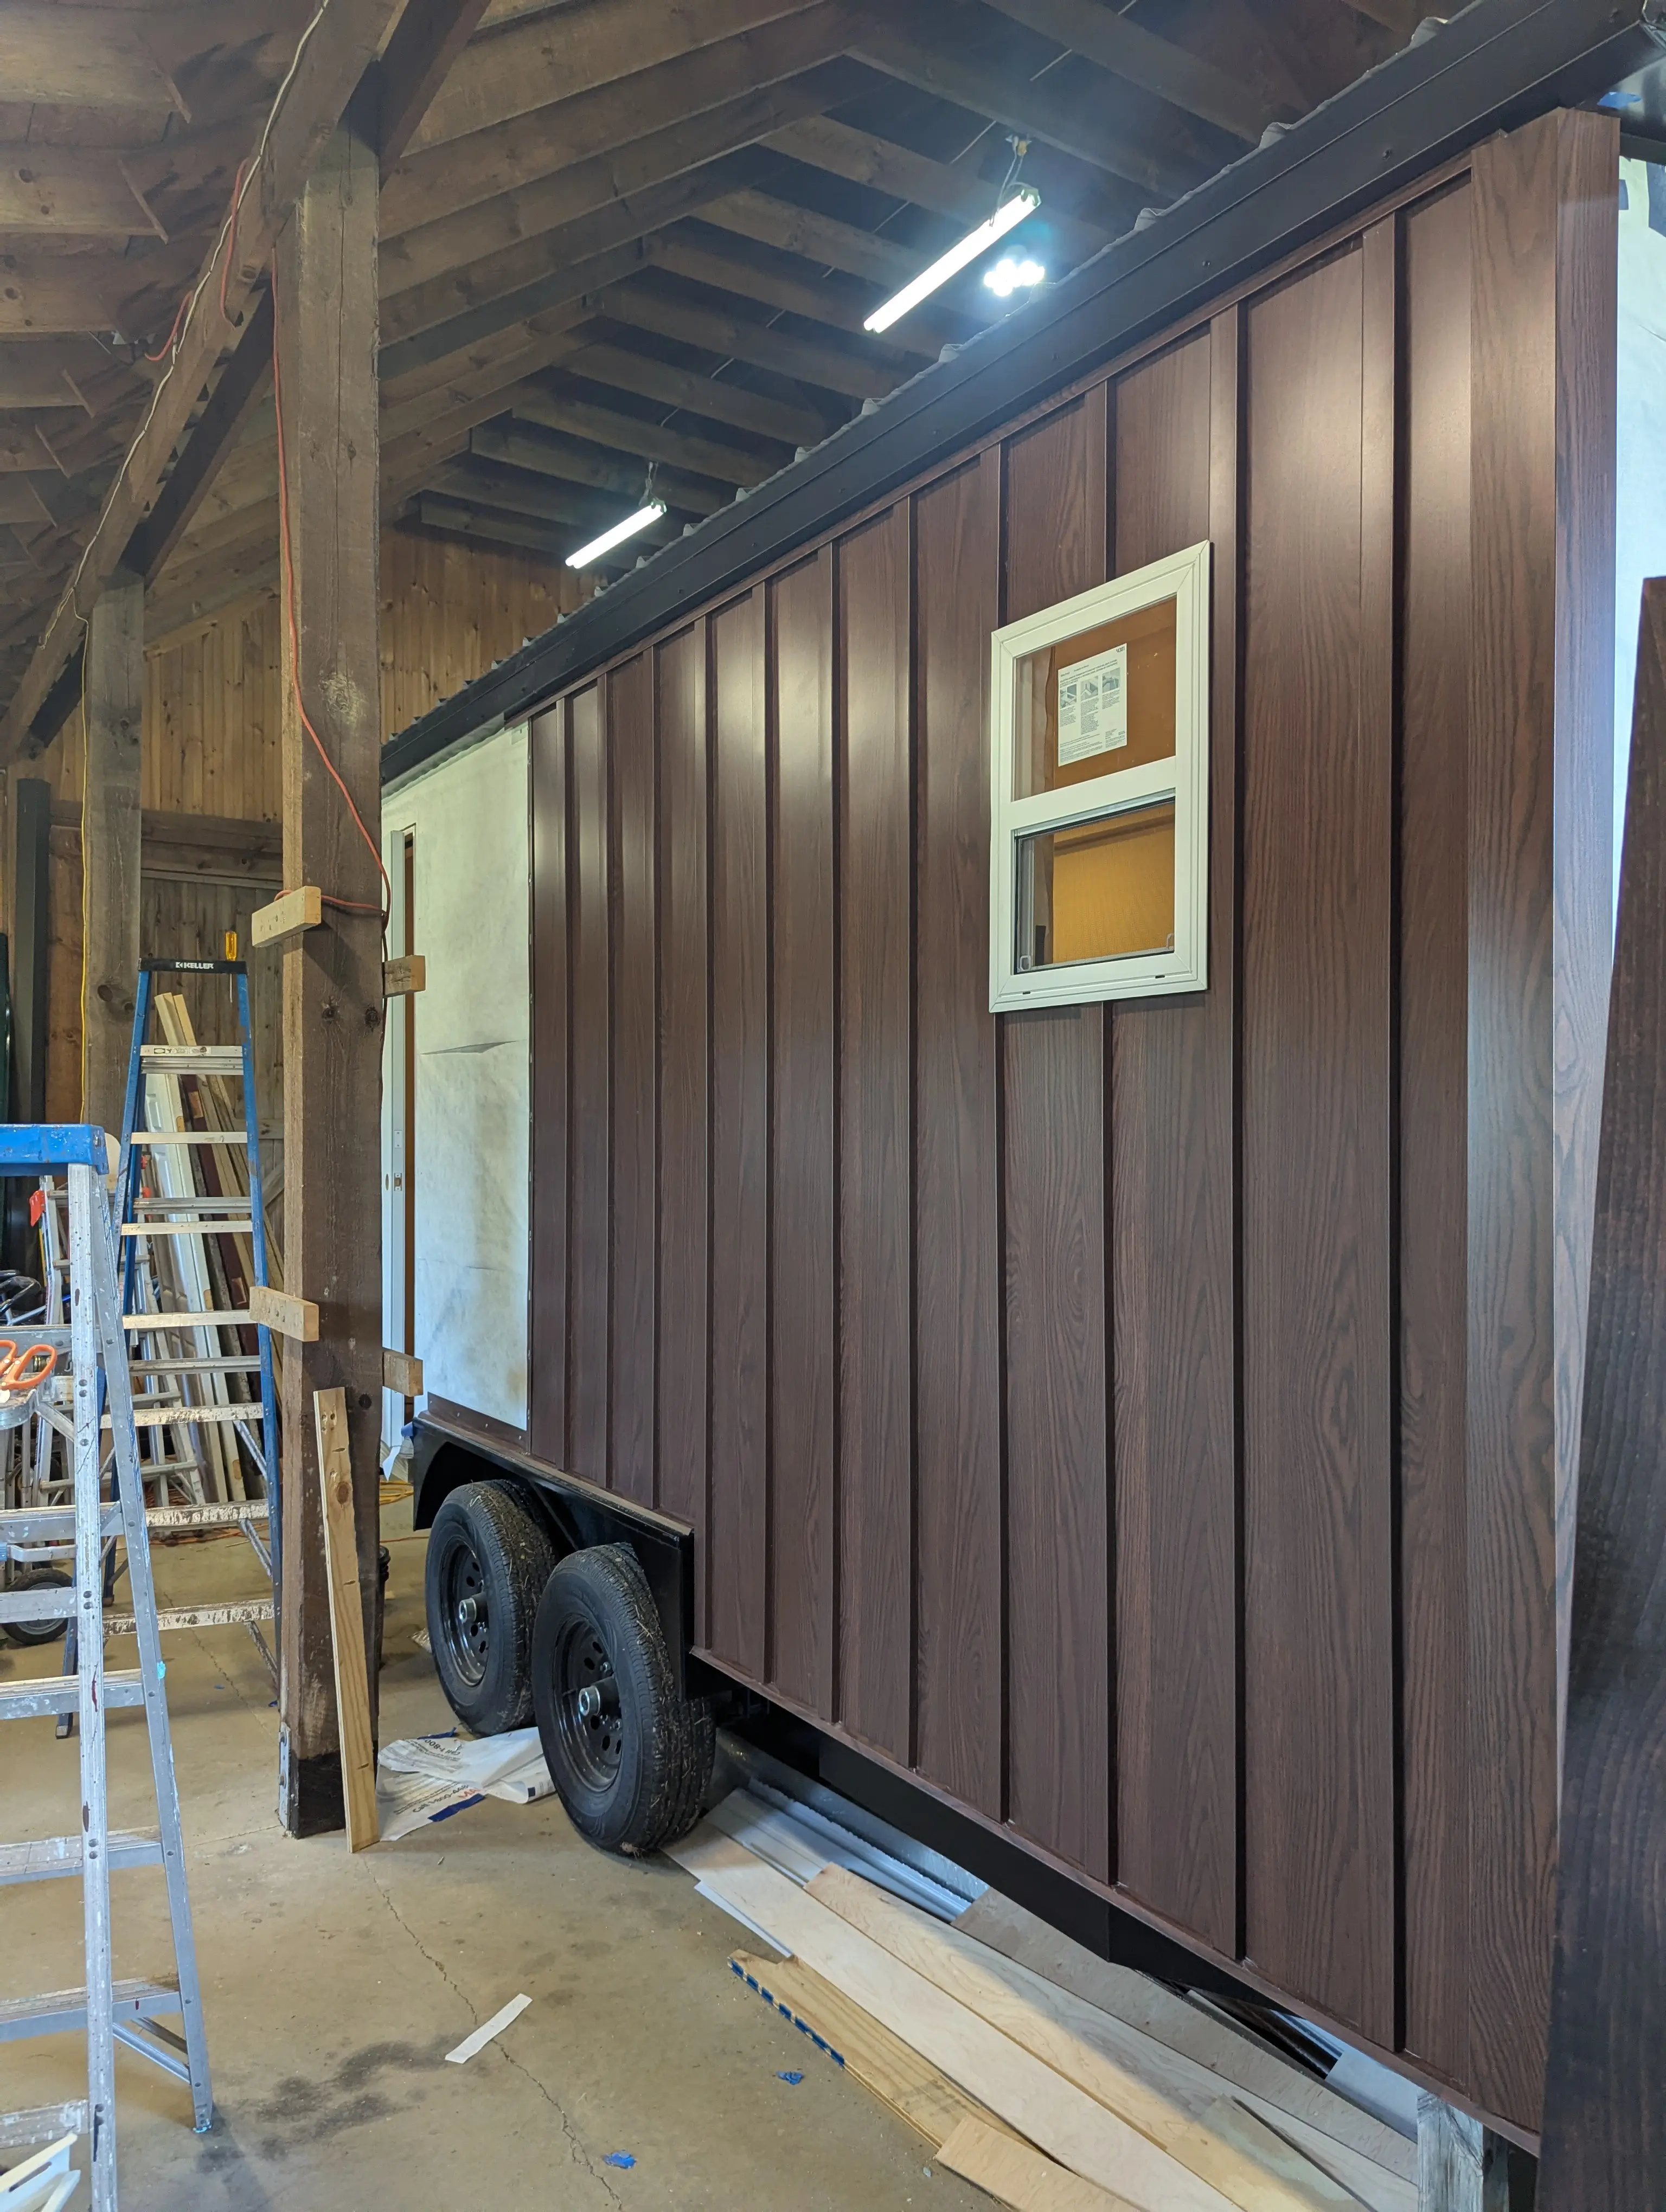
Metal Board & Batten Siding Goes Up
This week has been one of the most exciting of the build. We finally reached the stage where the exterior siding could go up — metal board and batten, something neither of us had worked with before. First time working with the material, and we're genuinely blown away by how good it looks. We've got about half of it installed at this point, and every panel that goes on makes the whole thing feel more real. The outside is starting to look exactly like what we imagined.
June 2026
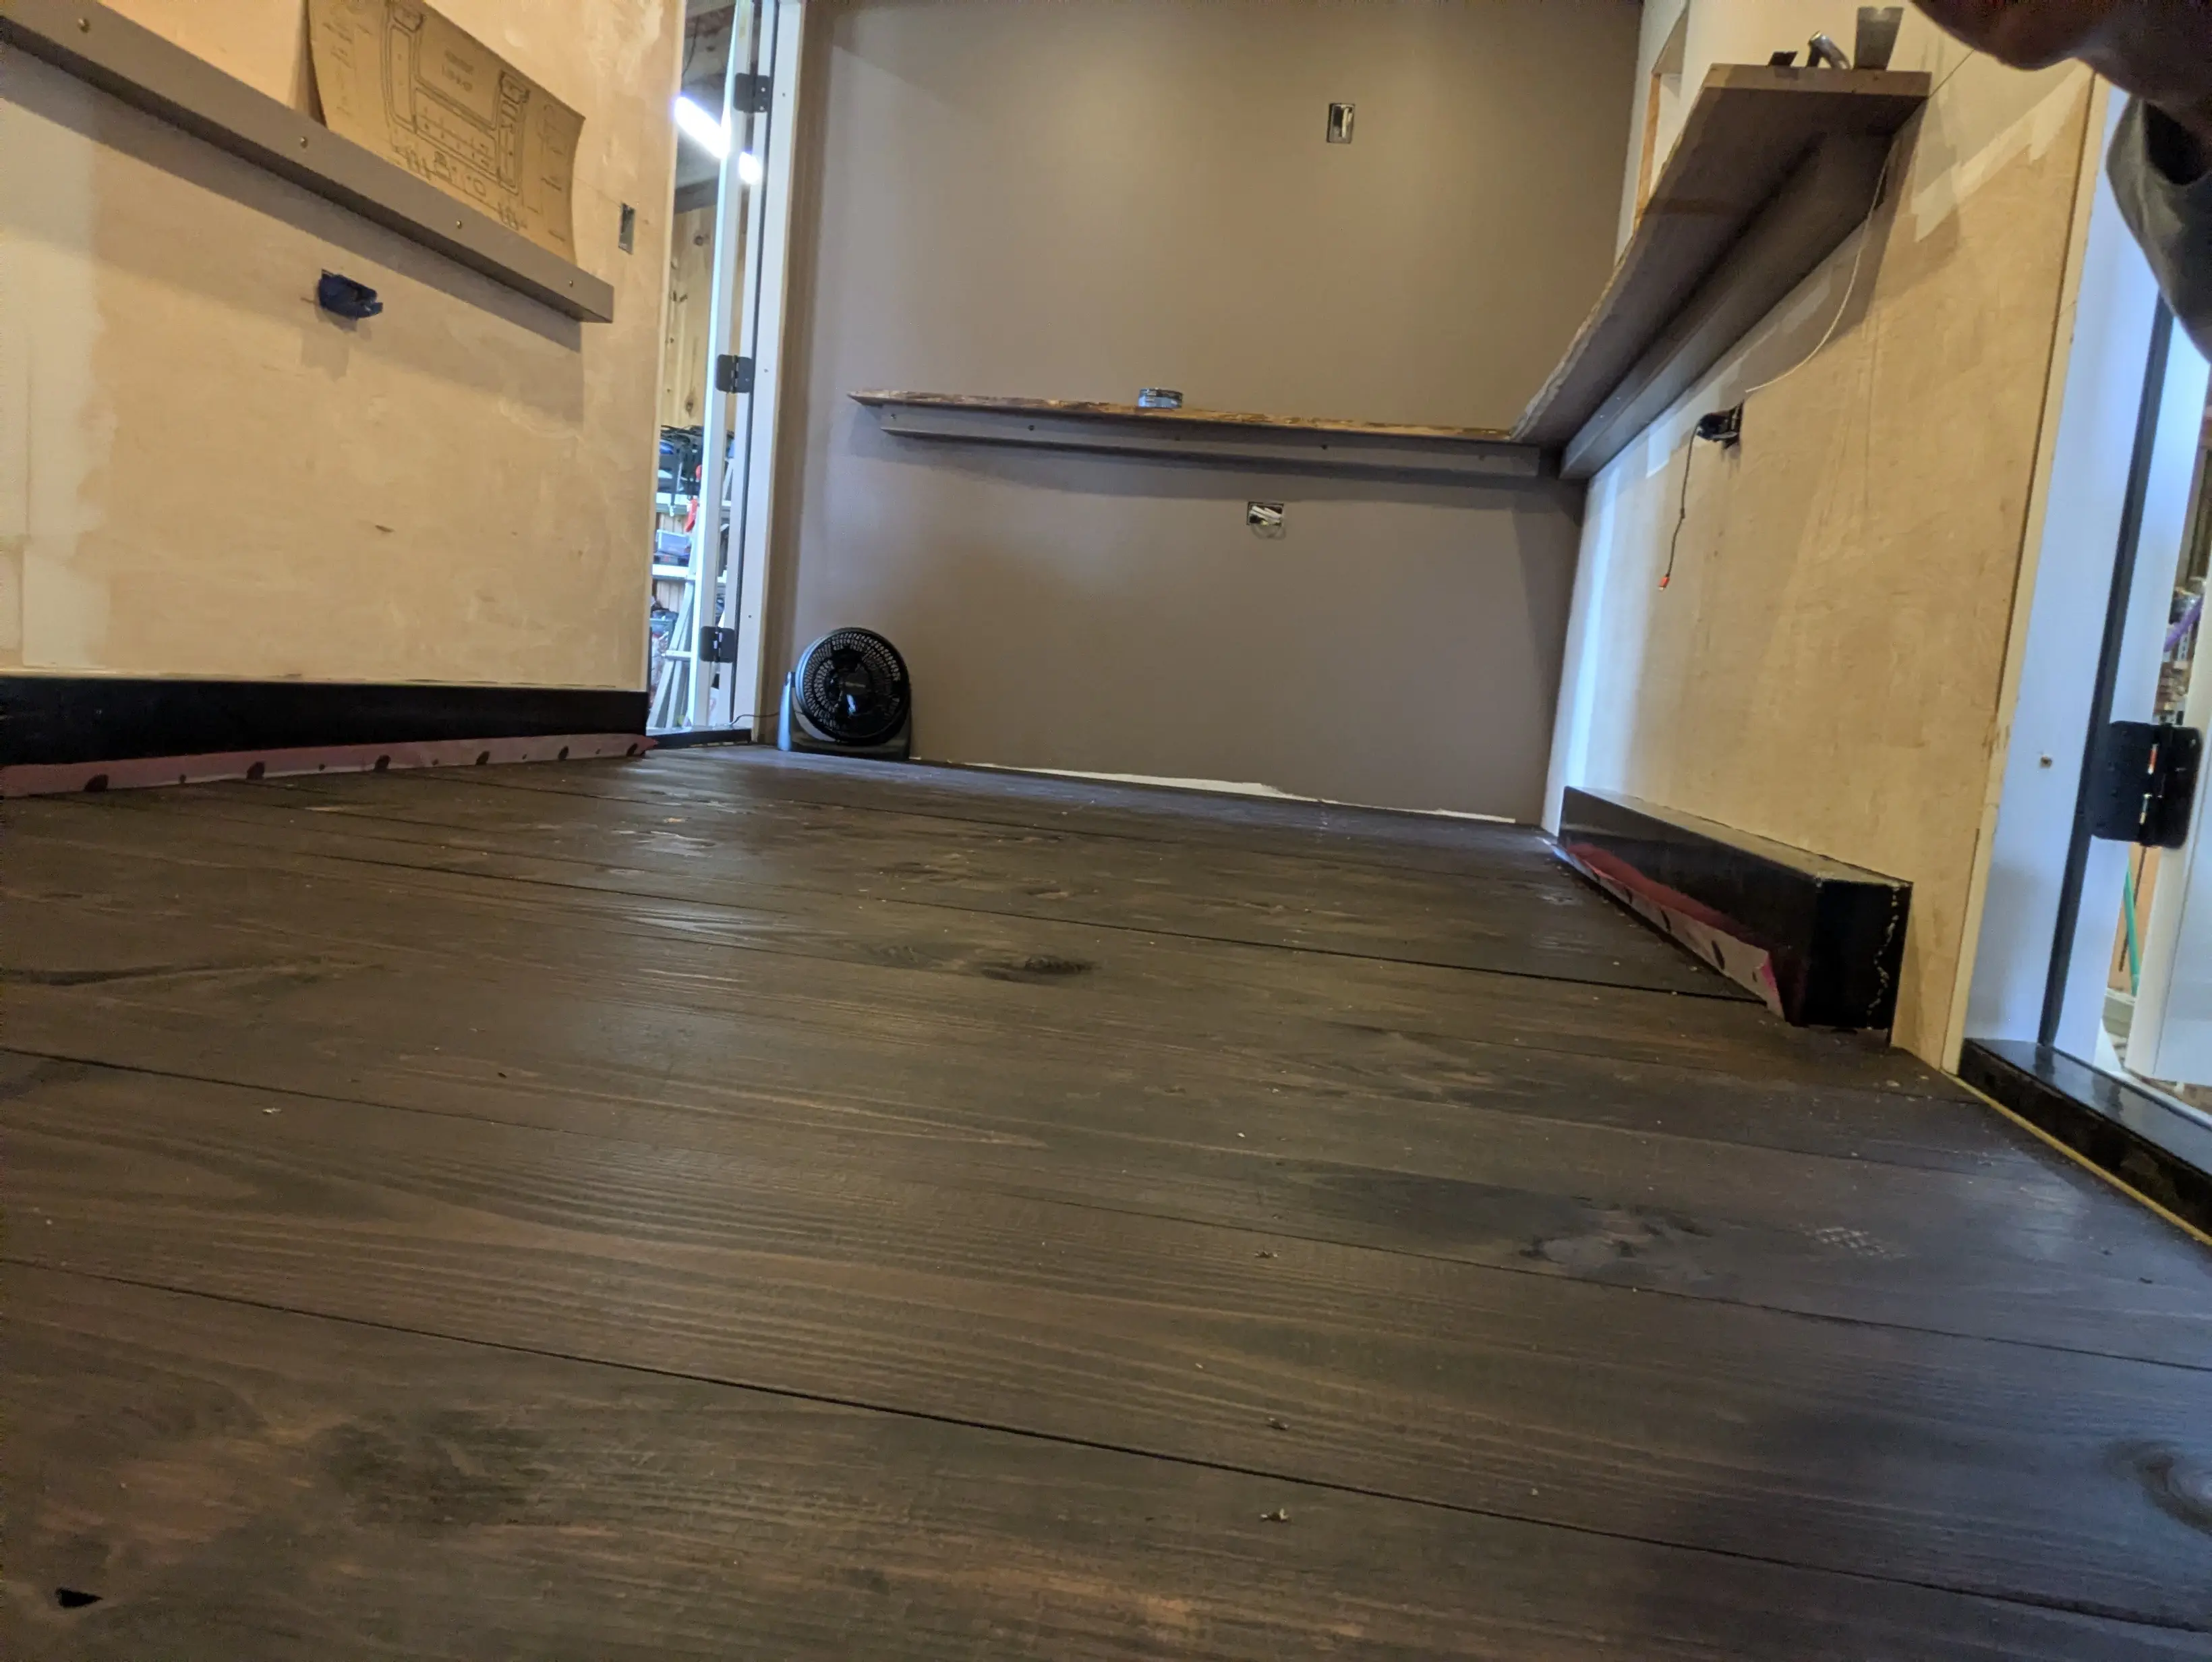
Floors Are In
The stained pine boards are down. Every plank fitted and fastened into the Swig Rig — and it looks exactly like we hoped. We still need to clean them up, touch up the stain, and let everything dry properly before we put poly on. But we're not waiting on that — the mini-split needs to go in before we seal the floors, so we're pivoting to the exterior next. Facia, then siding. The outside is about to start looking like something.
June 2026
Flooring Cut & Stained — Exterior Metal In Hand
Big progress on two fronts. We got all the pine flooring cut to final size and laid on a coat of stain — the color is exactly what we were after, warm and rich against the wood grain. It's going to look great on the floor. We also picked up all the board and batten metal for the exterior, so the outside is finally ready to take shape too. A lot is about to come together at once.
June 2026
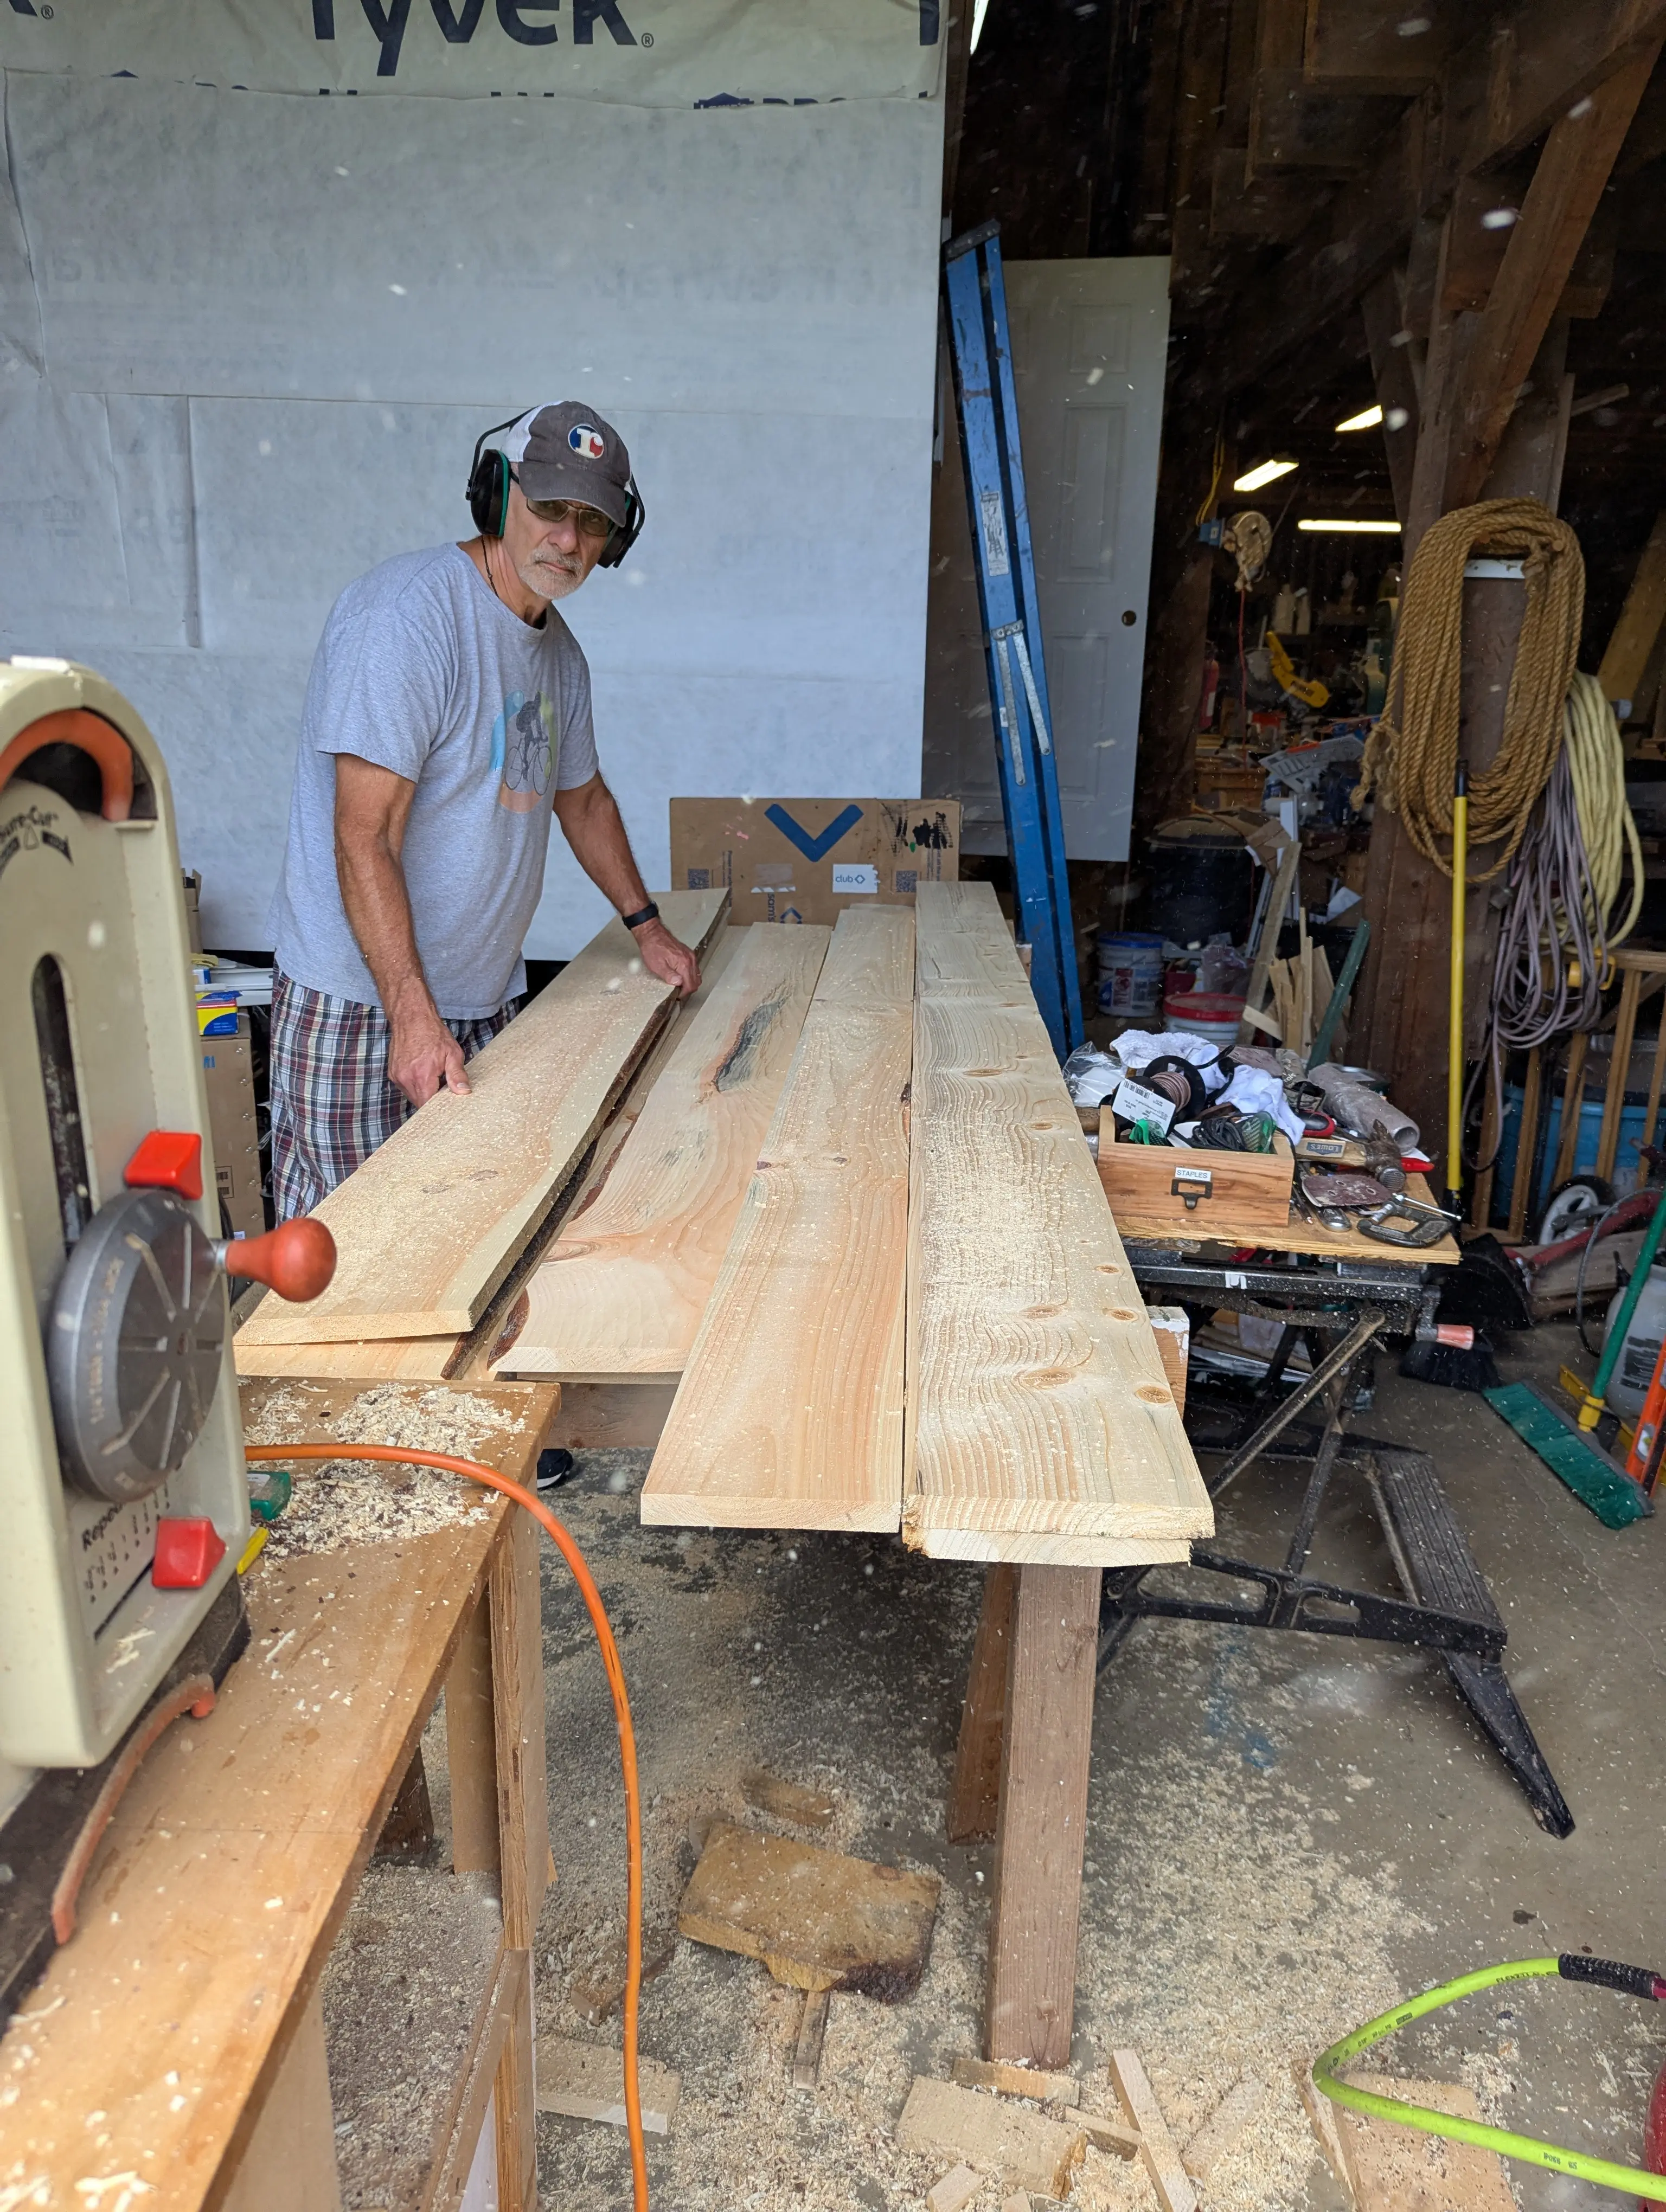
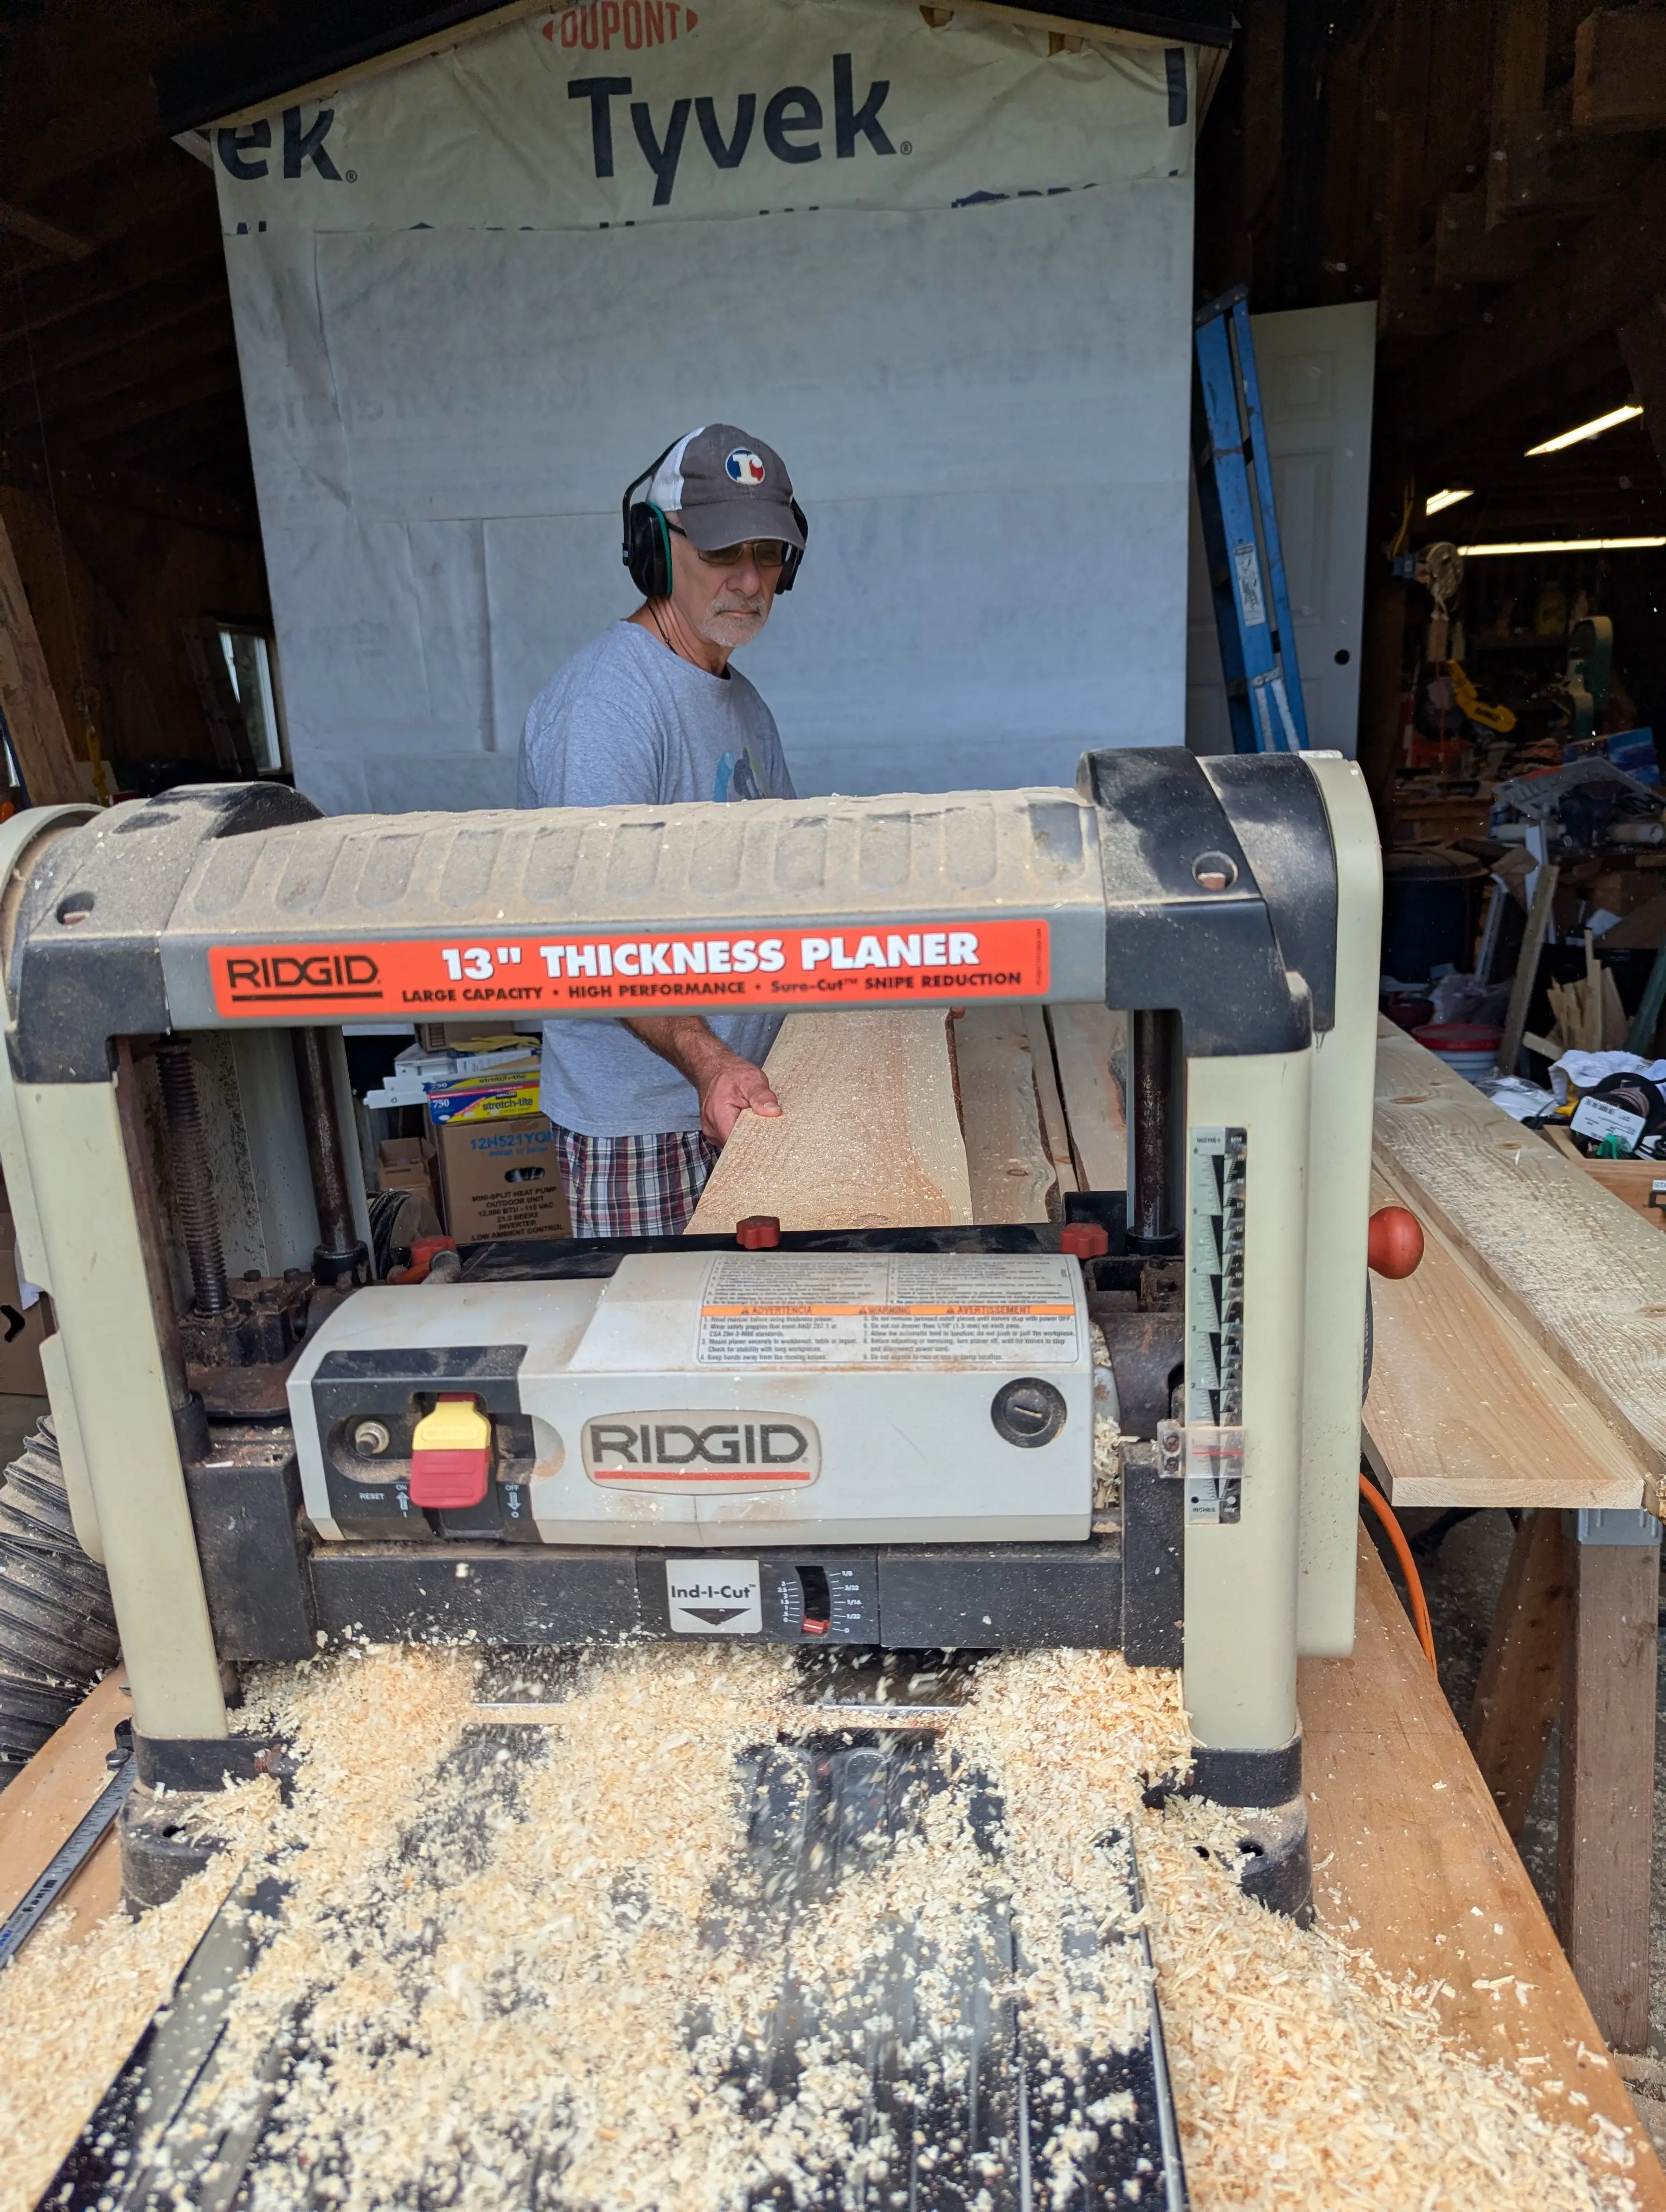
Planing the Pine — Flooring Prep
Spent the day running the rough-cut wide plank pine through the planer, bringing every board down to a consistent thickness. It generates an absolutely ridiculous amount of sawdust, but the result is worth it — boards that are flat, uniform, and ready for the next step. We're prepped to start squaring up the edges and getting this floor ready to go in.
June 2026
Drink Shelves, Trays Finished & Brick Preview
Only a couple of hours today, but productive ones. We finished up the trays, got the drink shelf supports installed, and test-fit two of the walnut drink shelves — and they look exactly like they should. Then we cleaned up and brought in the sample brick to see how it's going to sit against the interior. Seeing the walnut, the lights, and the brick all in the same space at the same time — it's coming together fast now.
June 2026
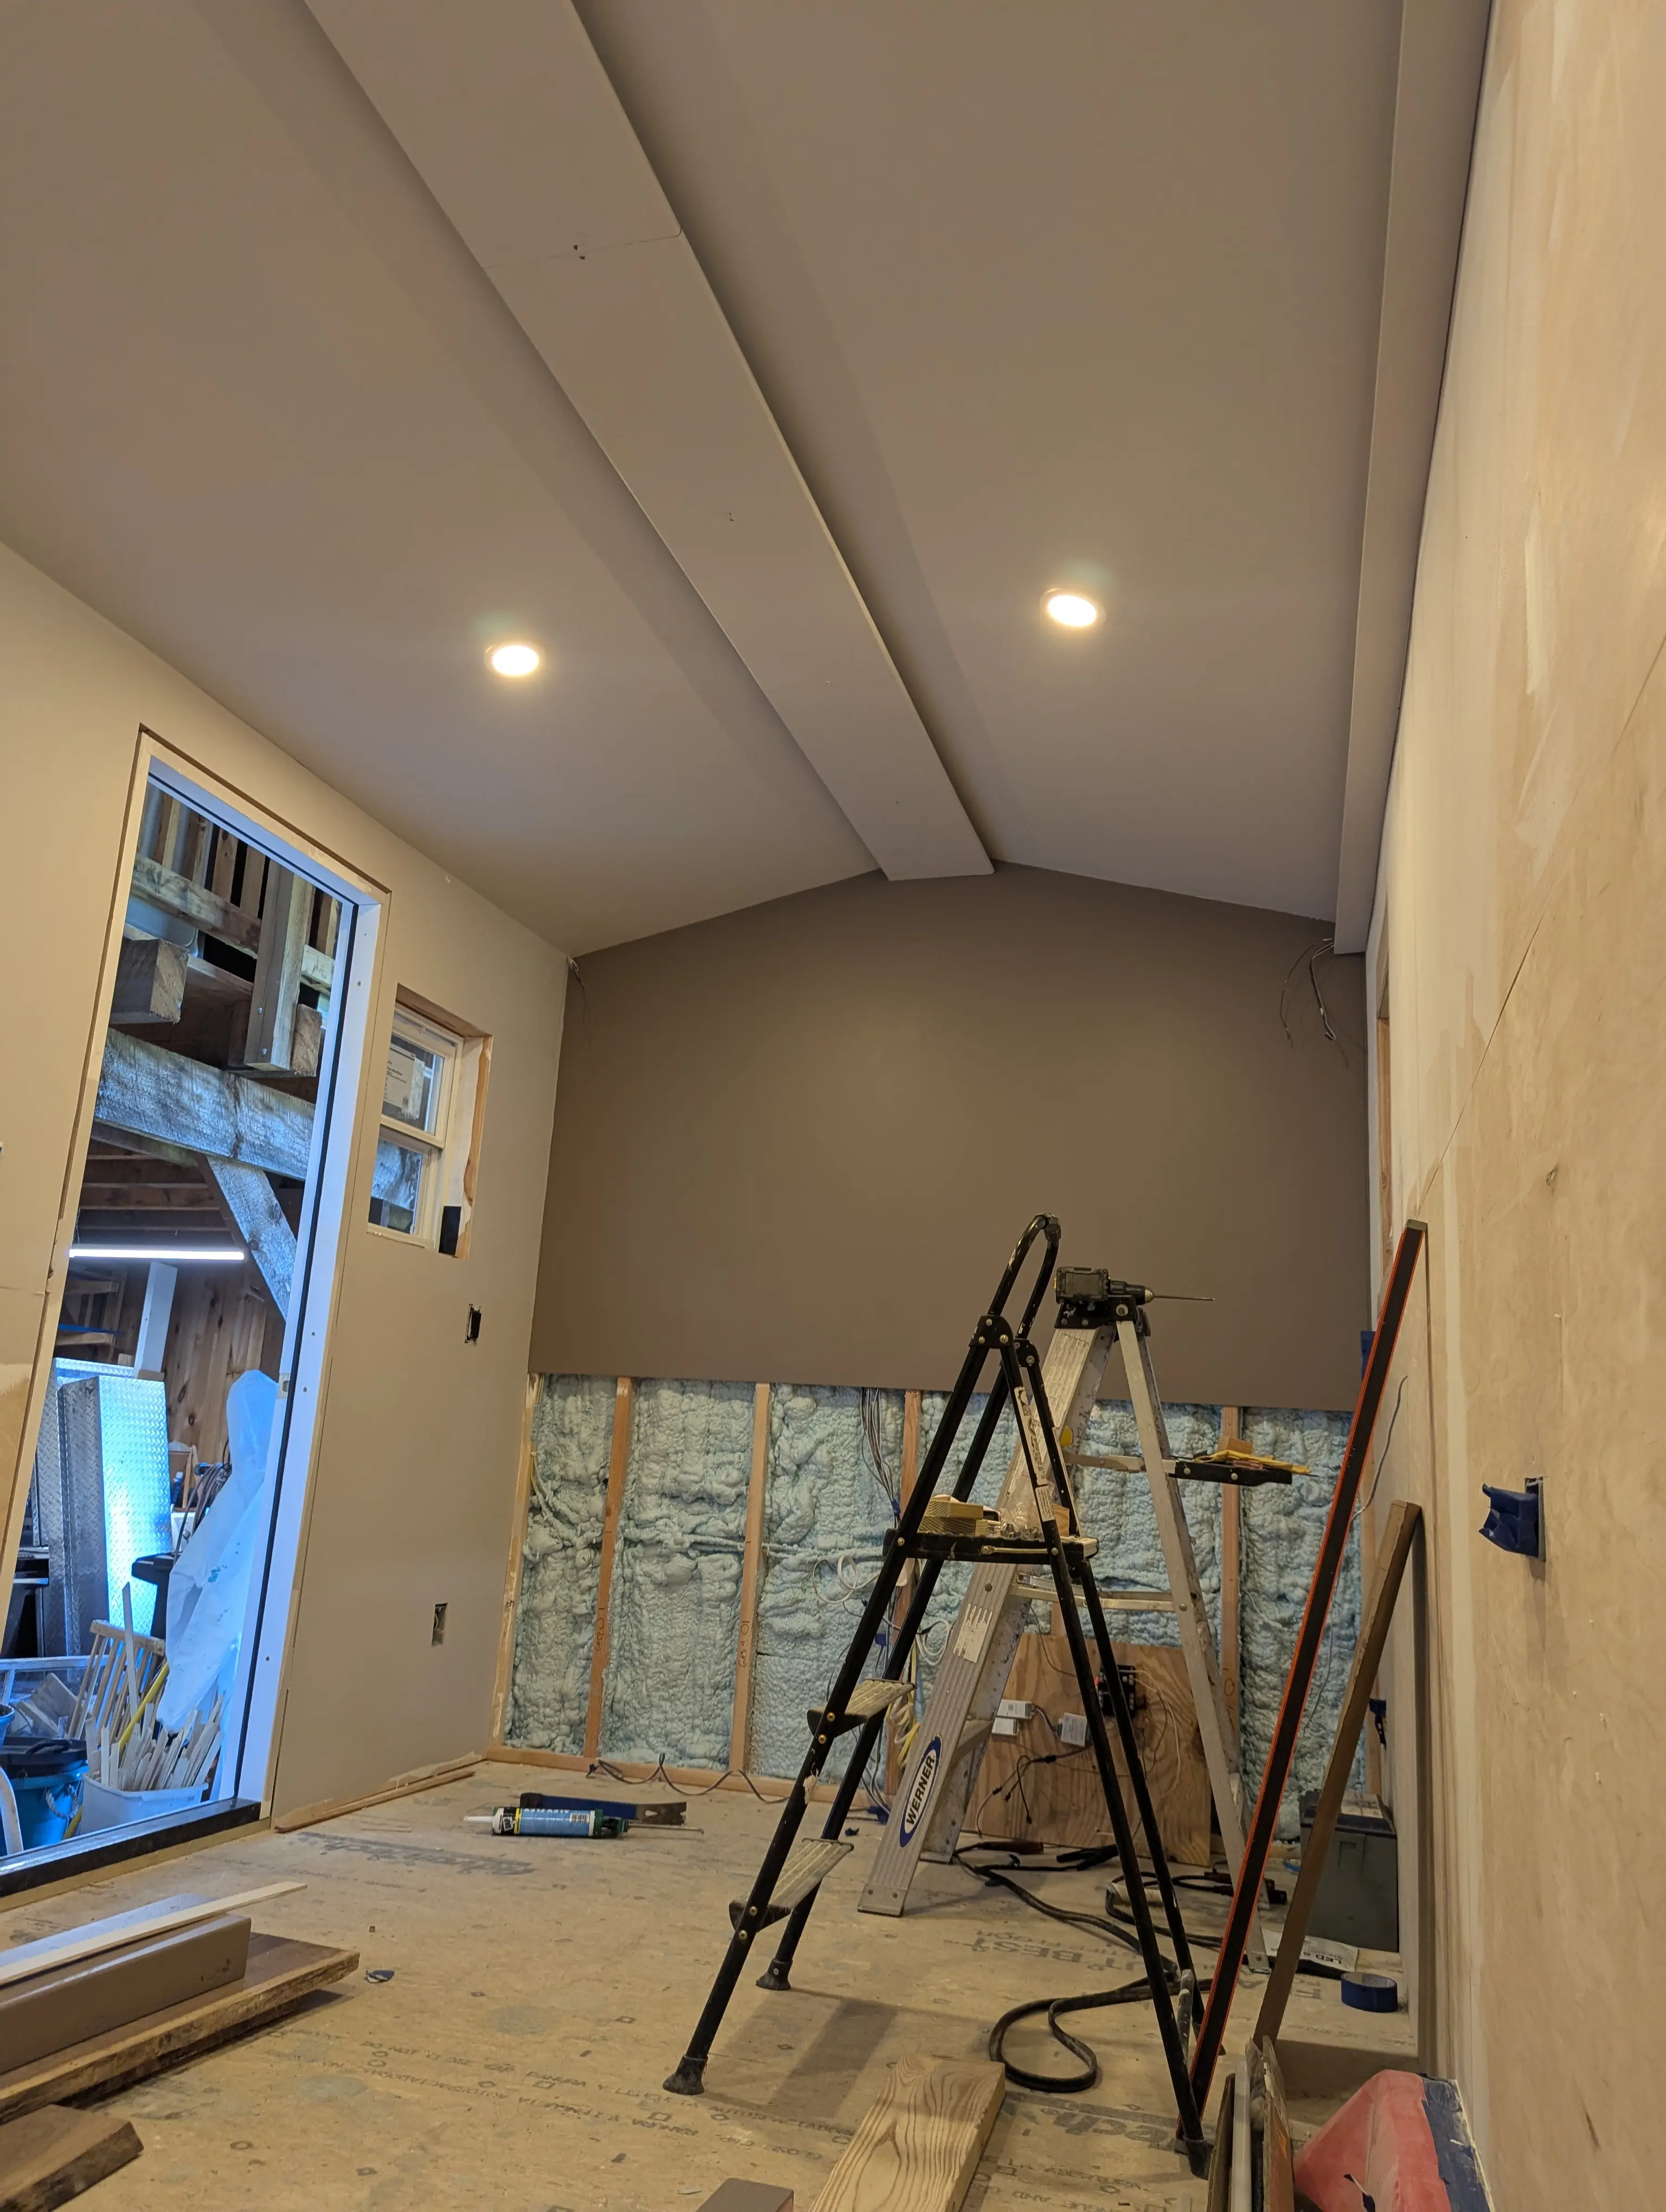
Light Trays & LEDs — It's Starting to Look Real
Big day. We got the left and right light trays framed and installed, the LED tray channels set inside them, the LEDs wired up, and the tray covers on. Flipped the switch and — there it was. The warm glow across the ceiling, the depth it adds to the space, the way the light plays off the wood. We've been staring at AI renderings of this moment for months. Standing inside the rig with the lights actually on, it looks just like them. Better, honestly.
June 2026
Center Tray
With the paint dry, we moved on to the center tray — the crown of the bar that'll house the LED lighting and anchor the whole look of the interior. It's the kind of detail that takes a finished space and makes it feel intentional. Getting closer every week.
June 2026
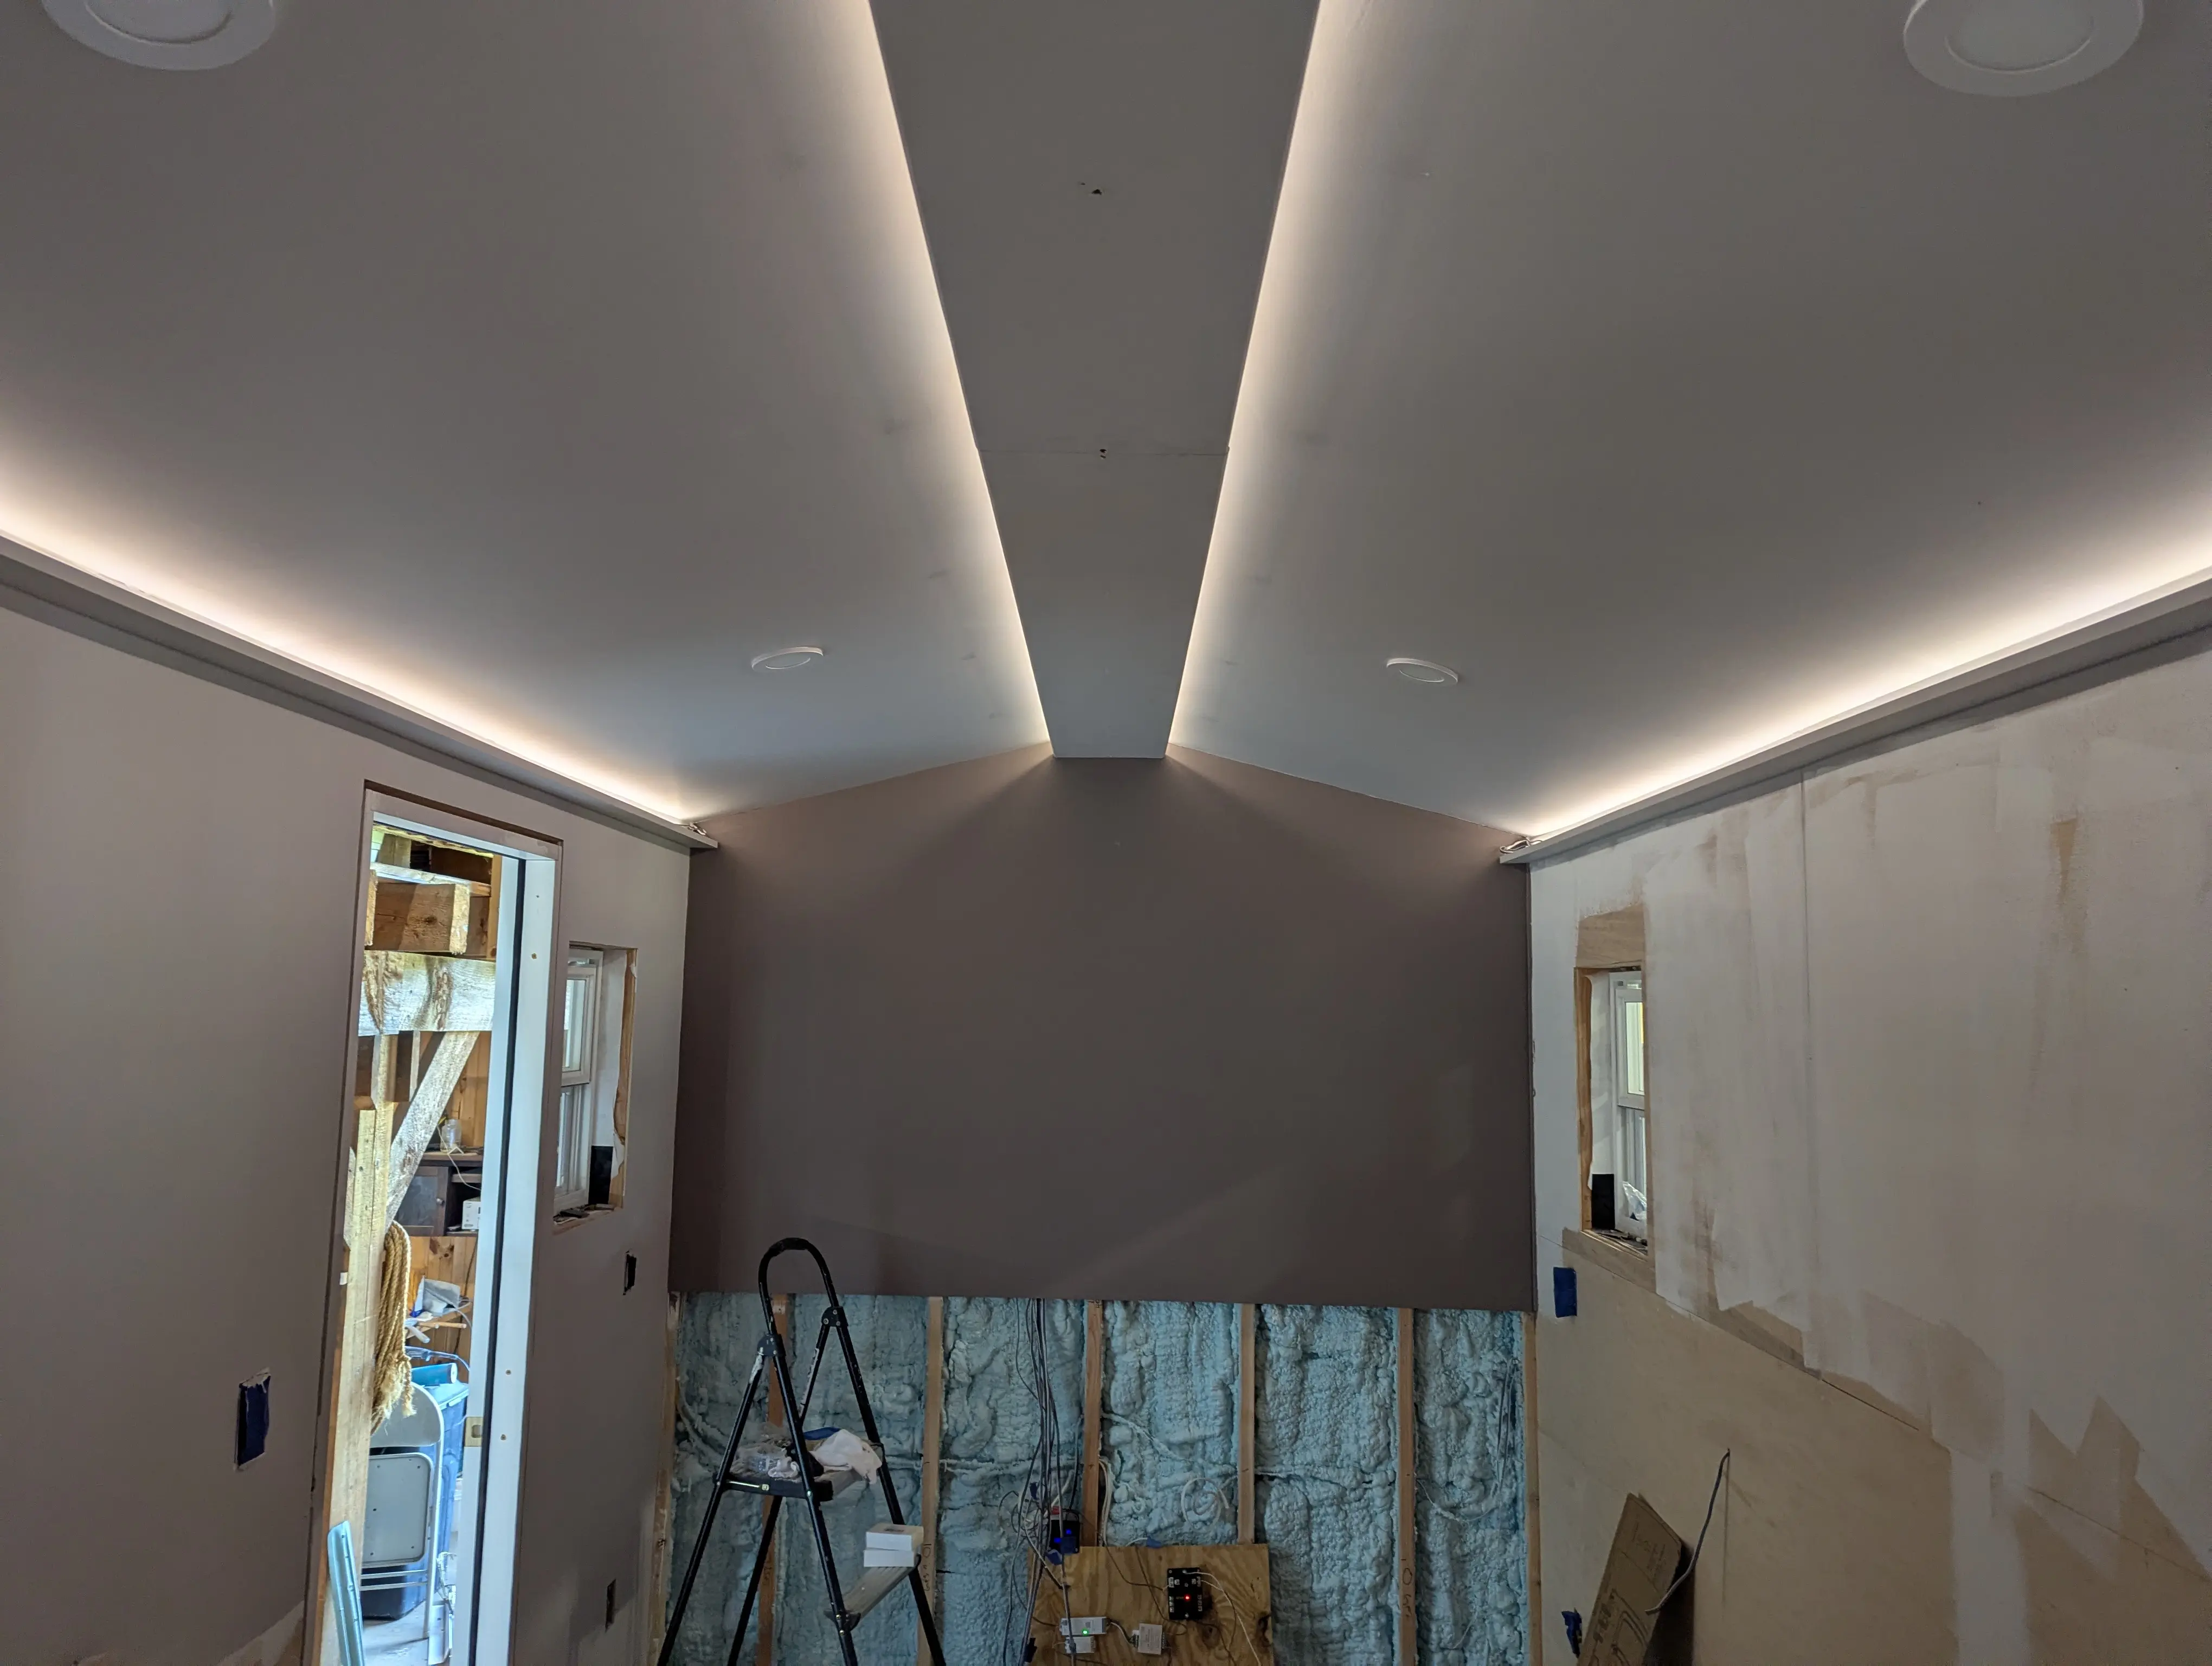
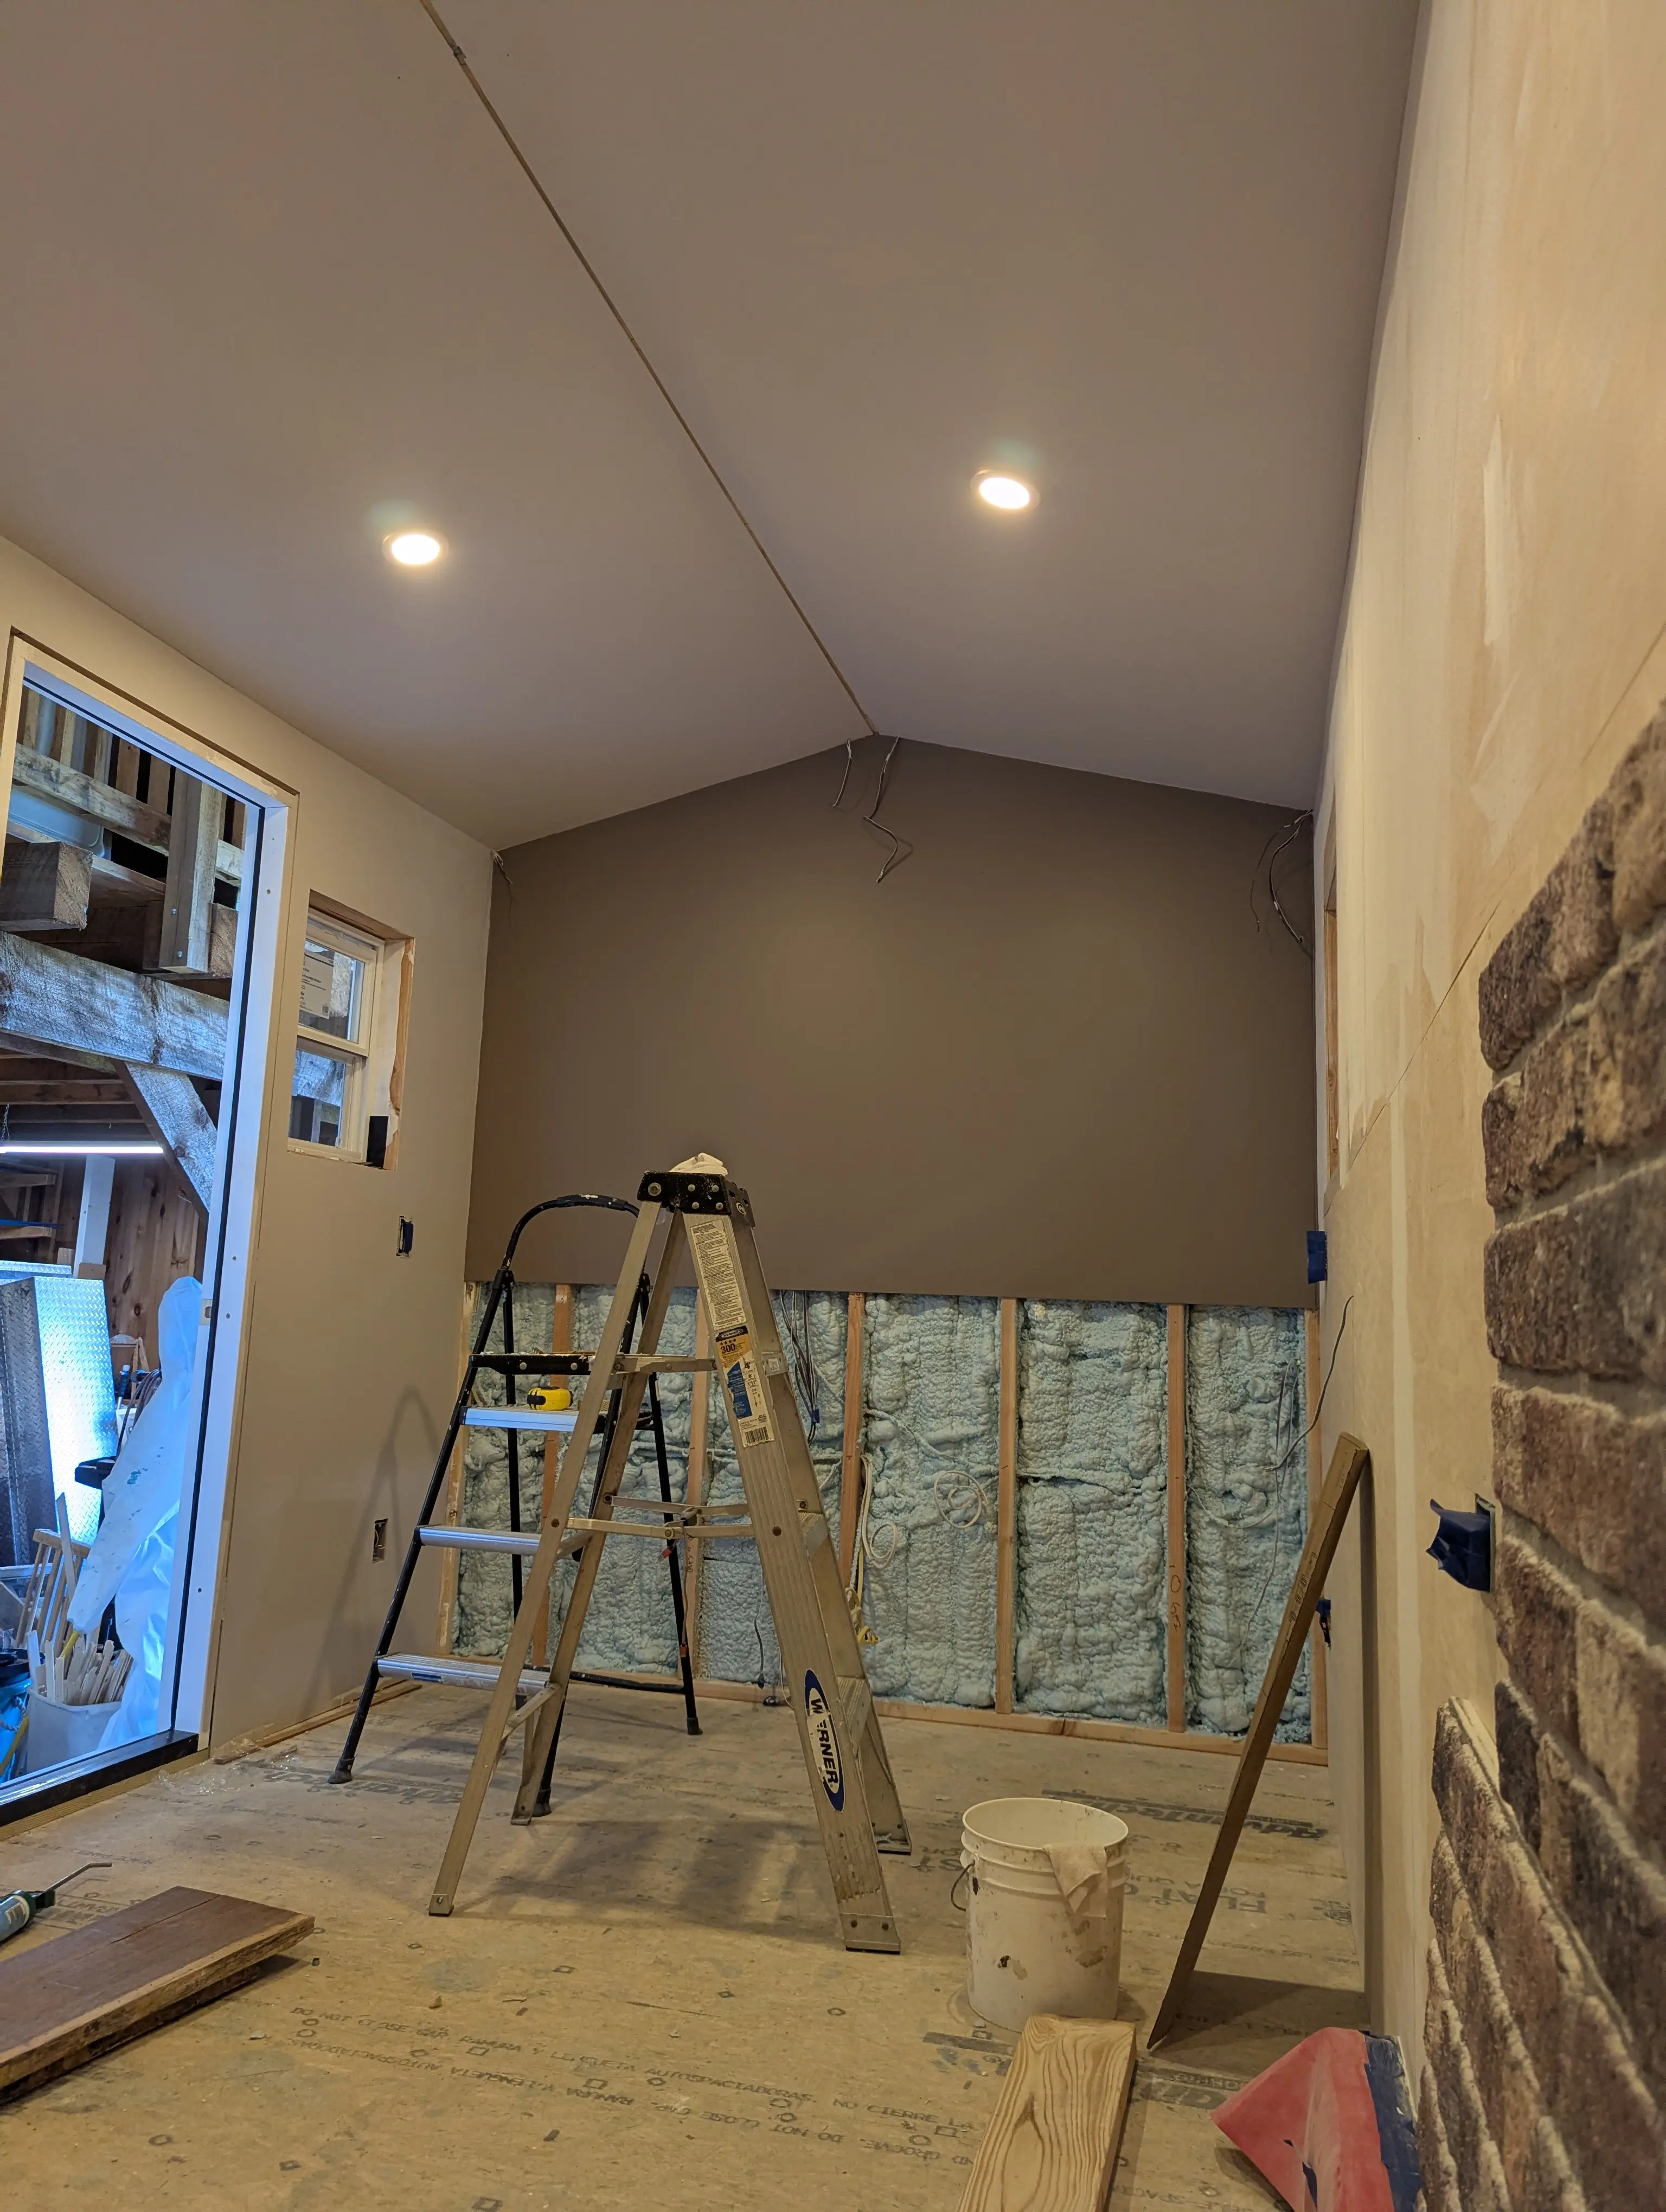
Painting the Interior
Paint day. We rolled through the ceiling and sides first, then came back for the ends — every surface getting its coat before we move on to the finish work. It's one of those steps that transforms the space. What was raw plywood started looking like somewhere you'd actually want to crack open a cold one.
May 2026
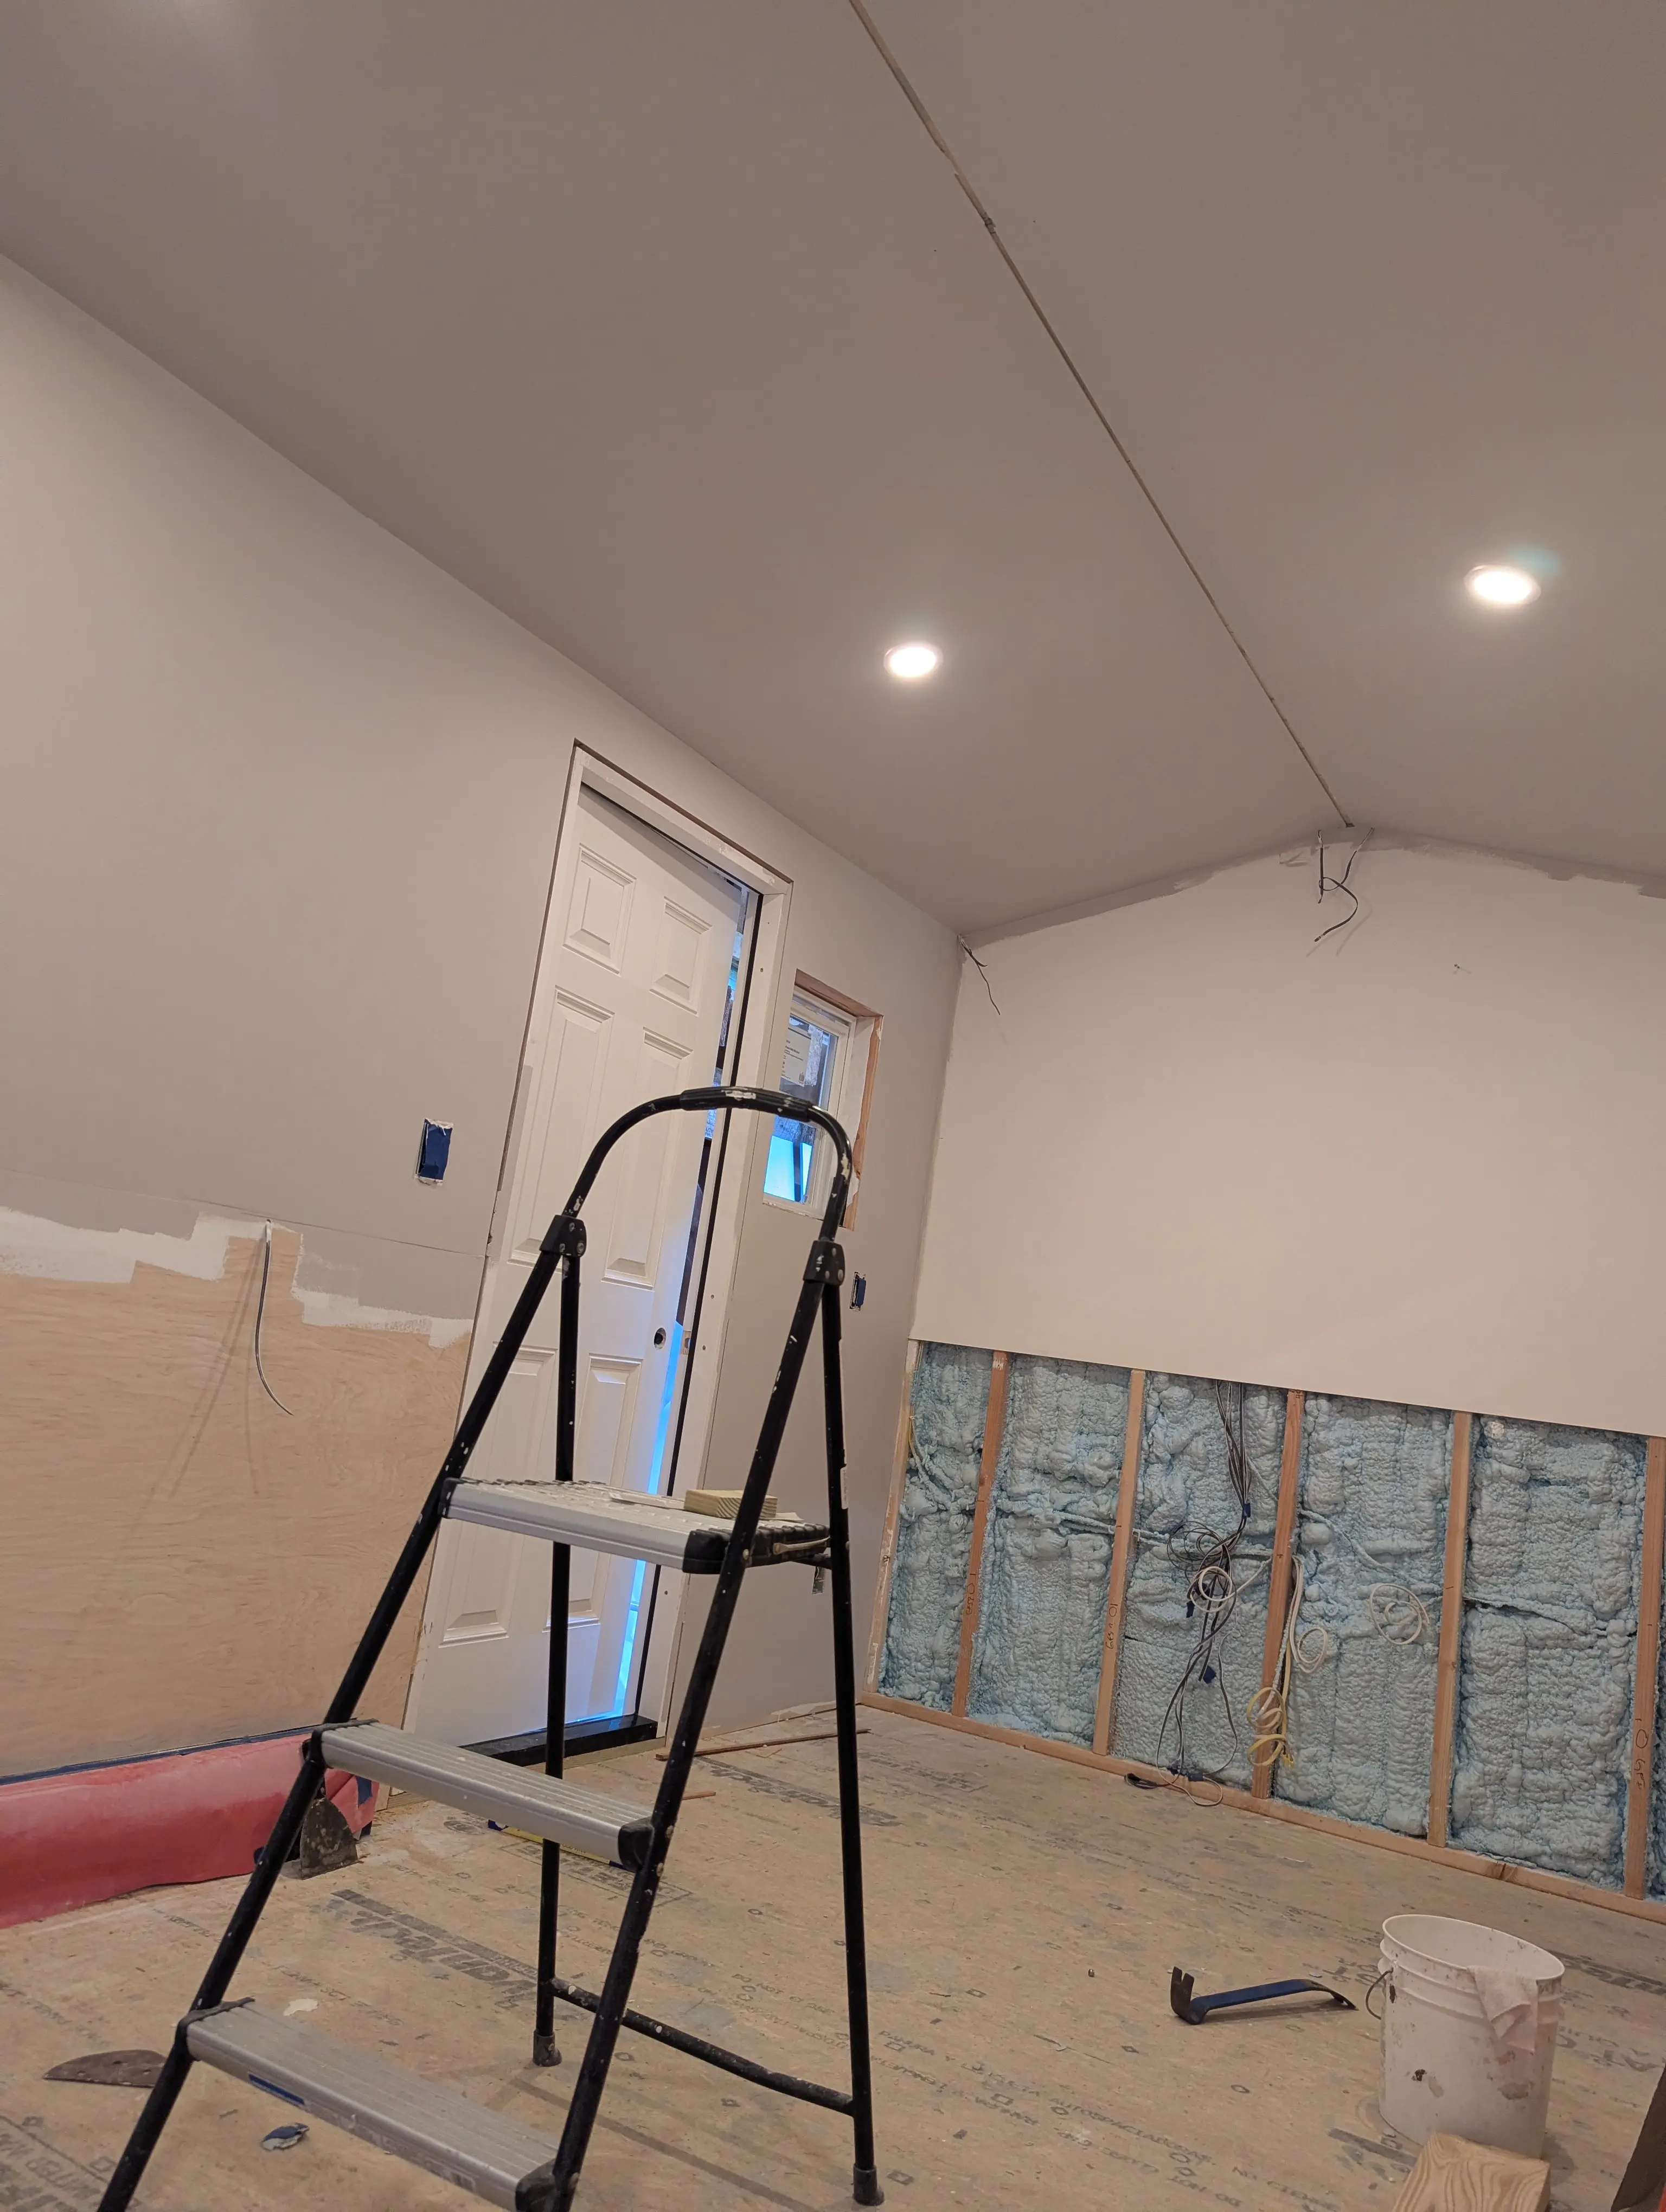
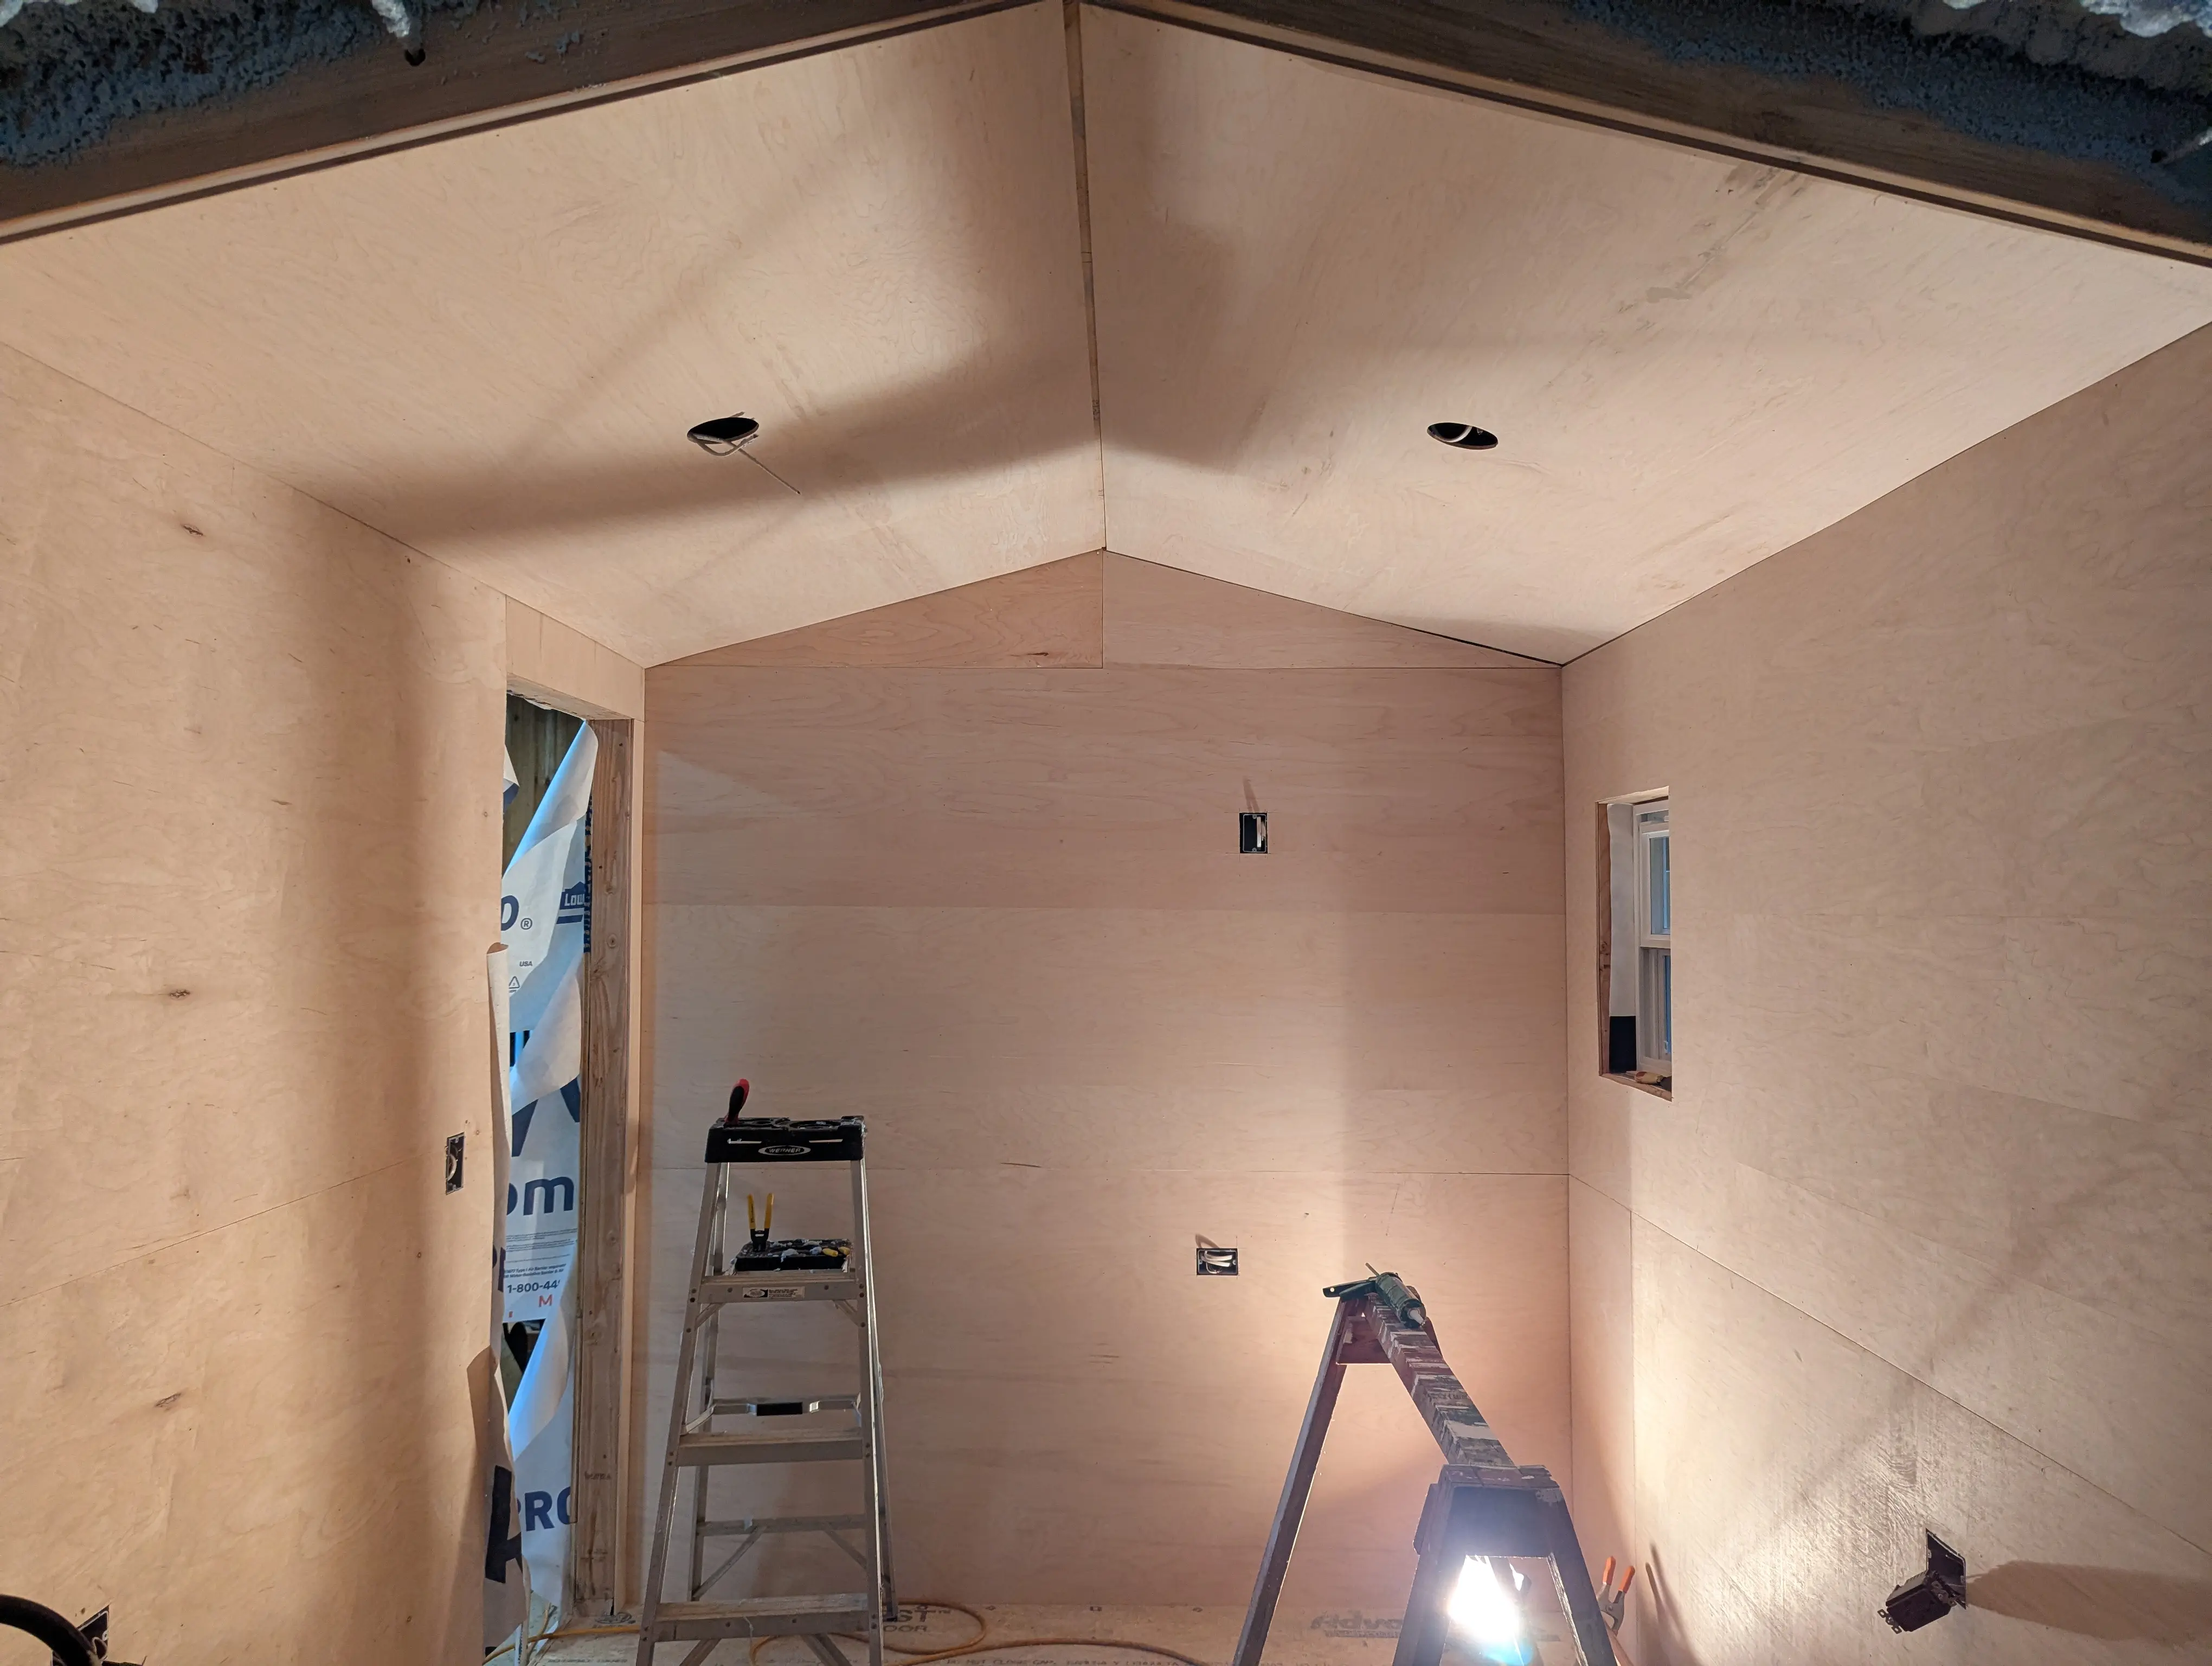
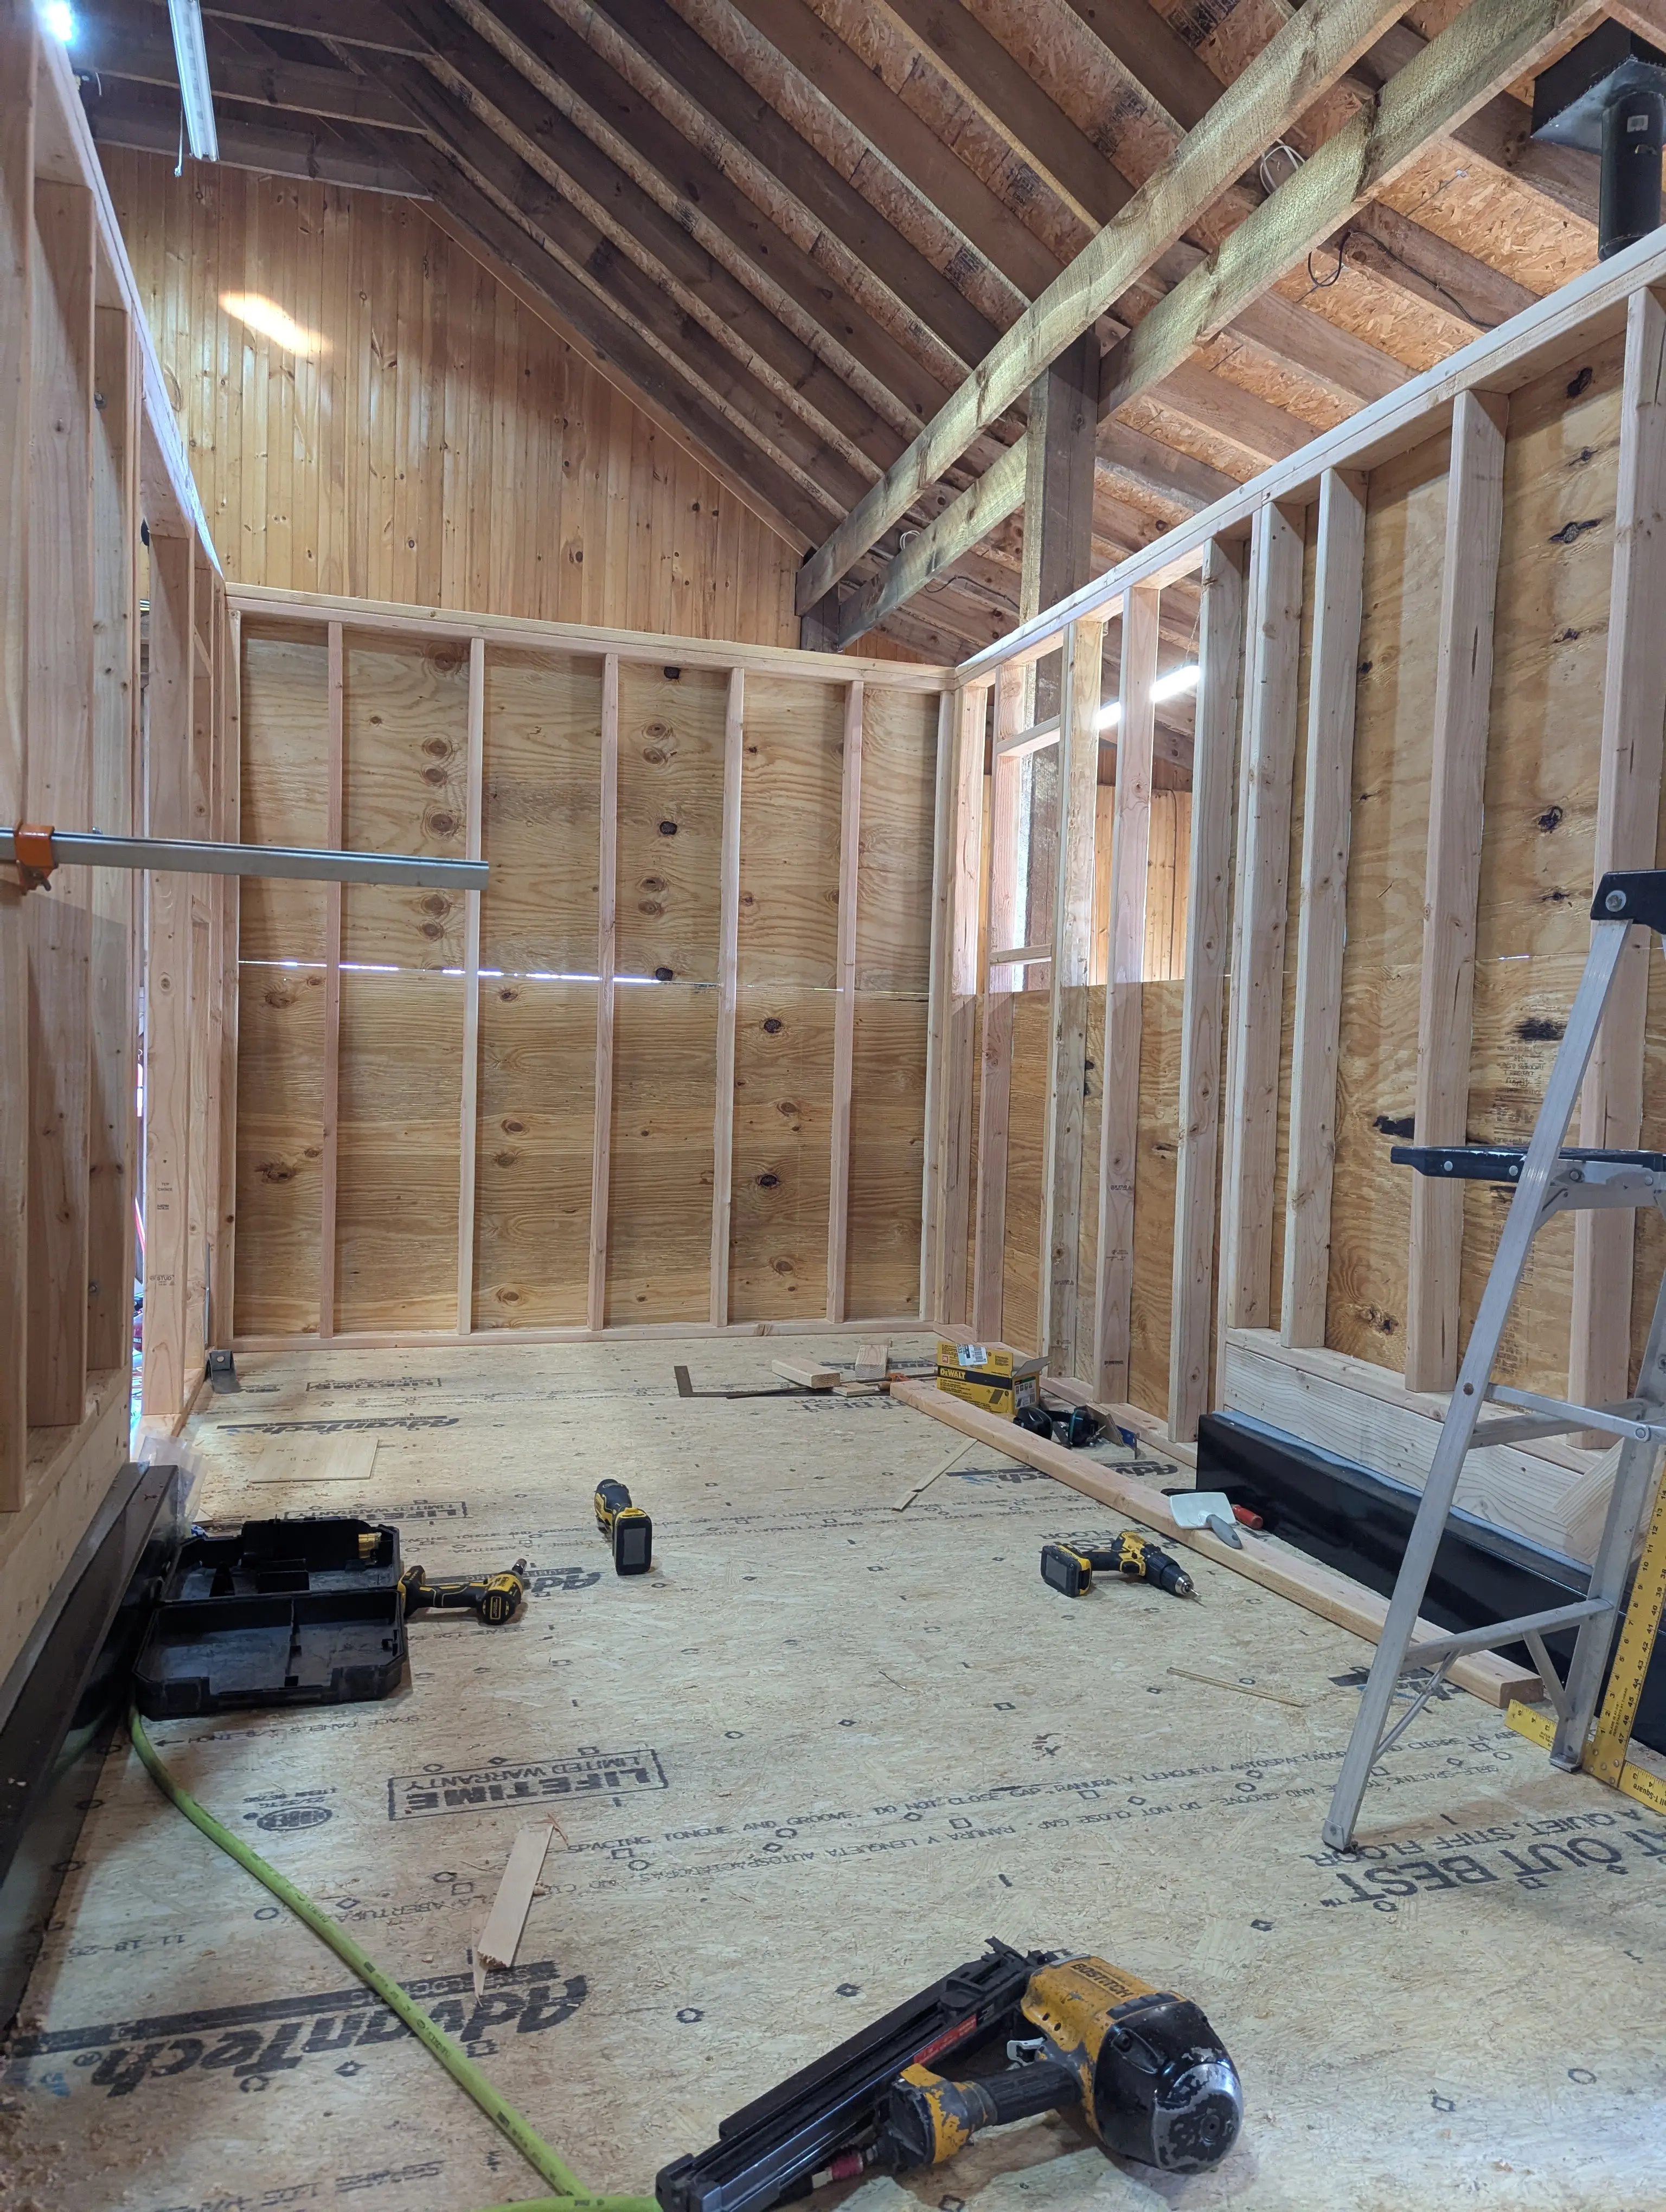
Interior Panels
With the bones insulated and the walls sealed tight, we turned to the interior surface — birch plywood panels going up one wall at a time, and recessed lighting being roughed in through the ceiling. The space started to feel like a room. A real room. Something you'd actually want to spend time in.
May 2026
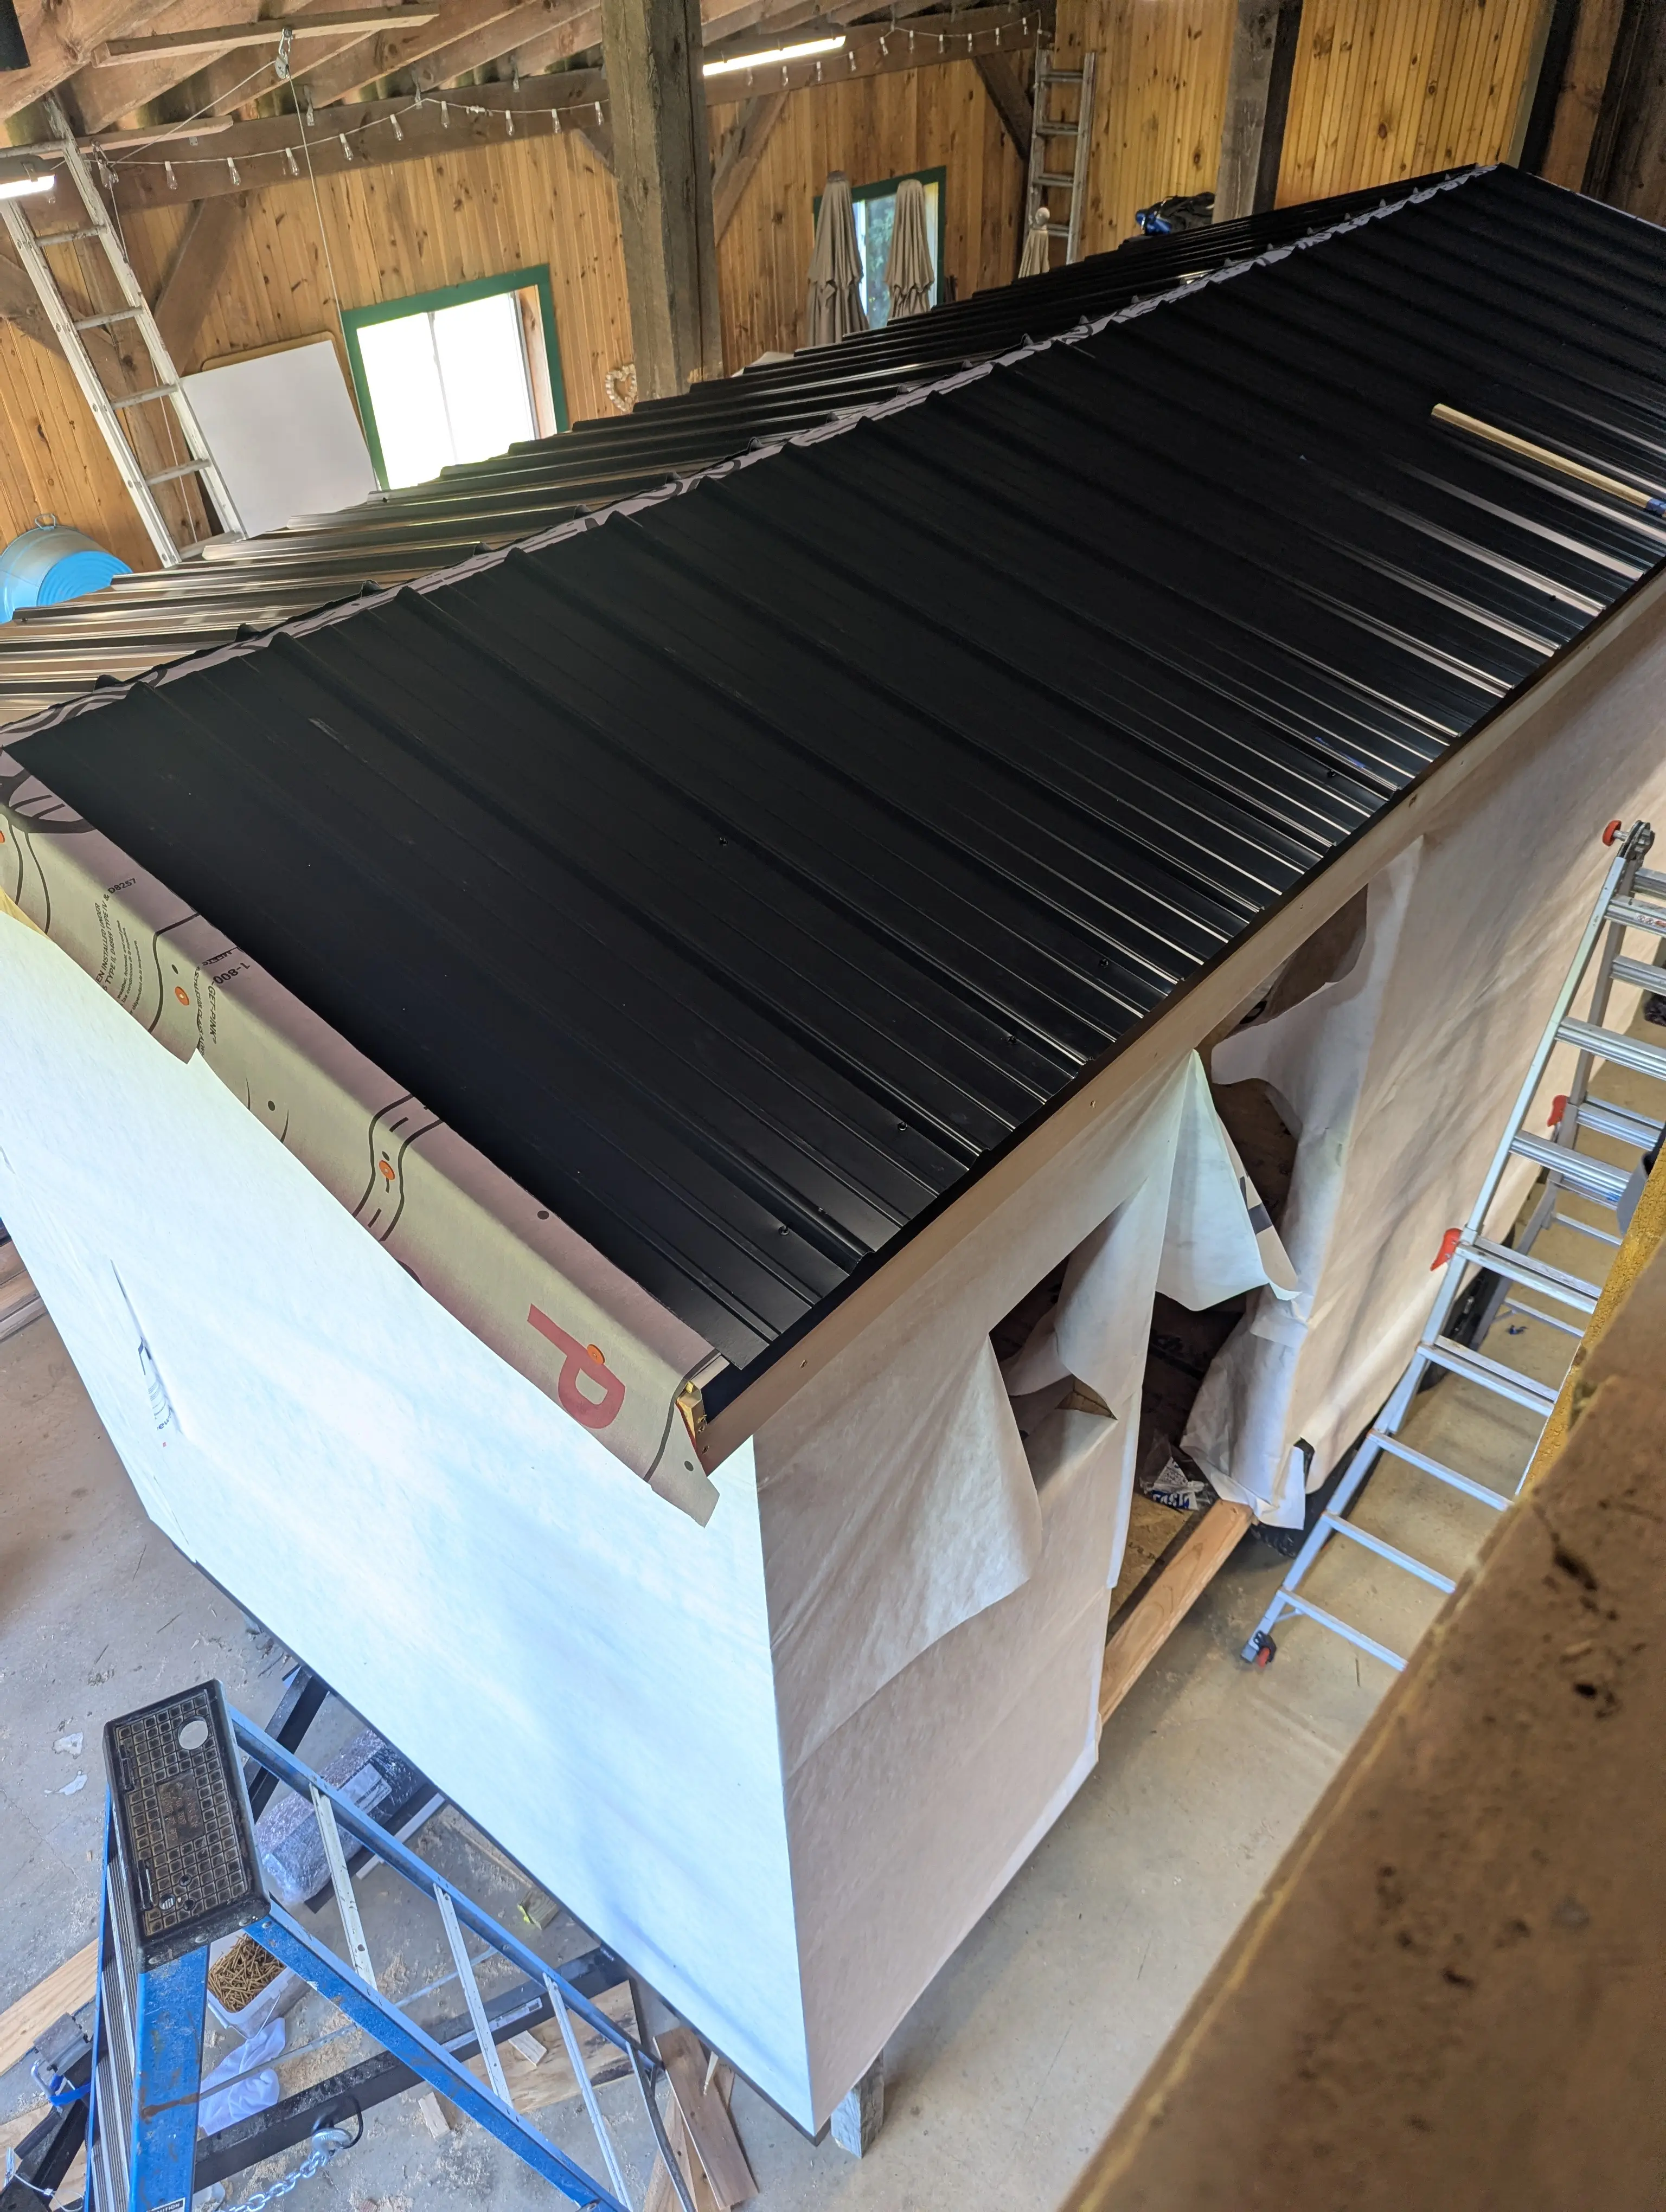
Black Metal Roof
Nothing says we mean business quite like a black metal roof going down. We spent a long Saturday up on the ladder running panels, and by the time the last screw was set, the rig had its signature look. Watertight, sharp, and exactly what we had in mind from day one.
April 2026
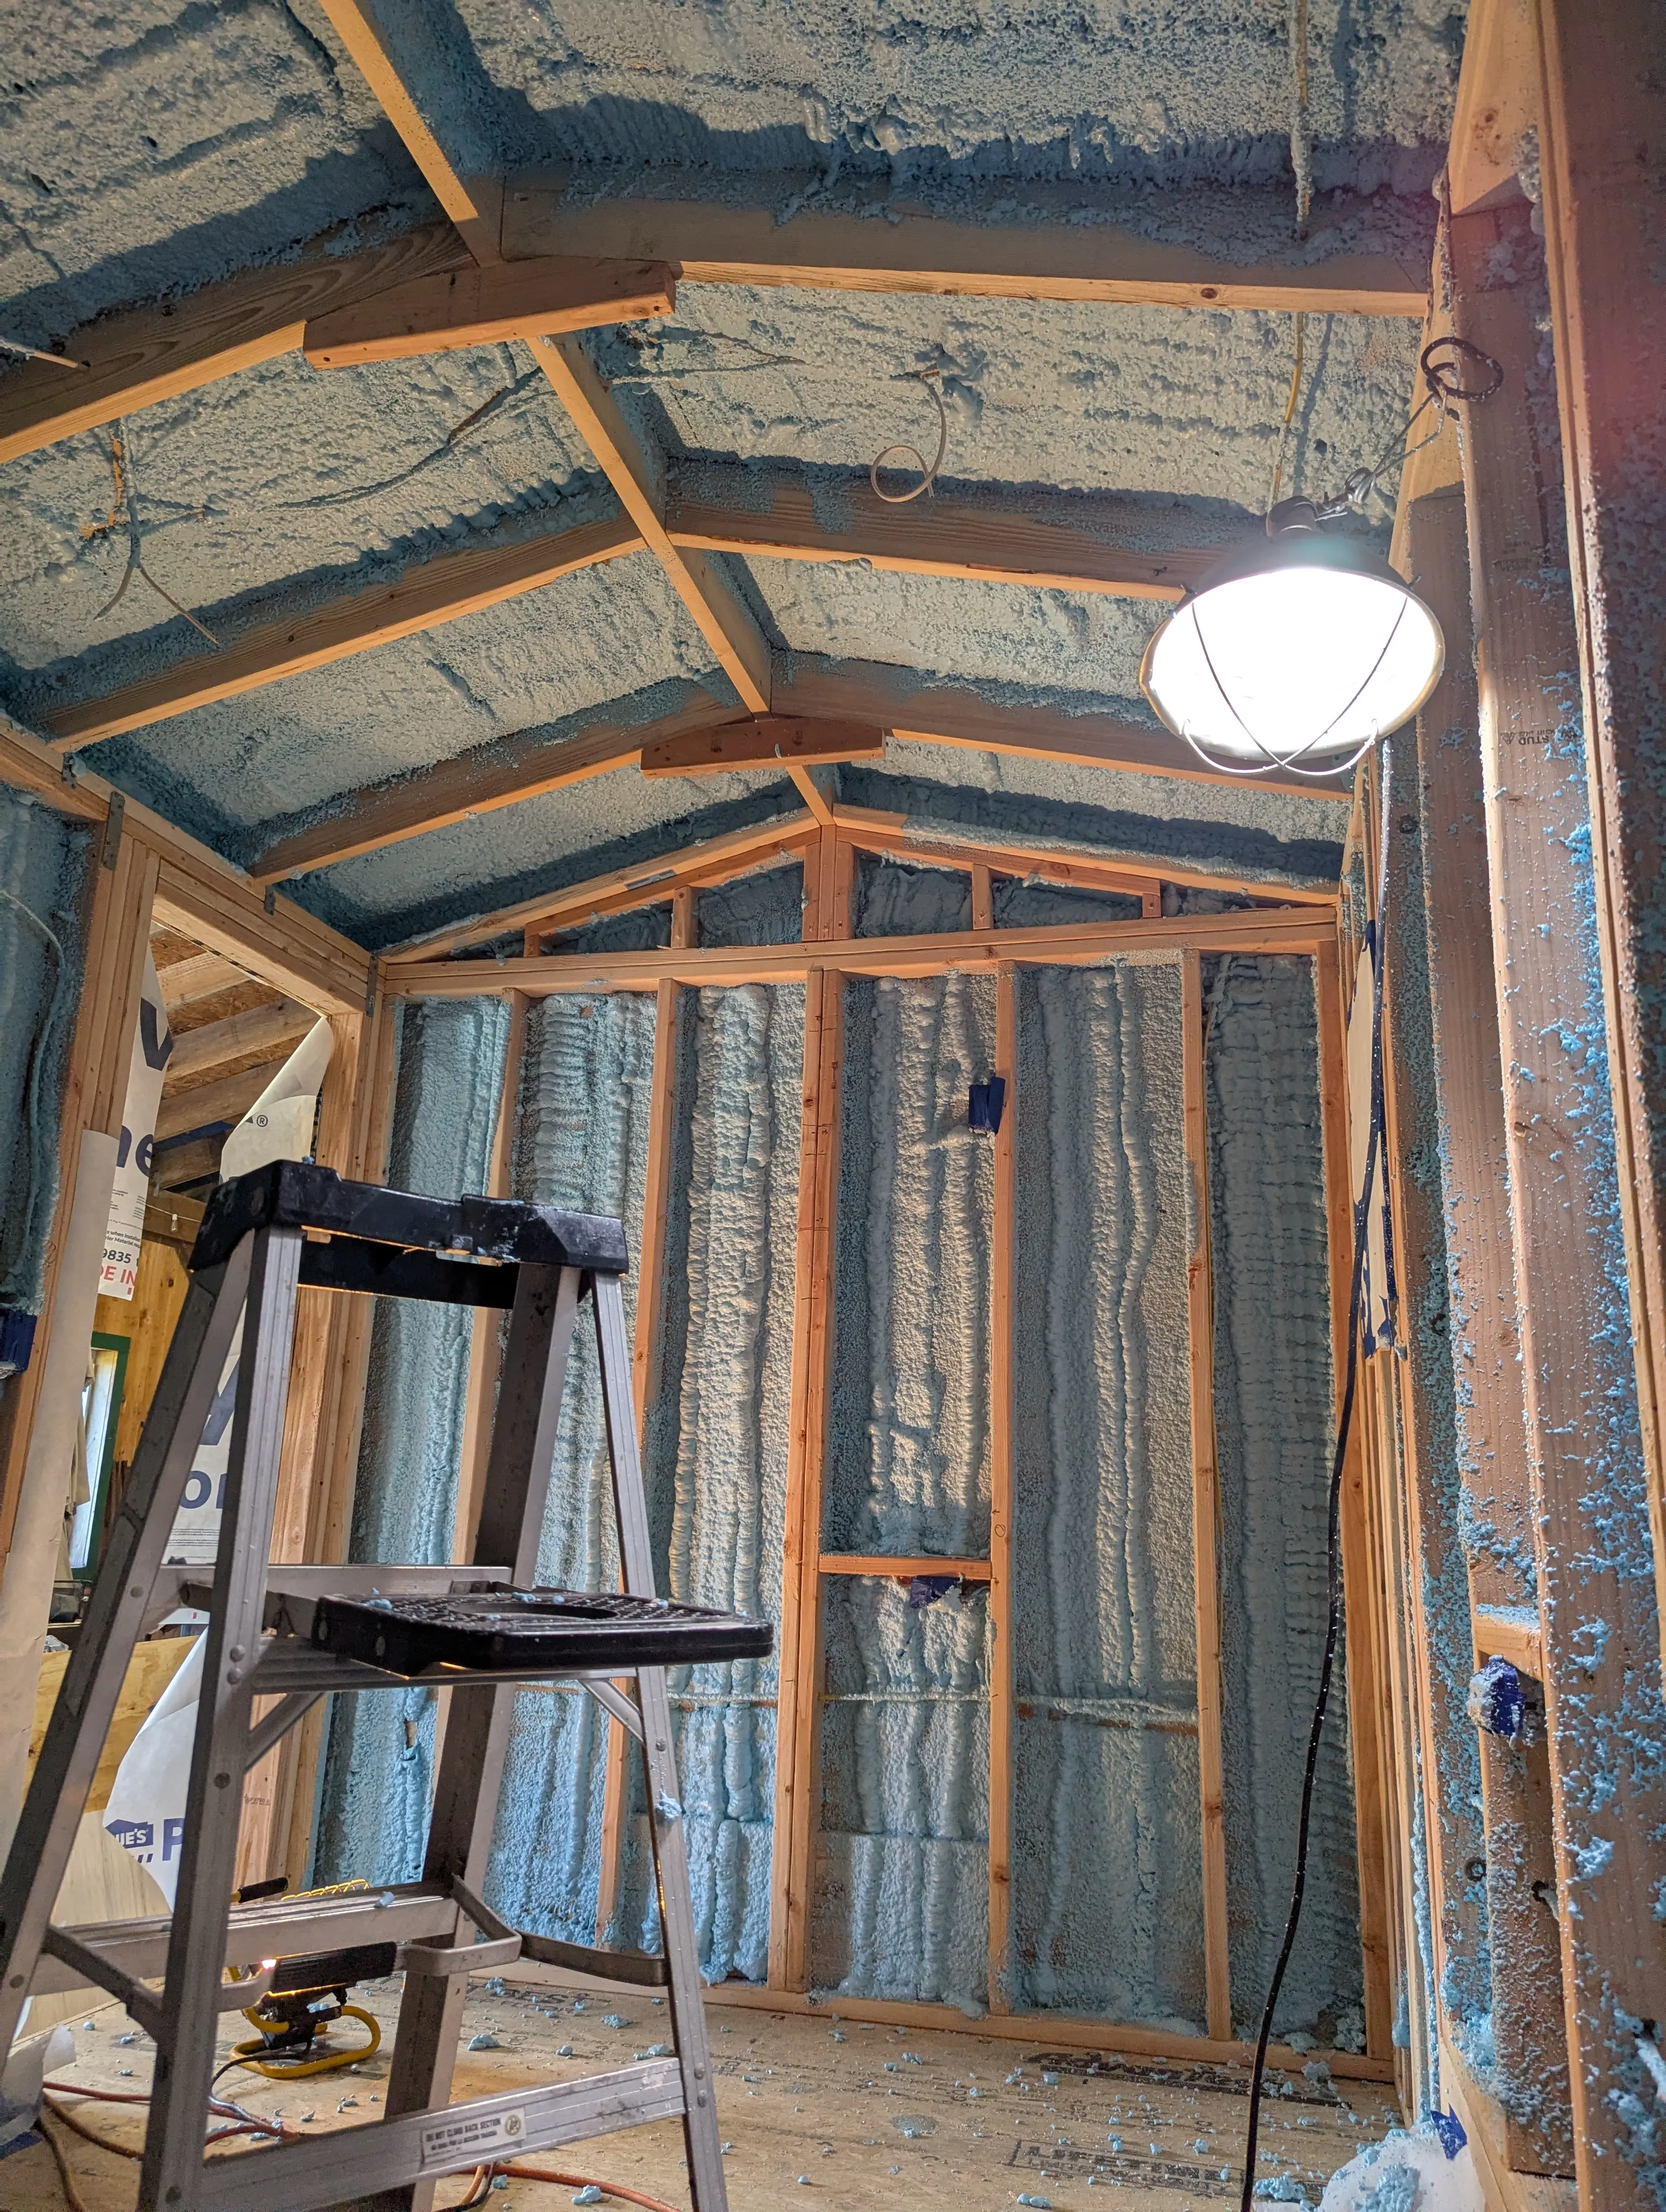
Spray Foam Insulation
Before we could think about walls, we had to seal things up right. A full spray foam application through every wall cavity and the ceiling means this rig will hold temperature whether it's July in a parking lot or February at a tailgate. Climate controlled — we weren't kidding about that.
March 2026
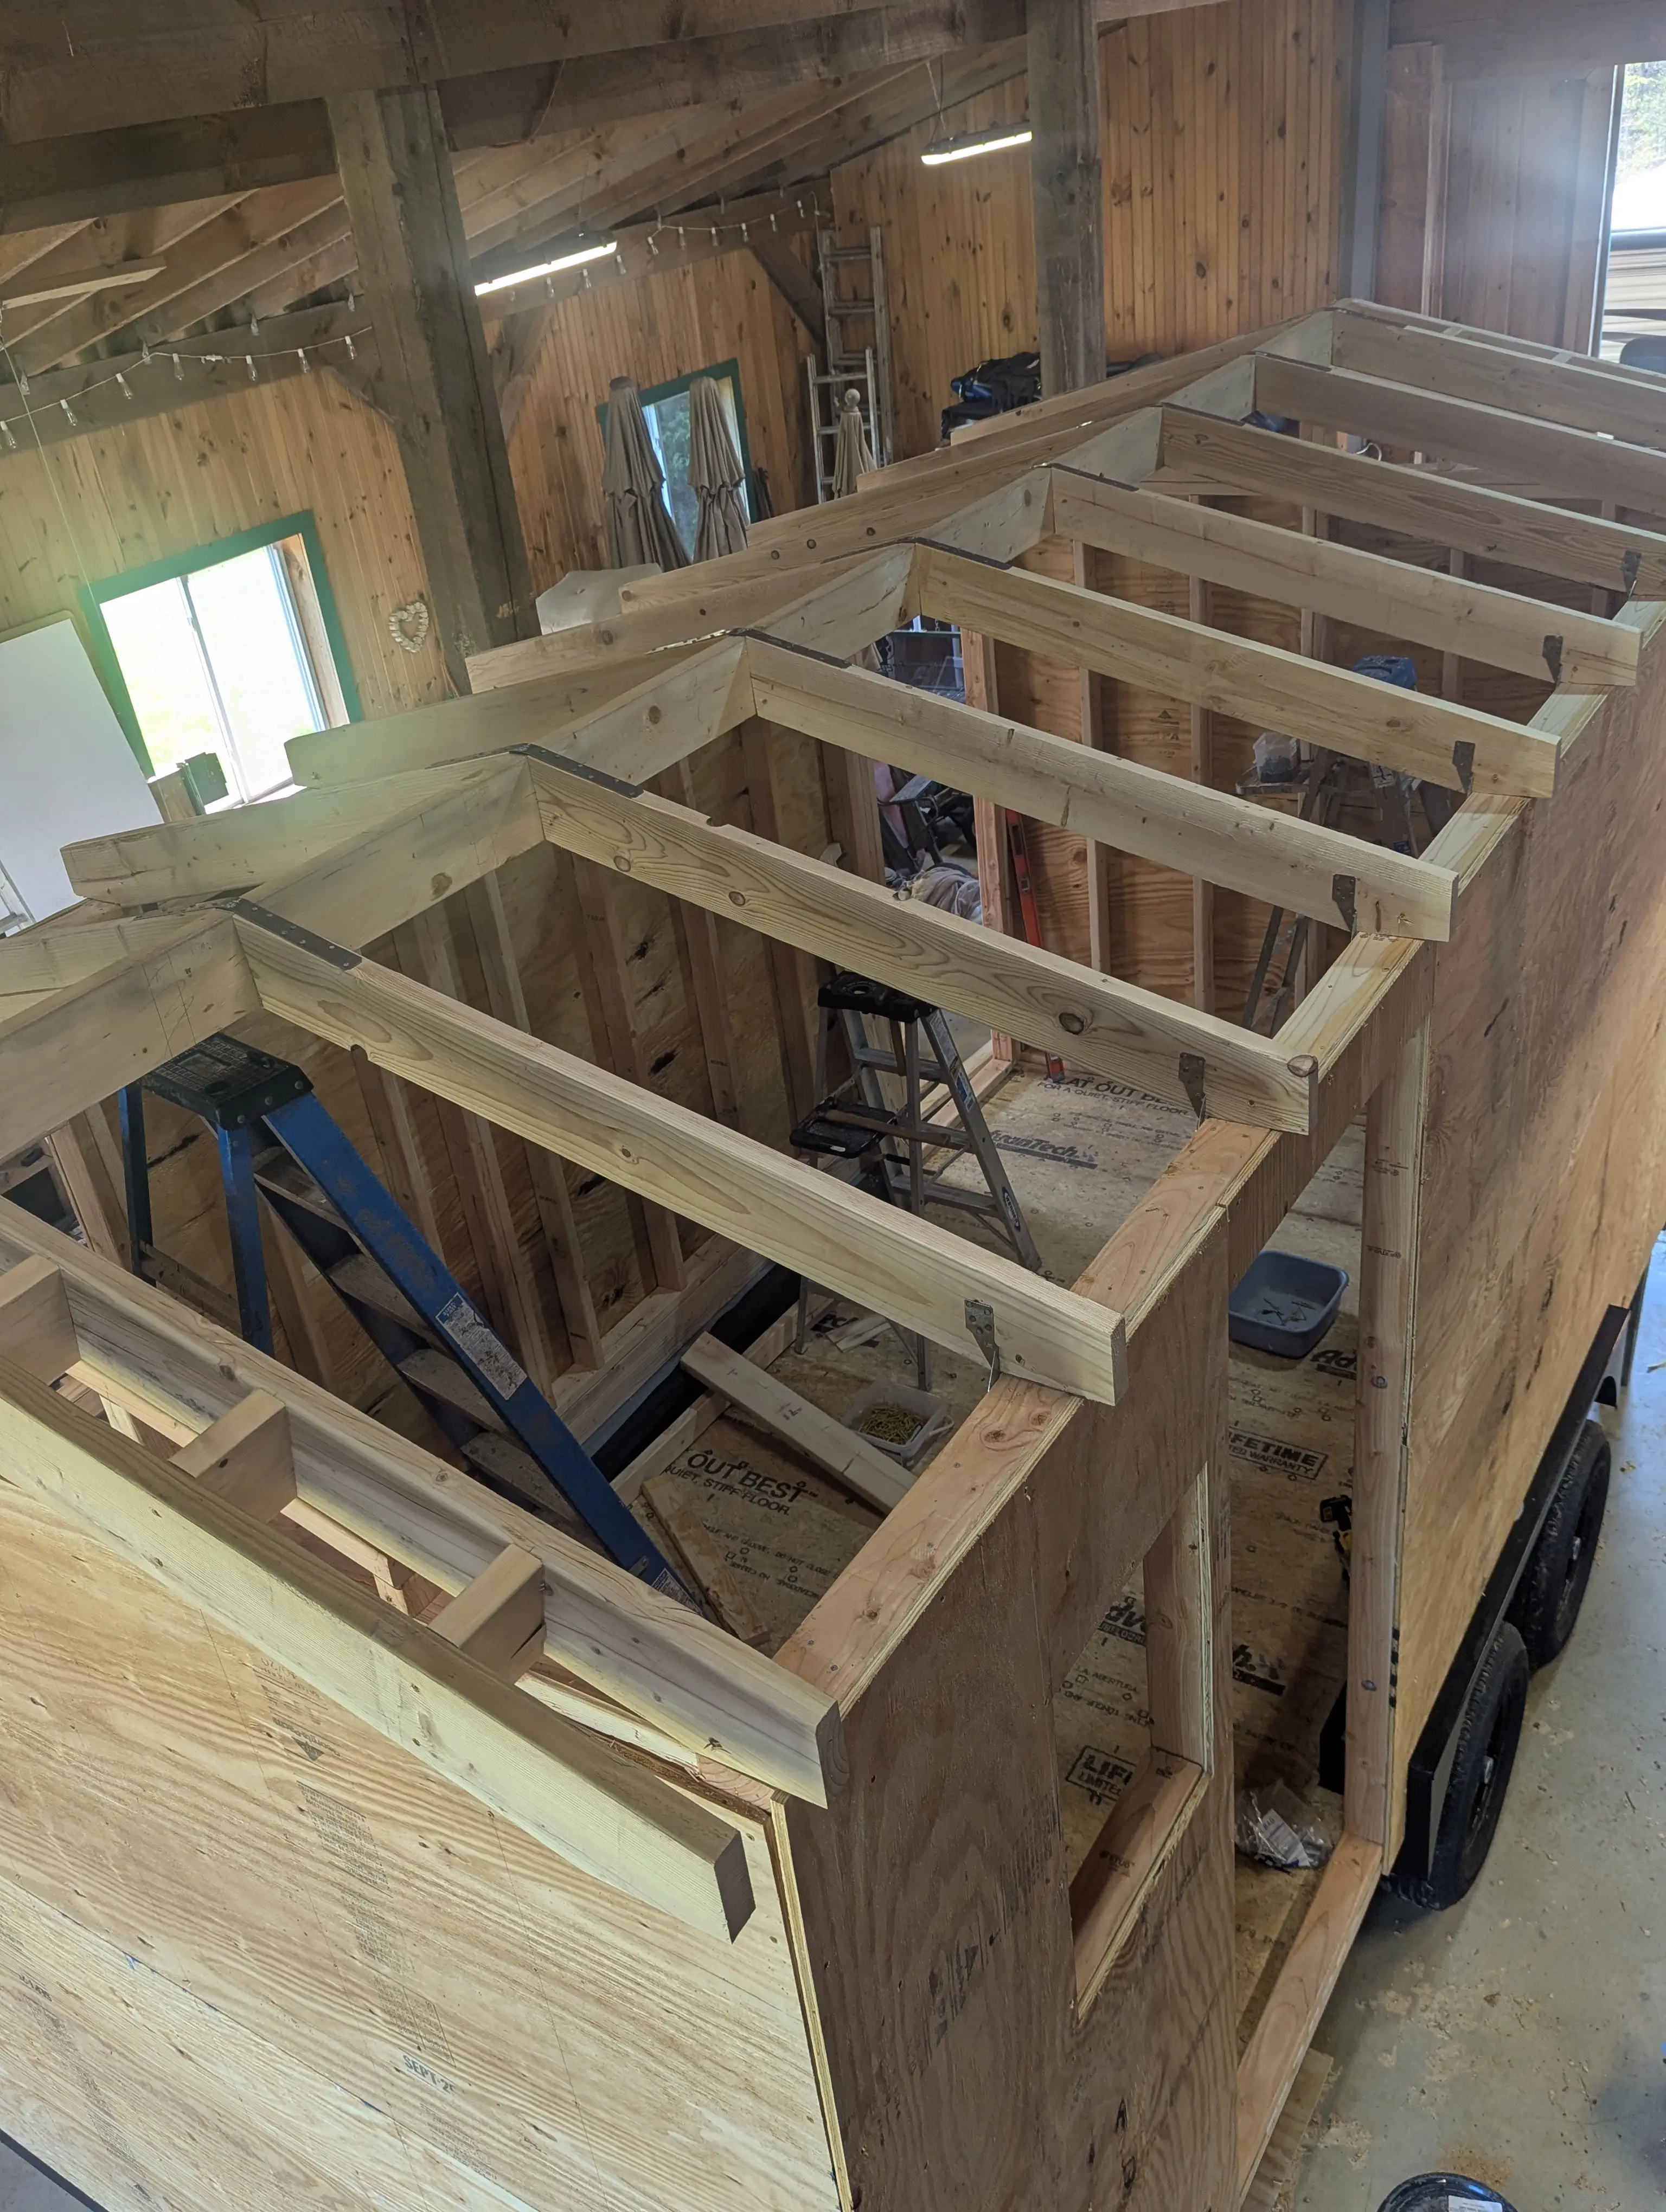
Roof Framing
The cathedral ceiling was the detail we refused to compromise on. More headroom, better feel, more presence inside. Getting those ridge boards in place and the rafters set was one of the better afternoons of the build — you could finally stand in the frame and look up at exactly what we'd been drawing on paper.
March 2026
Setting the Roof Ridge Beam
Before the rafters could go up, the ridge beam had to be right. This was the first step toward the cathedral ceiling — getting that center beam level, plumb, and locked in at the correct height. Everything about the roofline that came after depended on getting this one piece exactly right.
March 2026
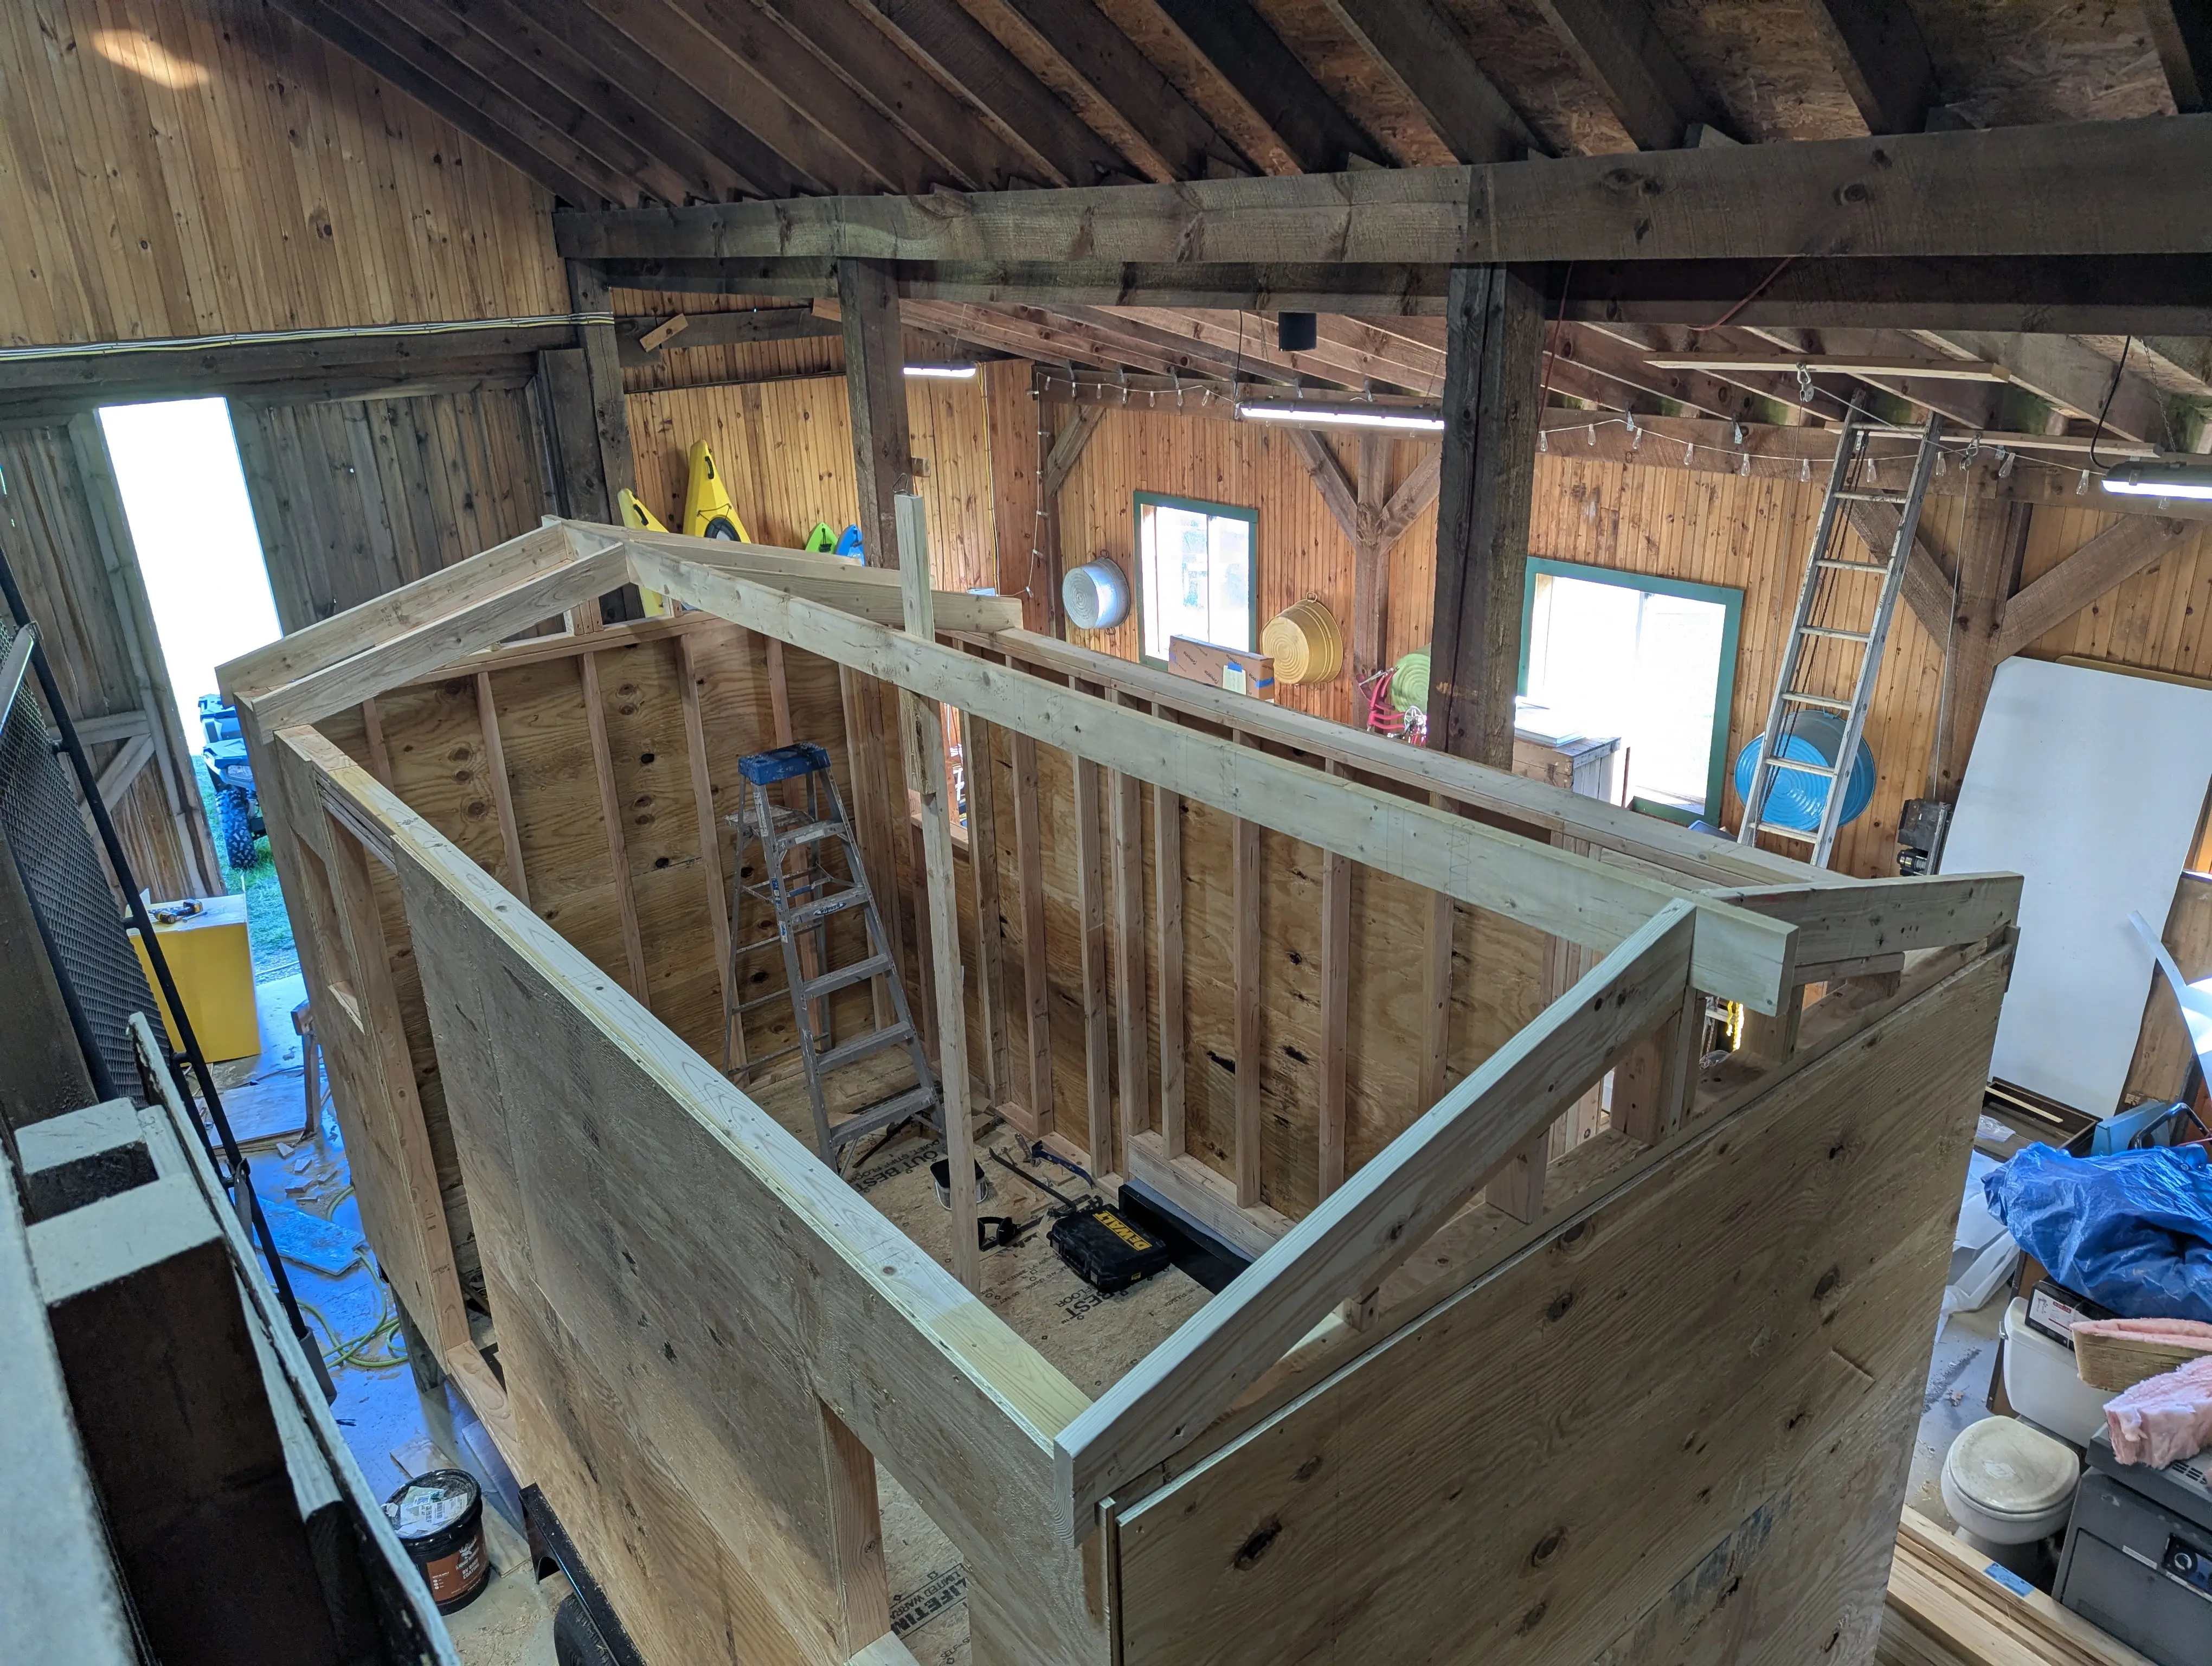
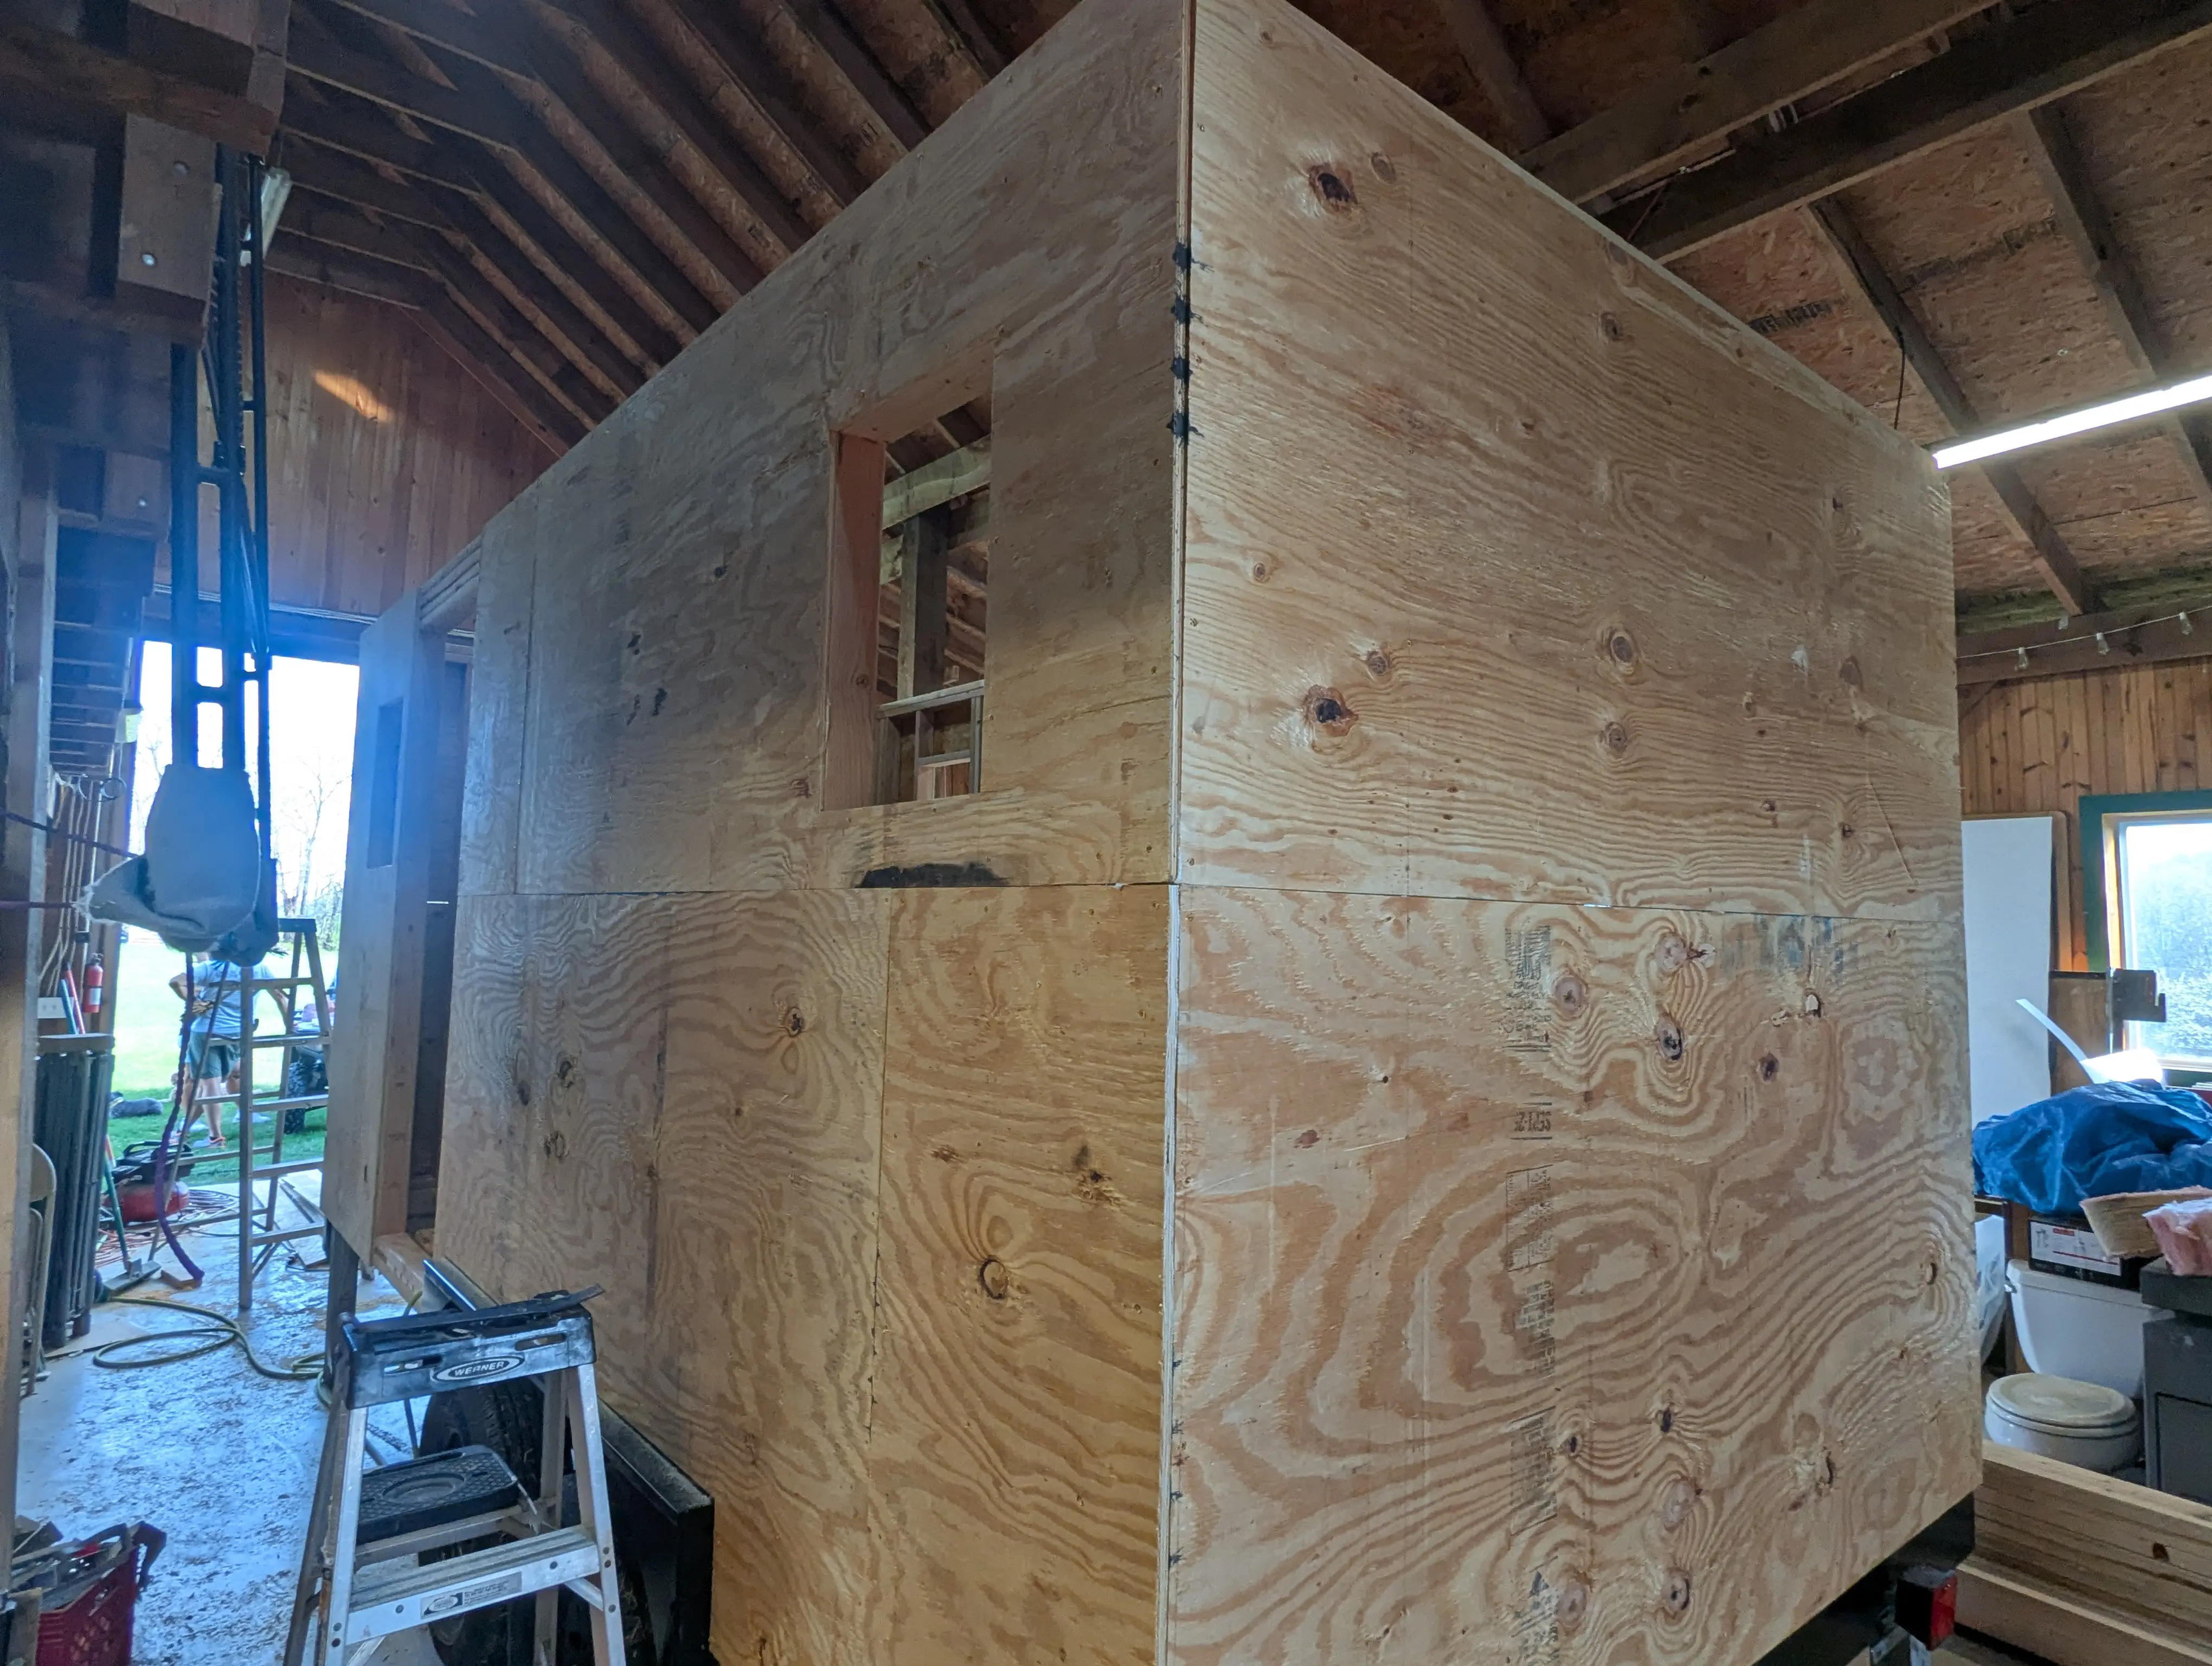
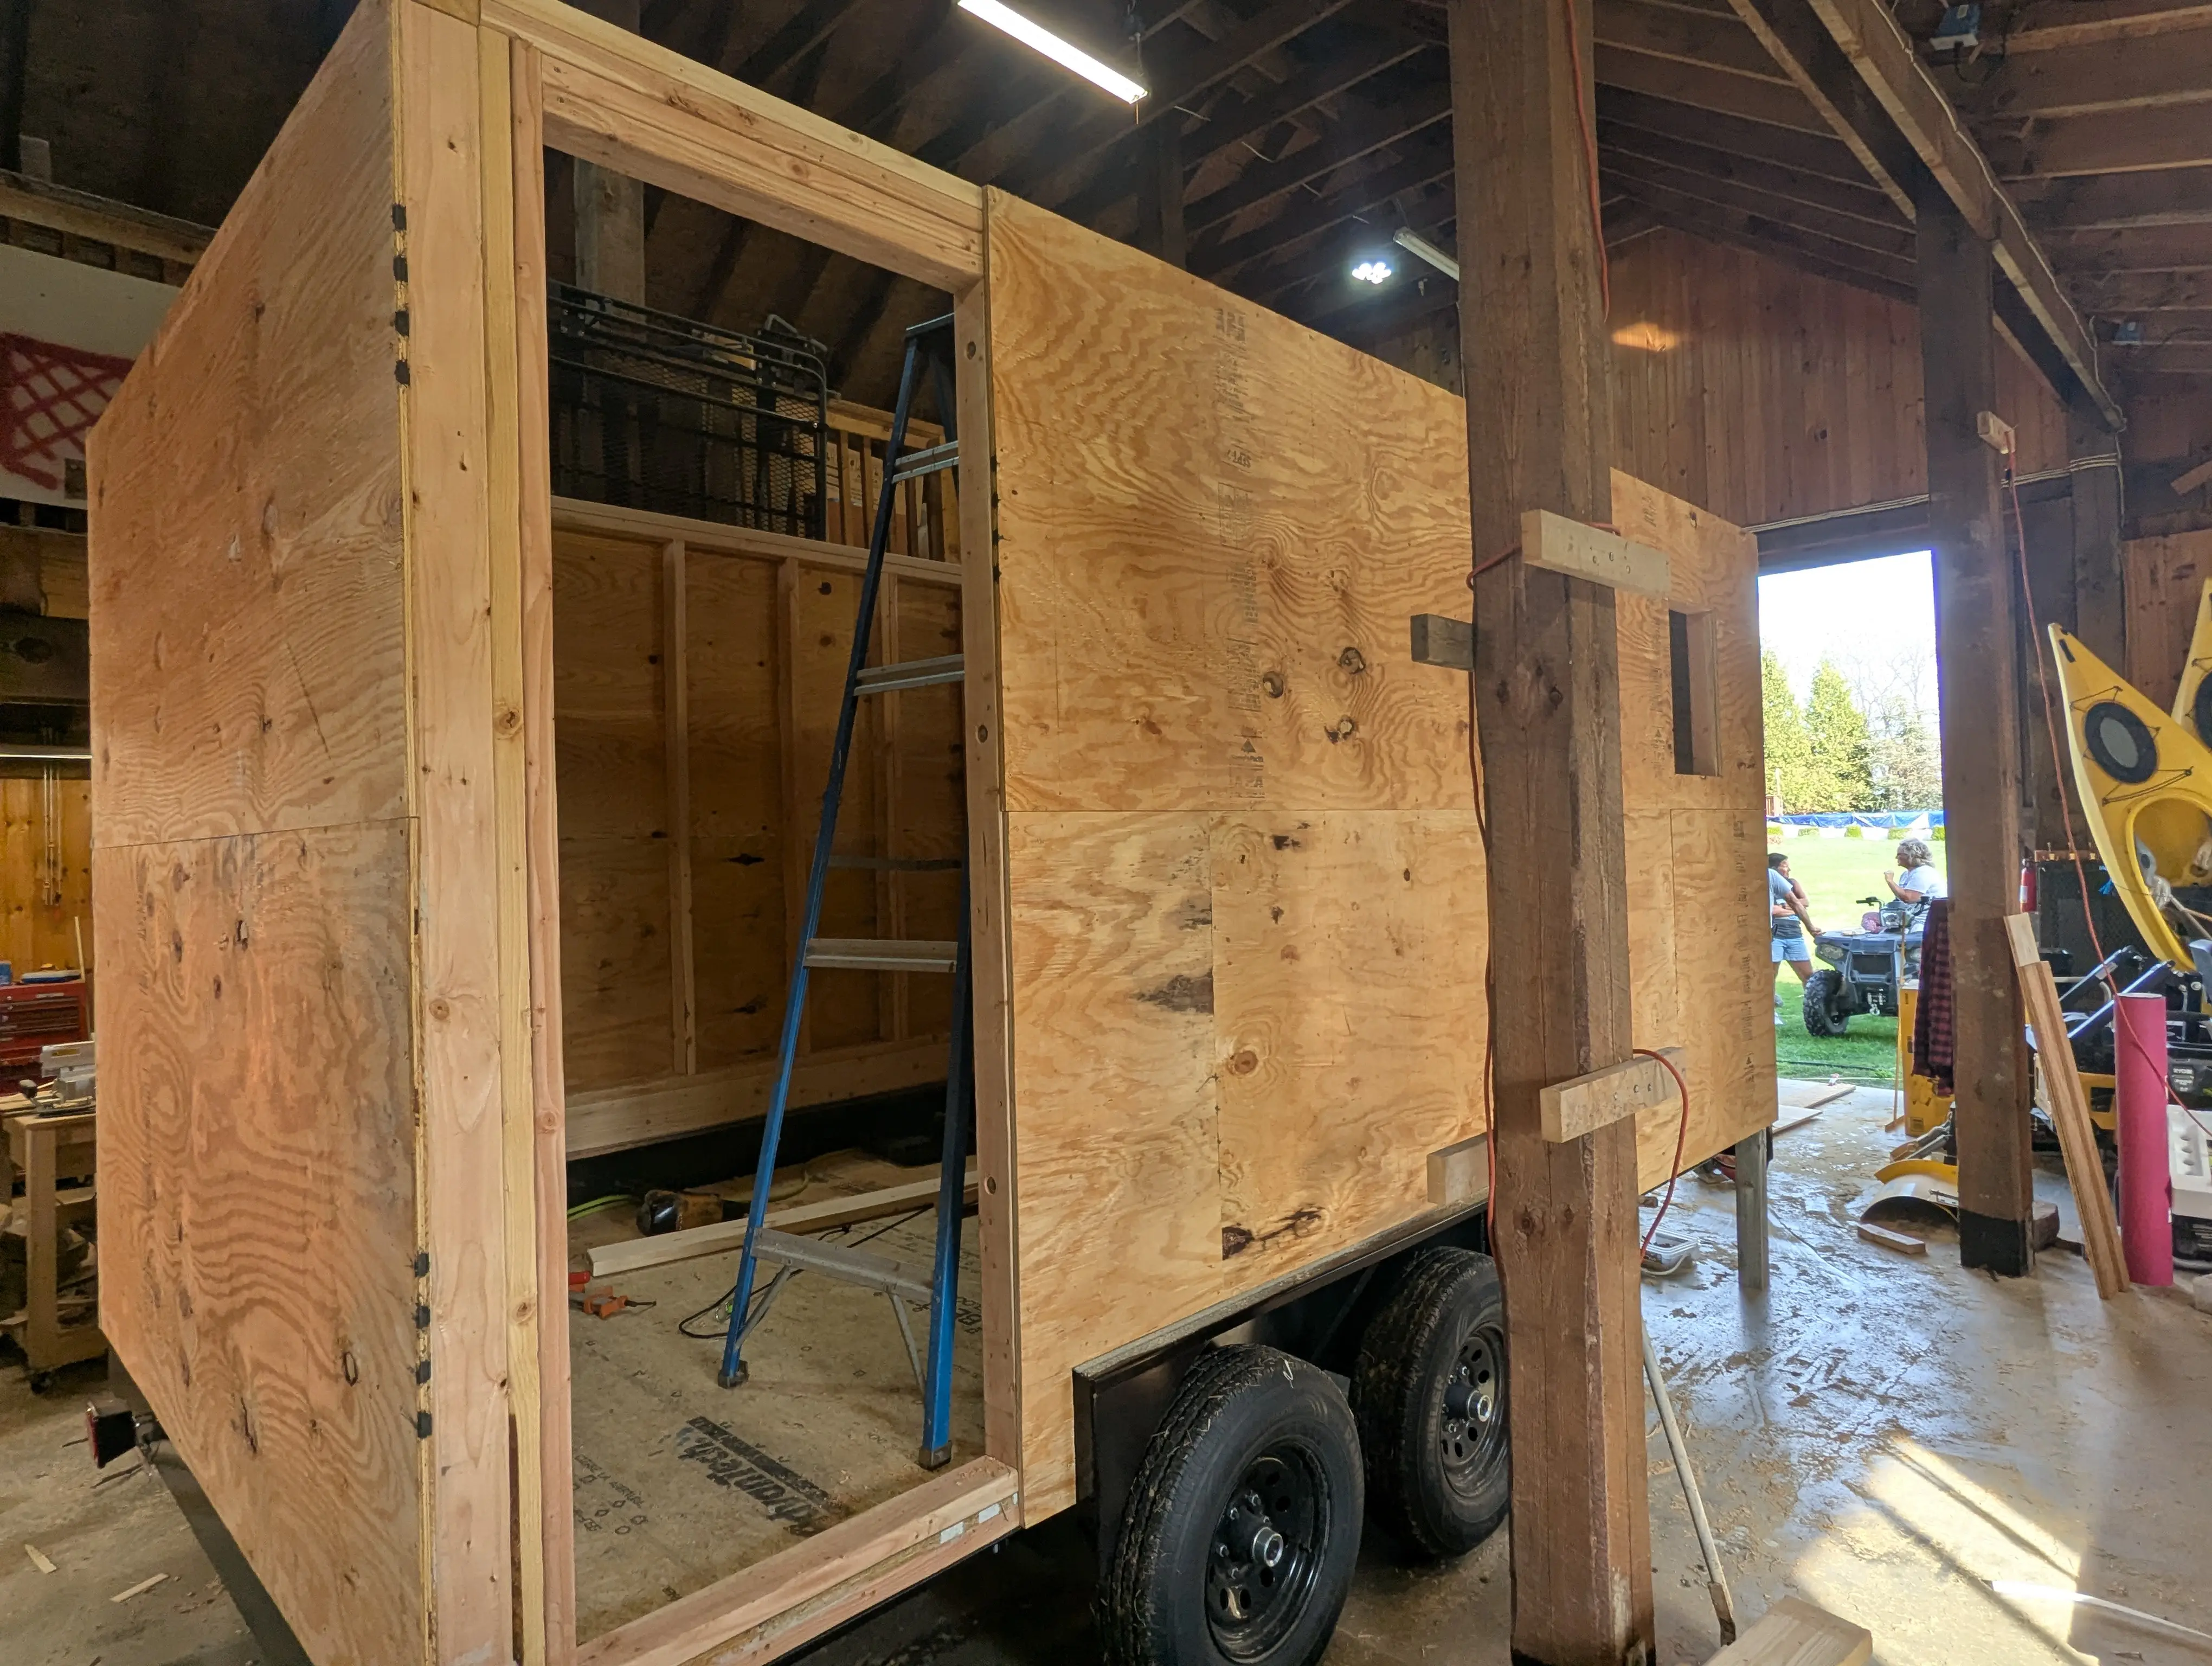
Sheathing
With the wall framing squared up and solid, it was time to skin it. Plywood sheathing went on panel by panel — every sheet measured, cut, and nailed flush over the studs. From the aerial view you could finally see the full floor plan laid out: where the bar runs, where guests will stand, the whole shape of it. The walls were becoming walls.
March 2026
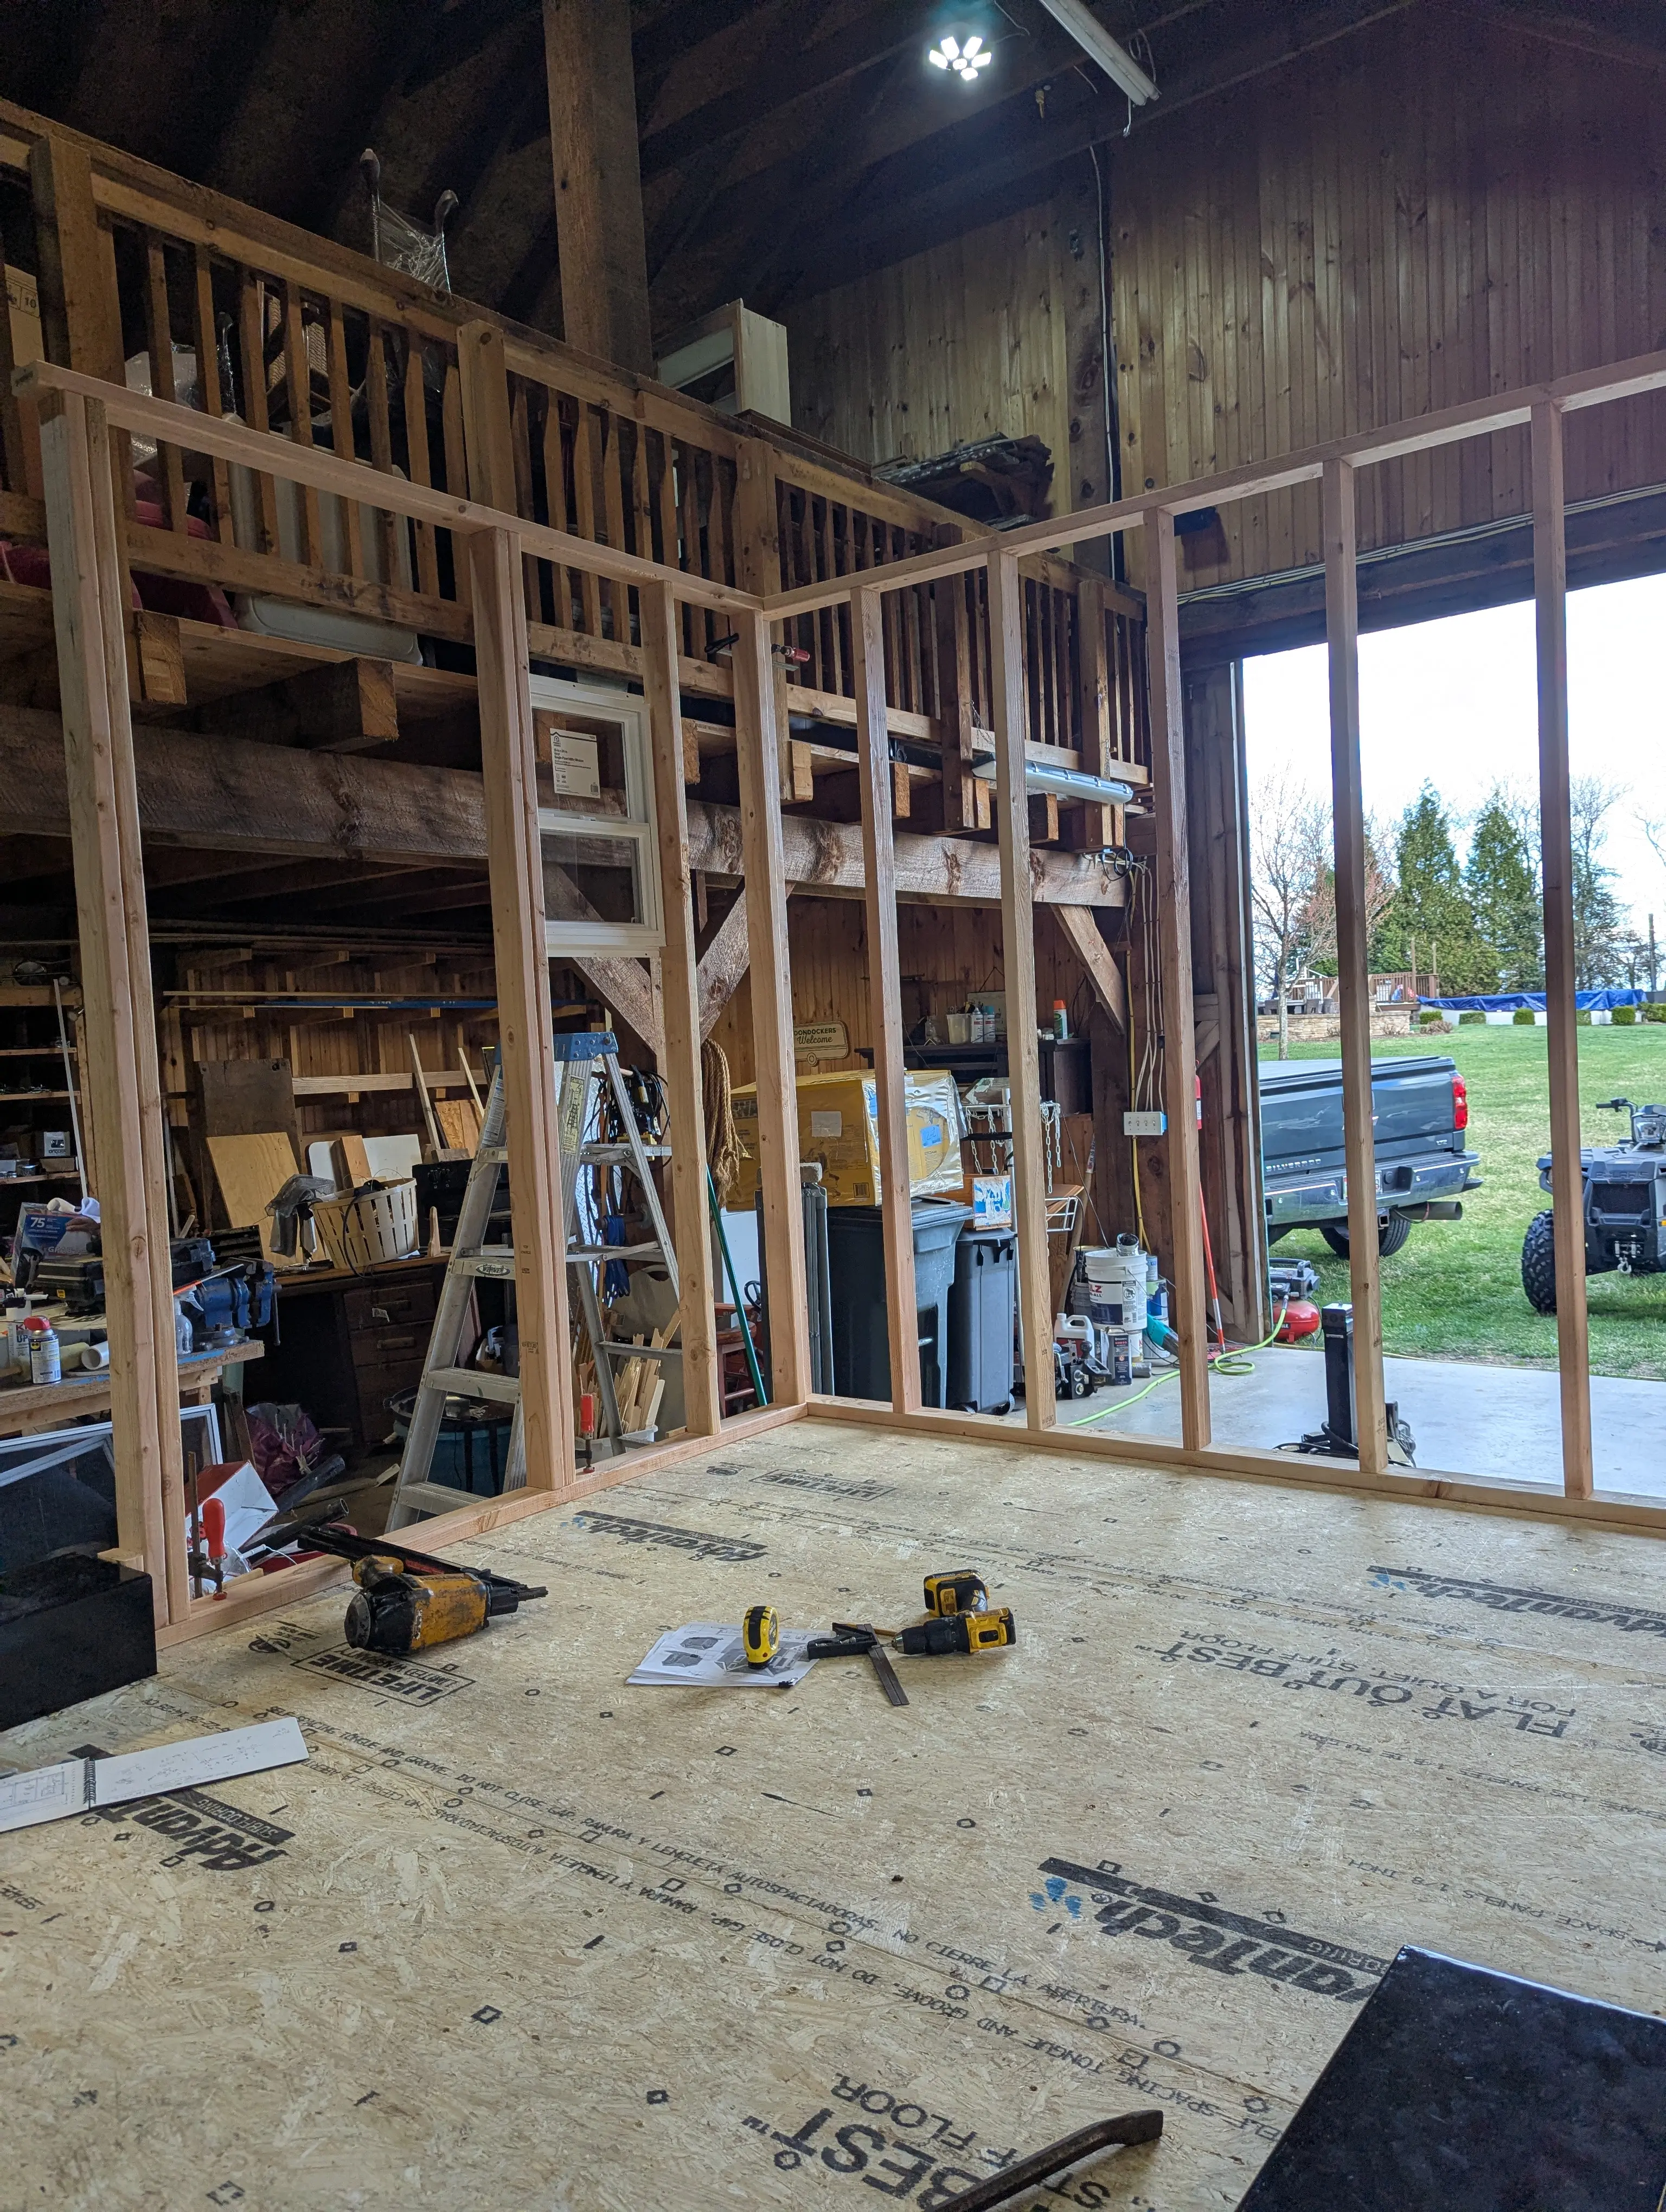
Wall Framing
First wall frames standing and bolted to the trailer deck. What started as a sketch on a napkin was becoming lumber, plumb and square. A few long days in the barn, a lot of measuring, and the walls were up. The kind of progress that makes you want to come back the next morning.
March 2026
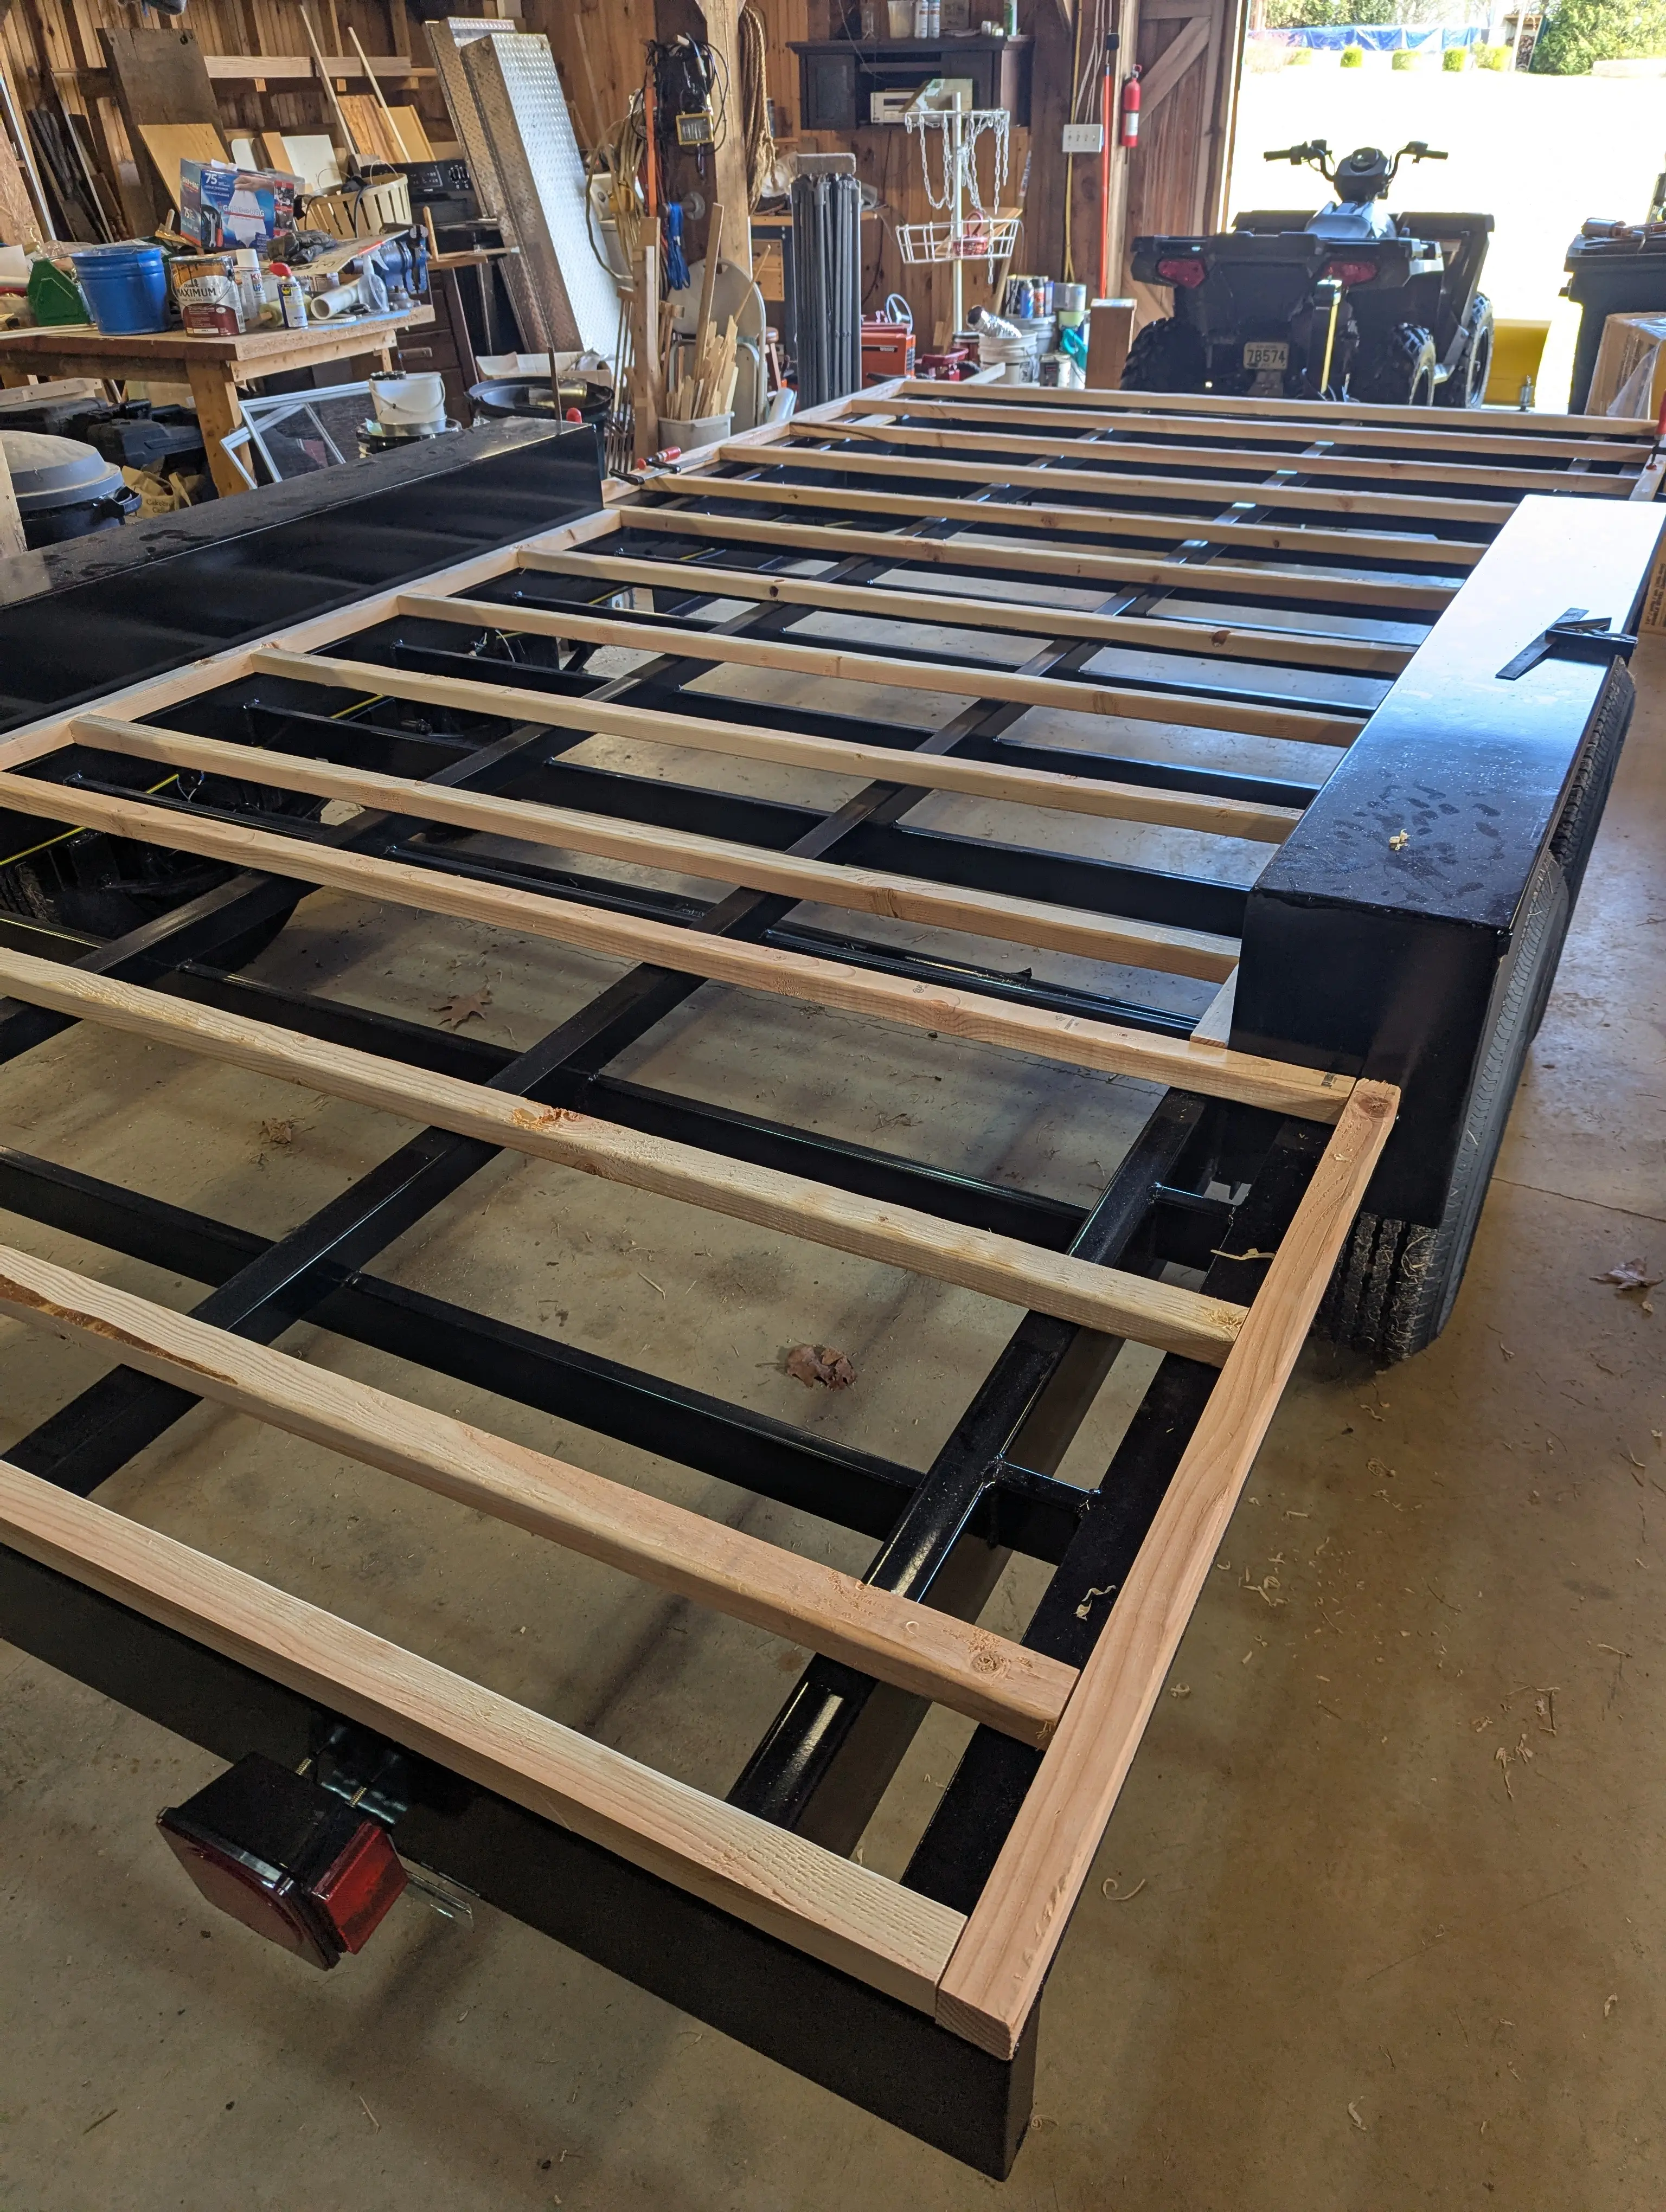
Gluing the Sub-Floor
Before the walls could go up, the sub-floor had to be solid. We glued down the plywood decking to the trailer frame — every sheet bonded tight, no squeaks, no flex. It's one of those foundational steps that you only do right once. The timelapse says it better than we can.
March 2026
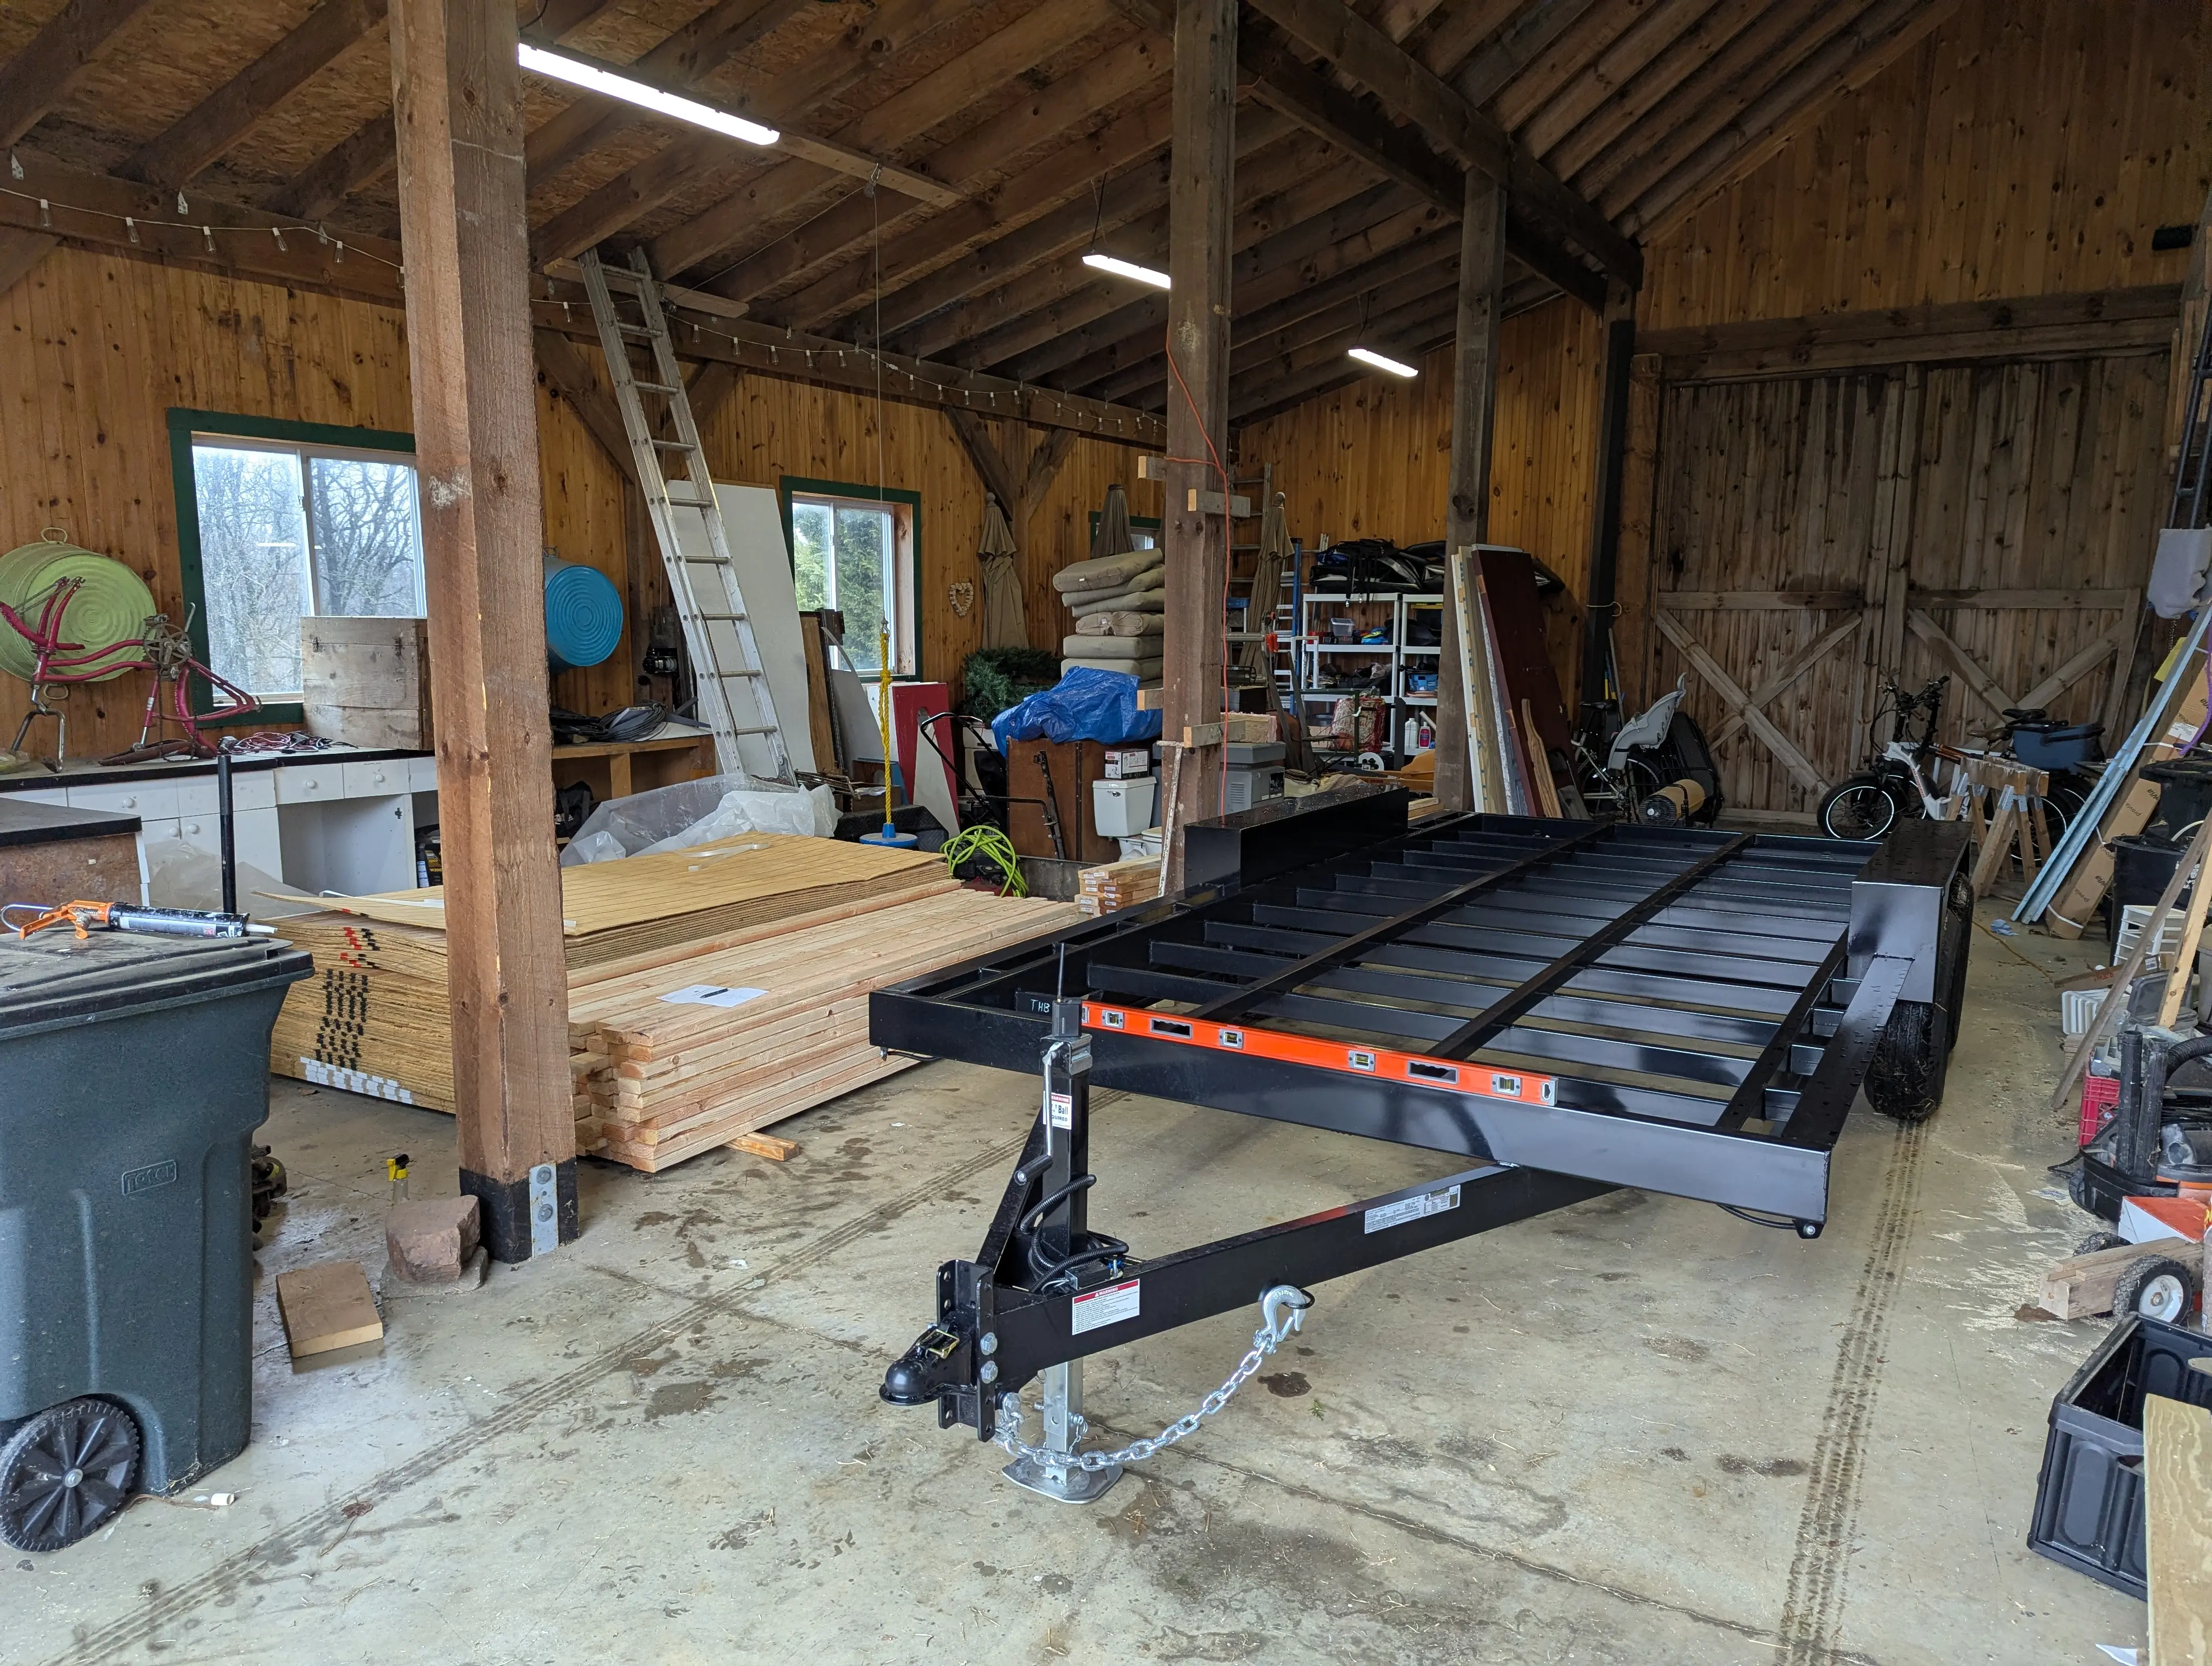
Day One — Trailer Frame
It starts with a flat deck and a plan. Day one was about getting the trailer frame right — laying out the wood floor joists, squaring everything up, and committing to the dimensions that the rest of the build would follow. Every decision made here echoes through everything that comes after. We measured a lot. Then we measured again.
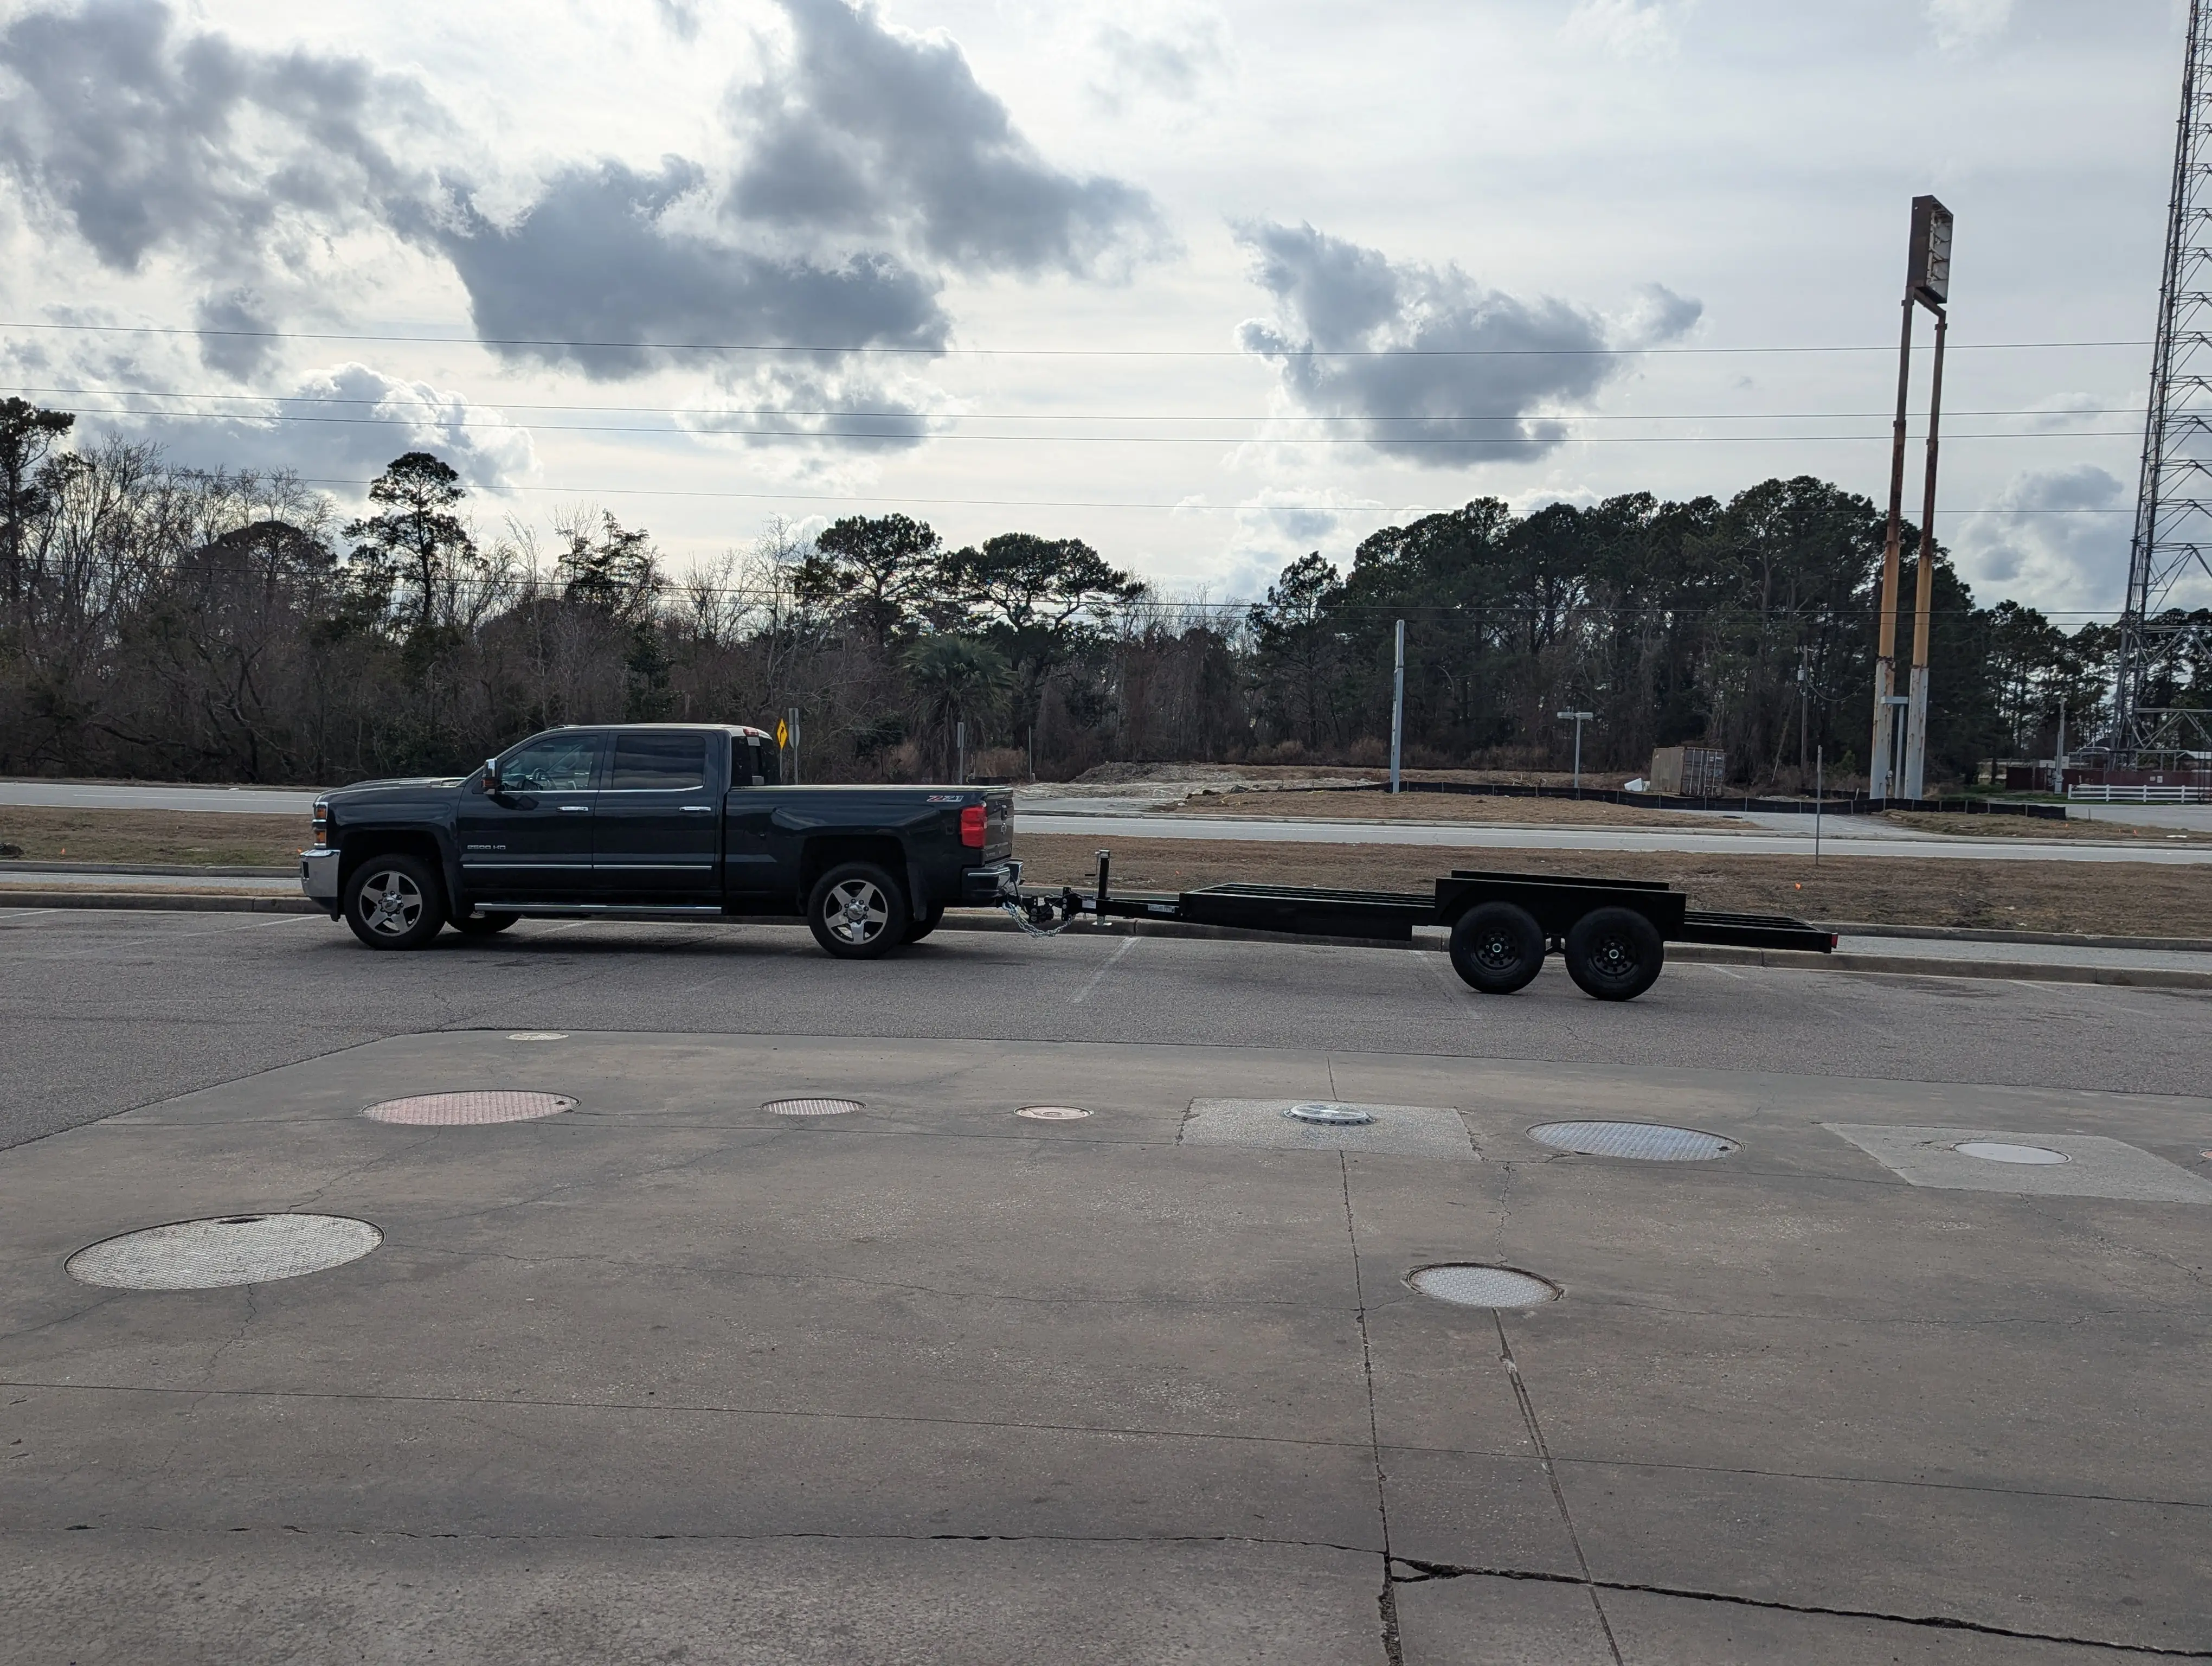
February 2026
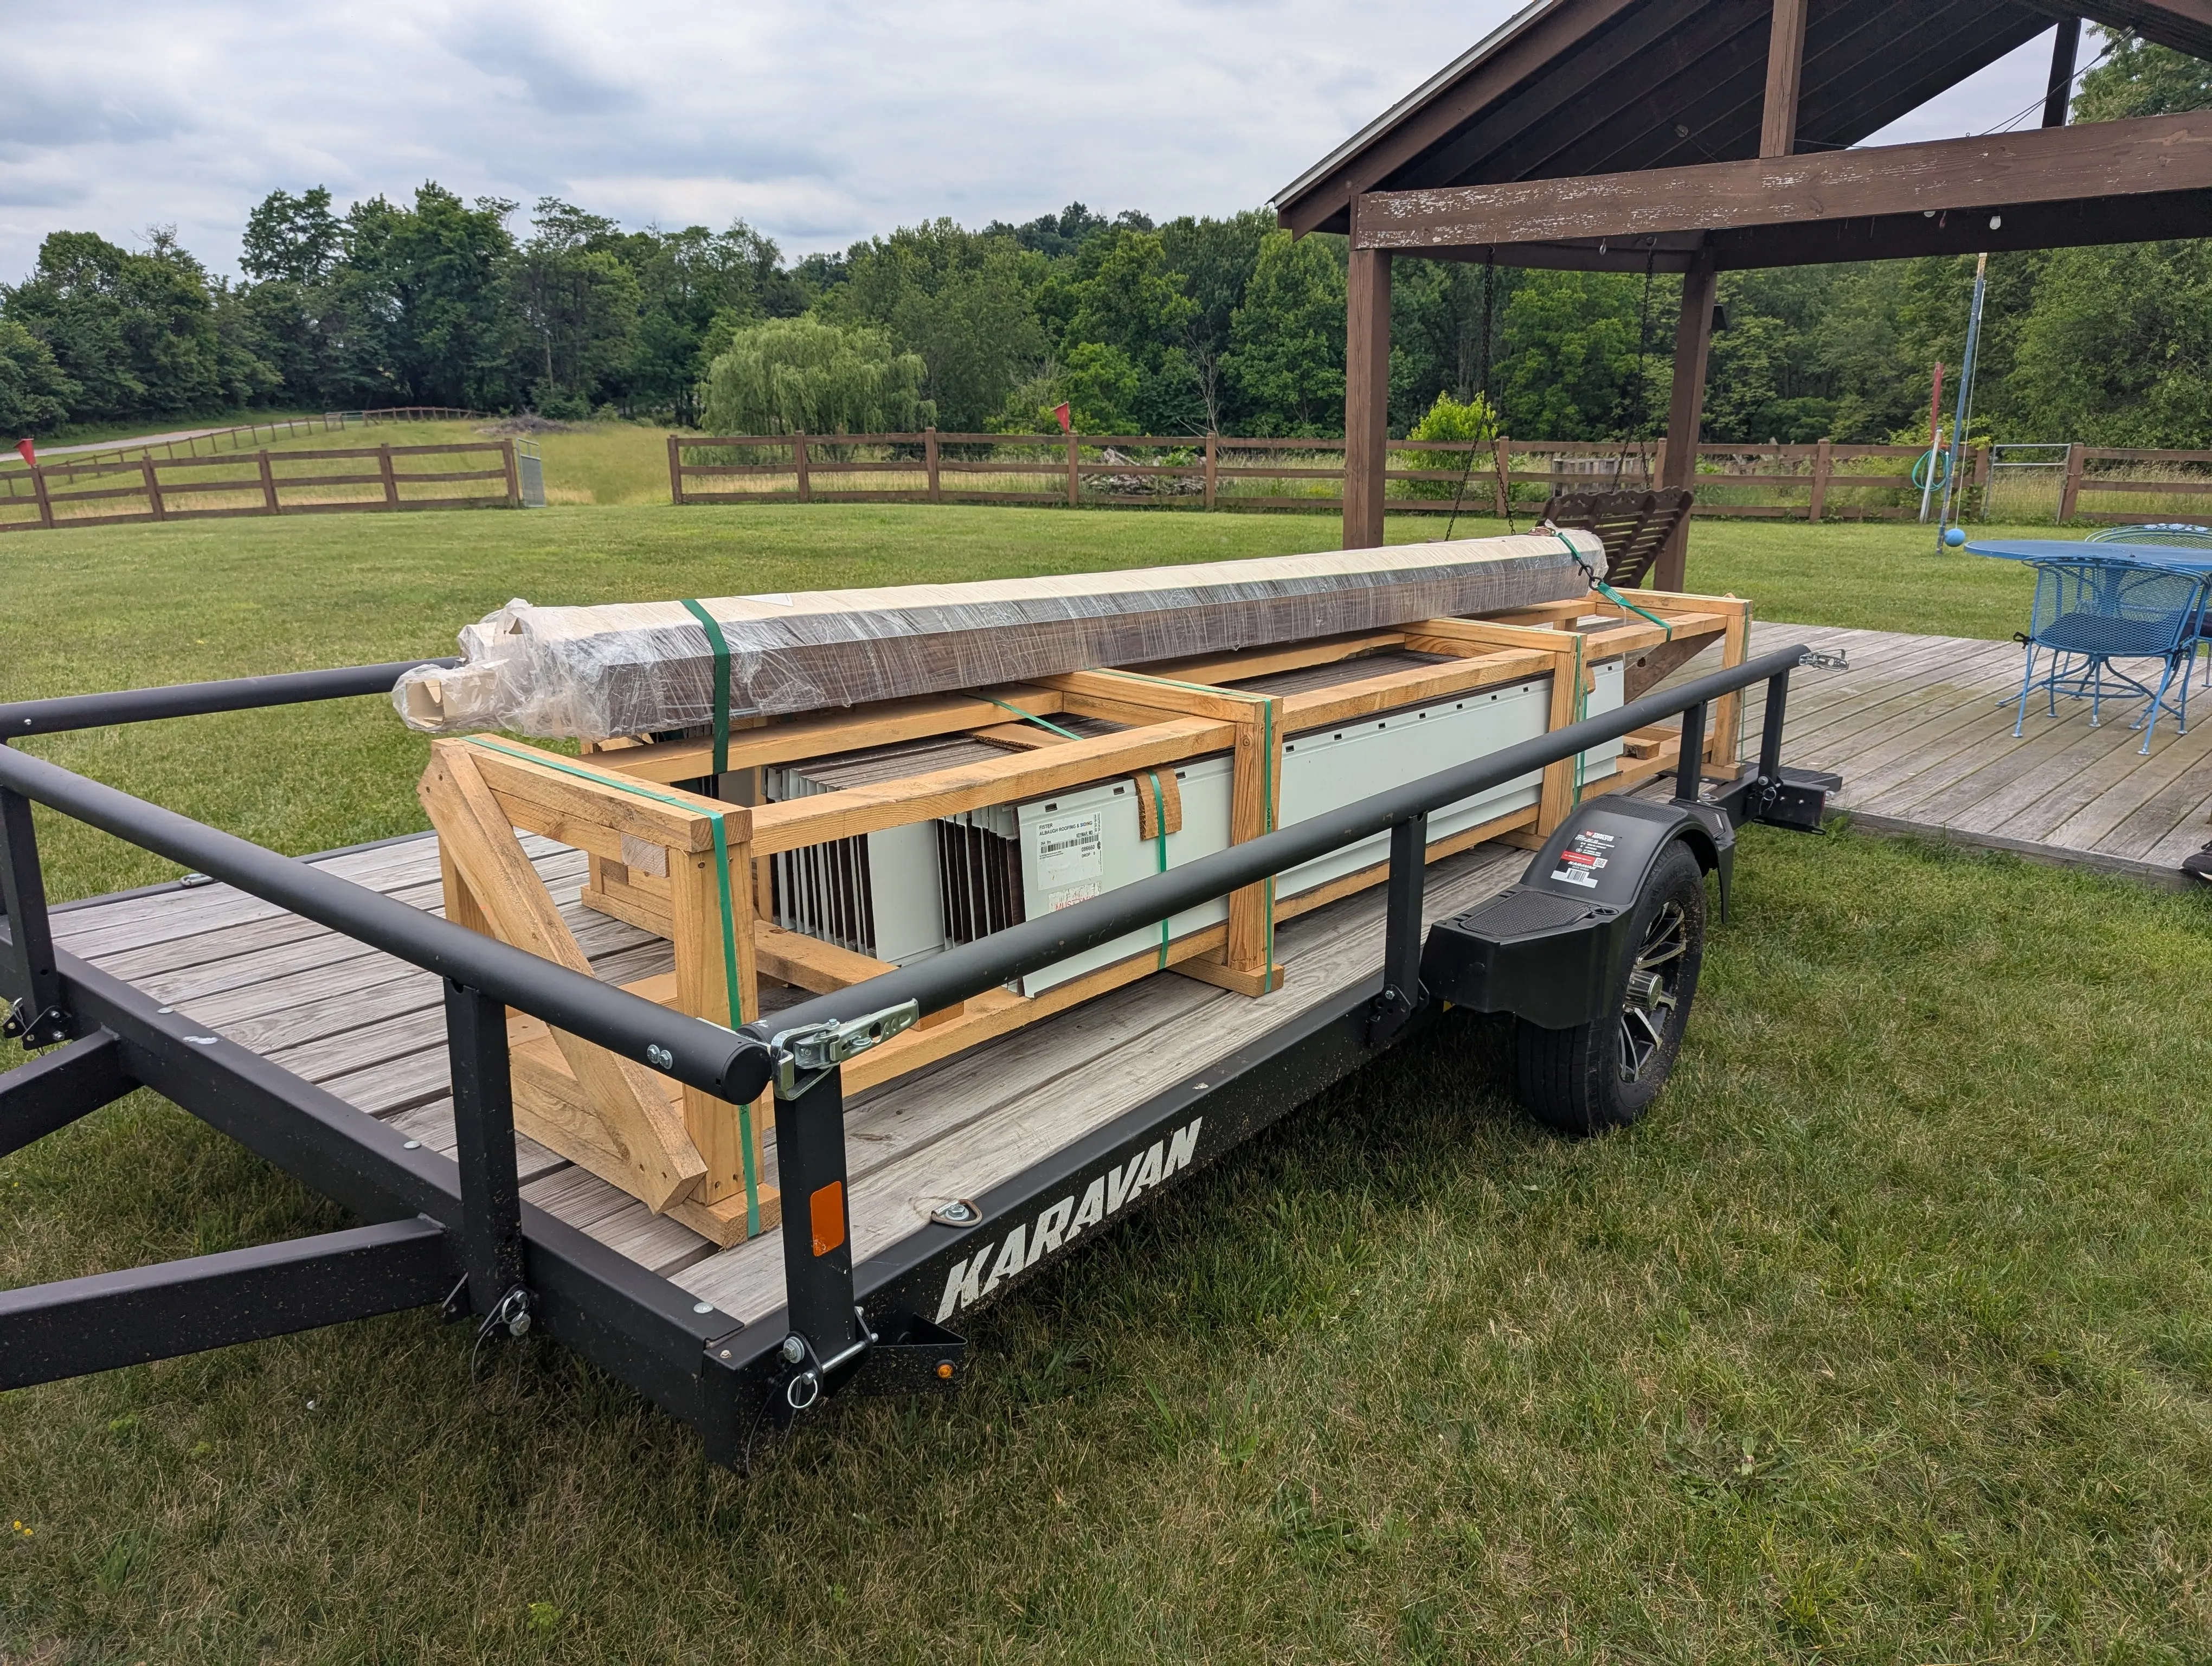
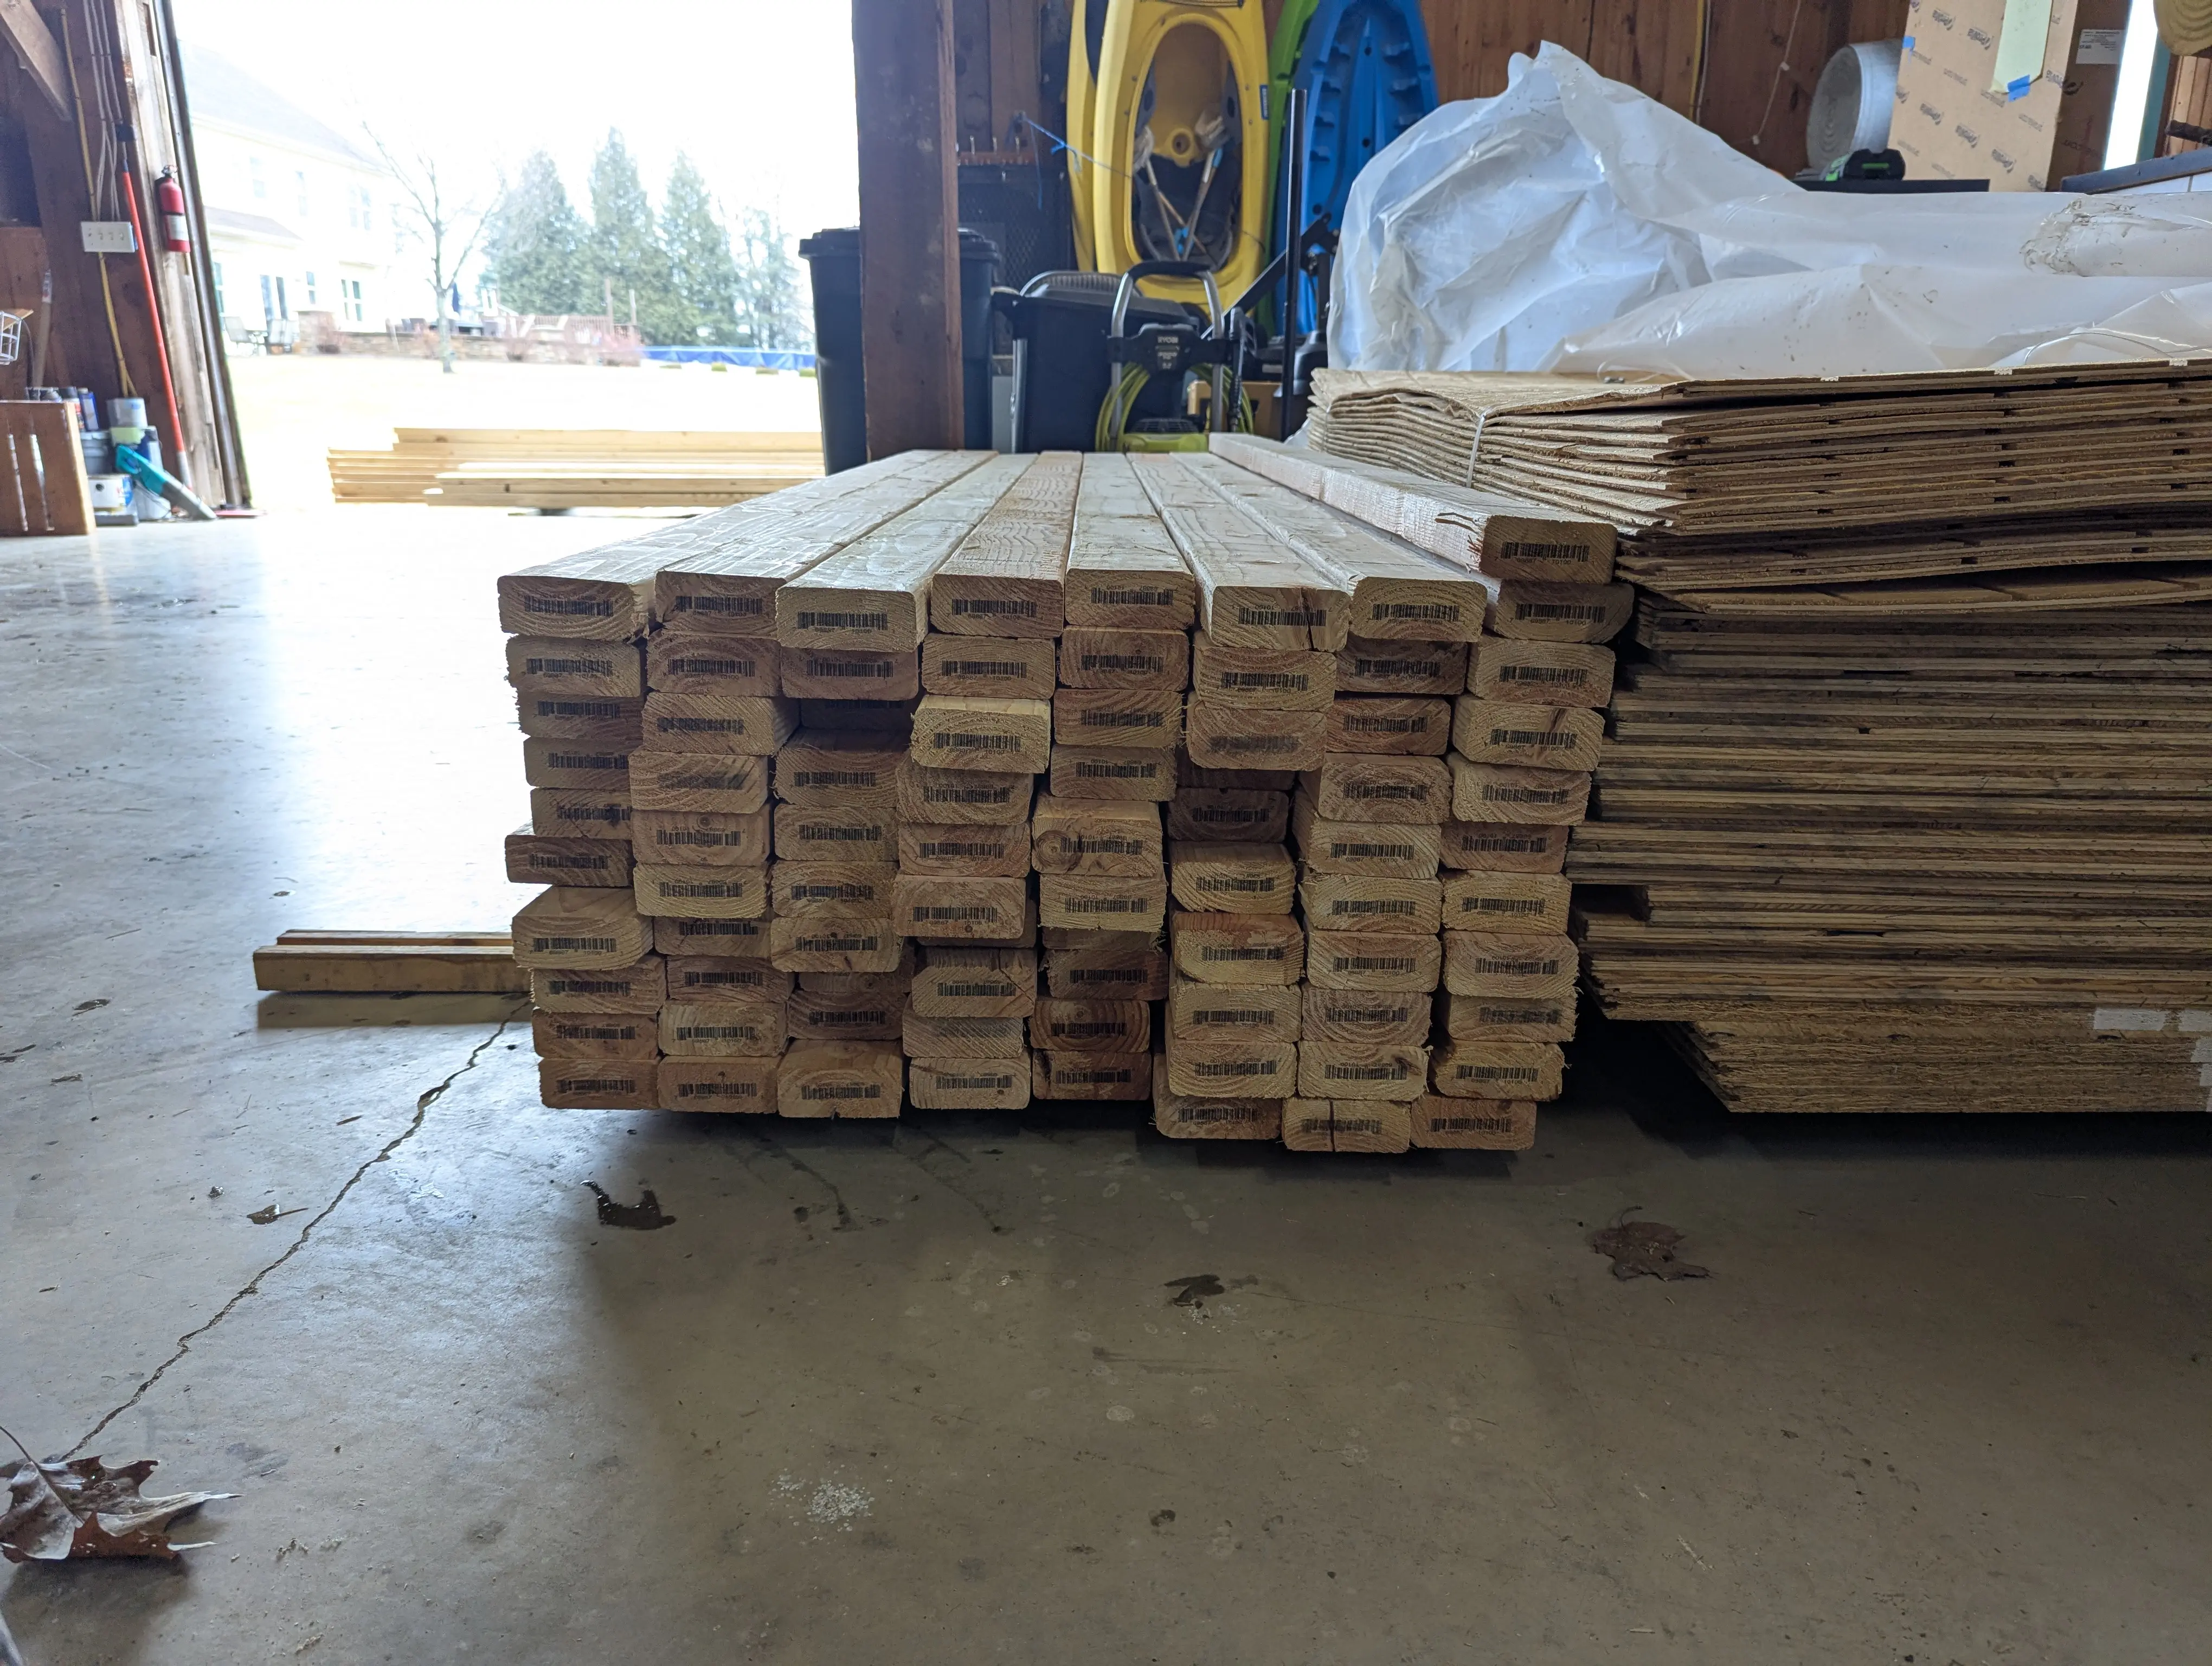
Before the Build — The Trailer Comes Home
Every build has a beginning, and this one started with a truck, a trailer, and a truckload of lumber. We tracked down the right trailer, made the pickup, and got a delivery of the lumber that would become the bones of the whole rig. Then came the part that made it feel real — backing it into the barn and thinking, okay, we're actually doing this.